How to generate the zoom API credential?
To generate Zoom API Credential, go to the Zoom Live Classes > Setting. On the right side setting page will be open.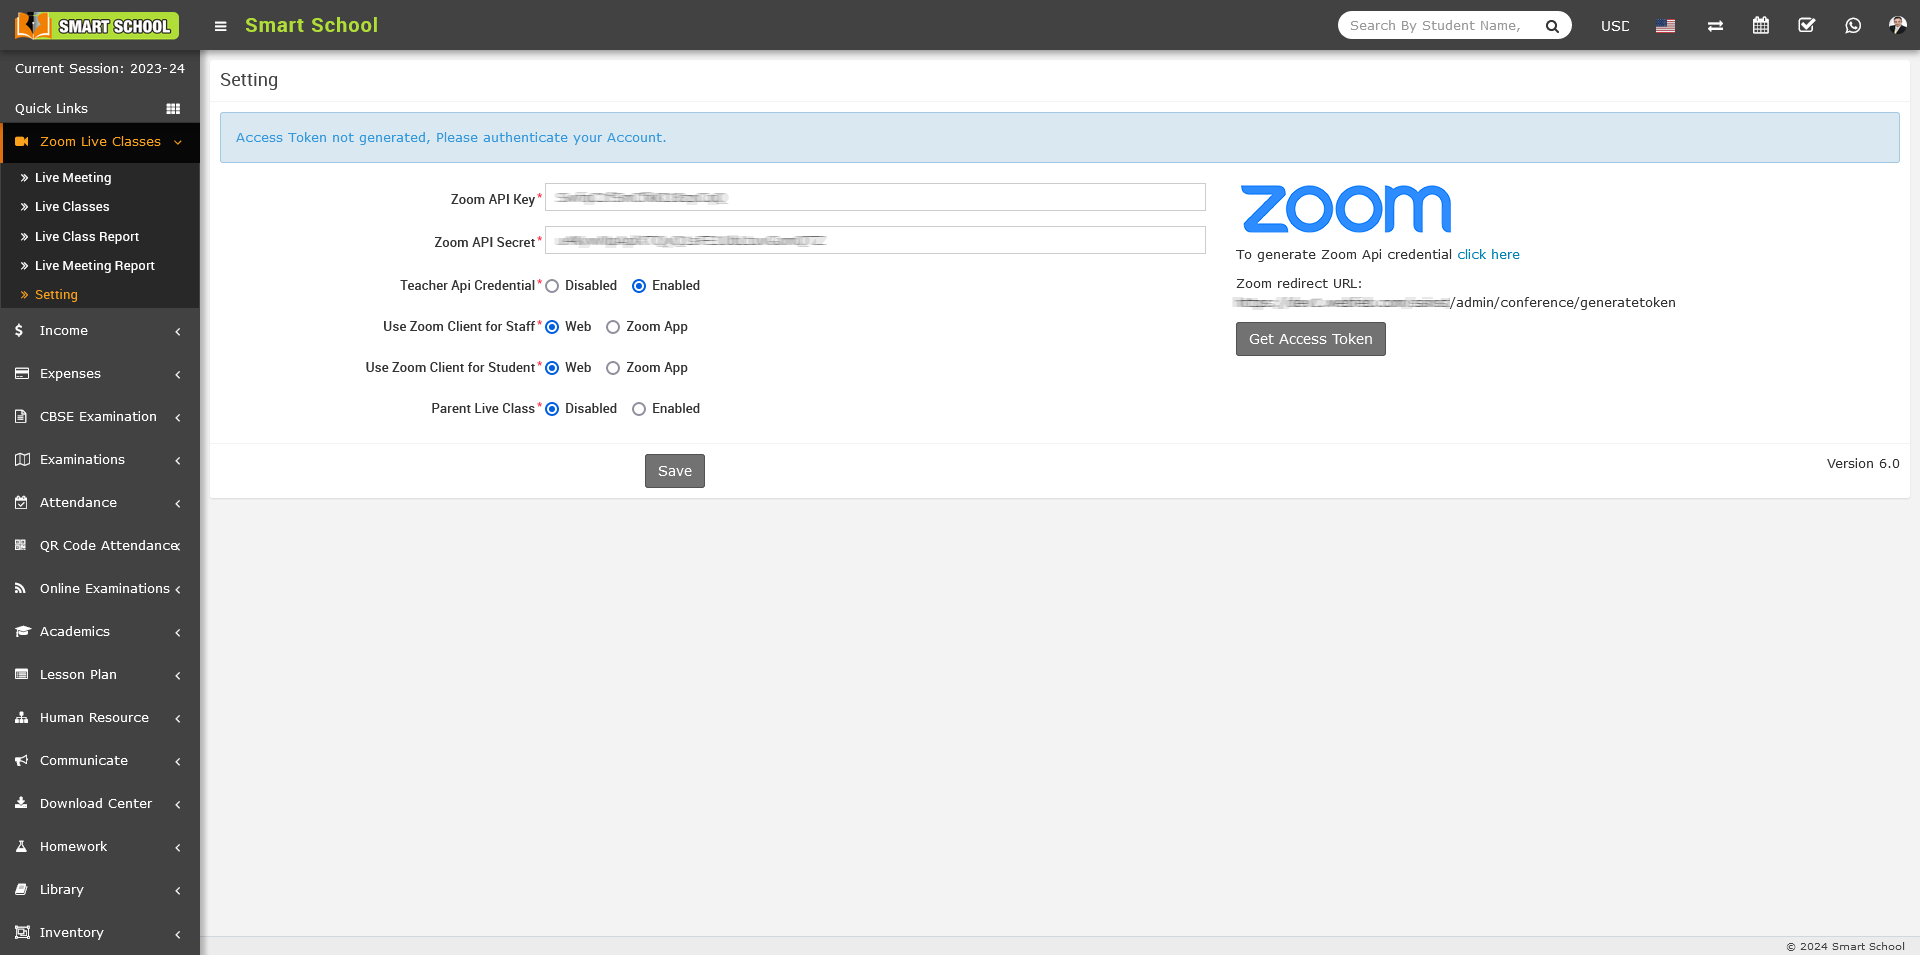
On this page, you can see multiple configuration options are available. To generate zoom api credential, simply click on the 'click here' link, which is shown in blue on the right above..png)
After click on the click here link, Zoom App Marketplace page will open.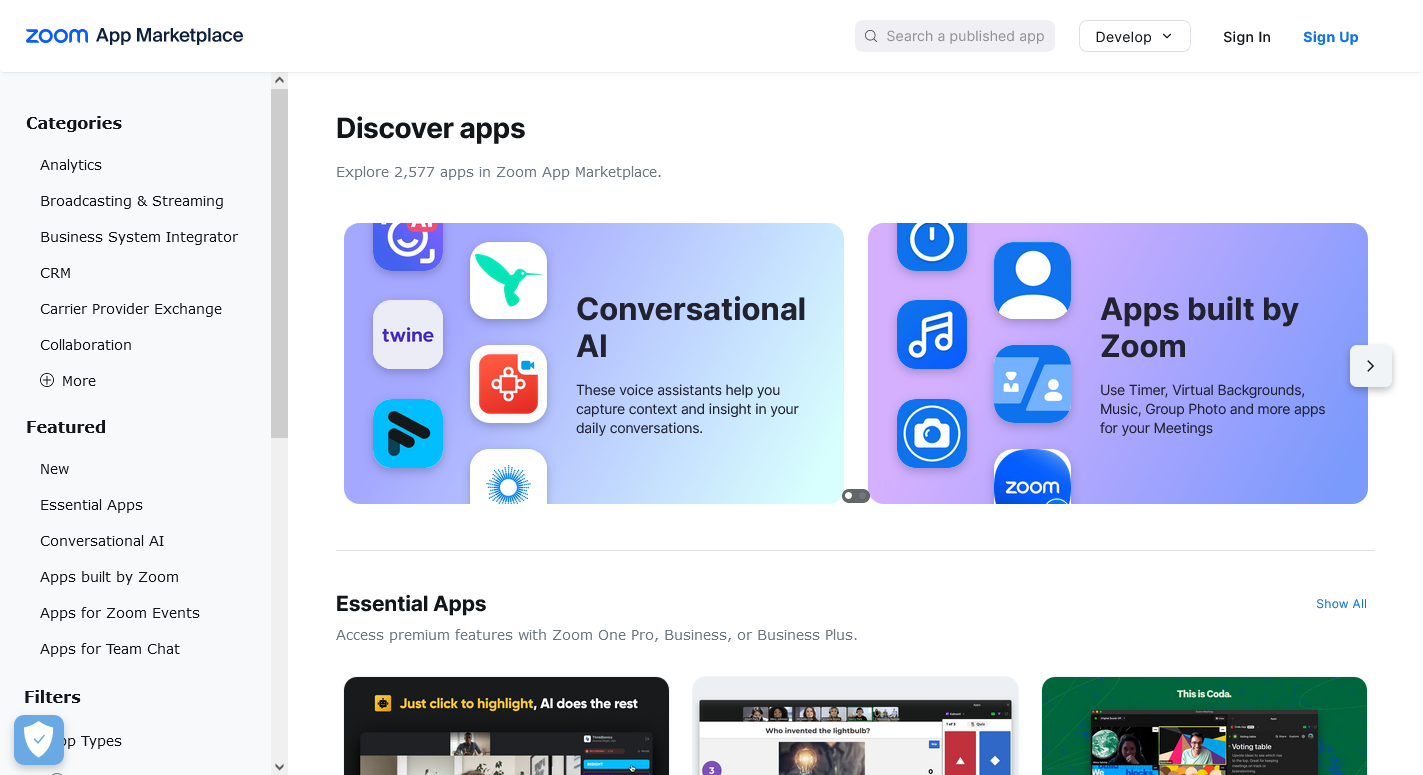
To sign in for Zoom, simply click on the 'Sign In' button, which is available at the top right corner. After click, sign in page will be open.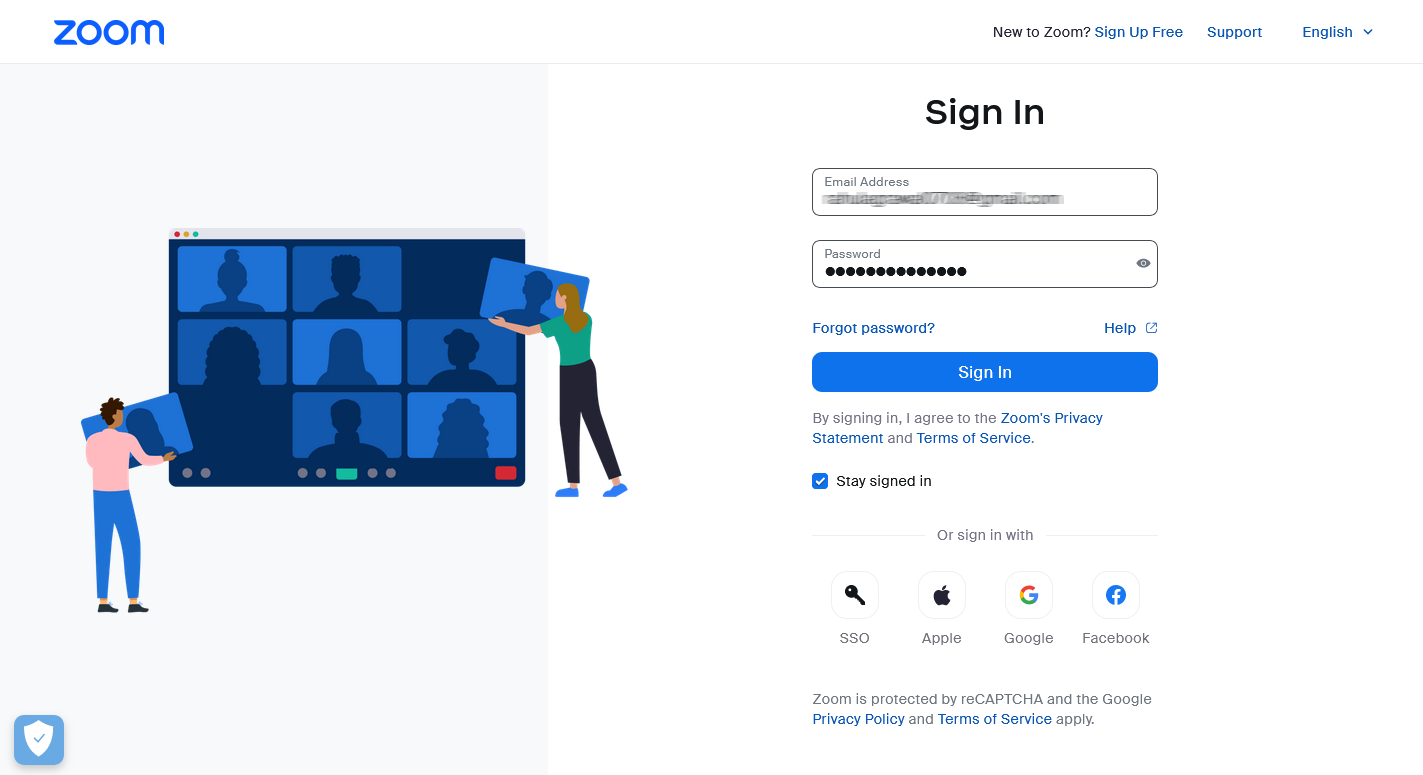
Now, fill in your details and click on the 'Sign In' button to log in to the Zoom application. After successfully login in zoom application, page will be open.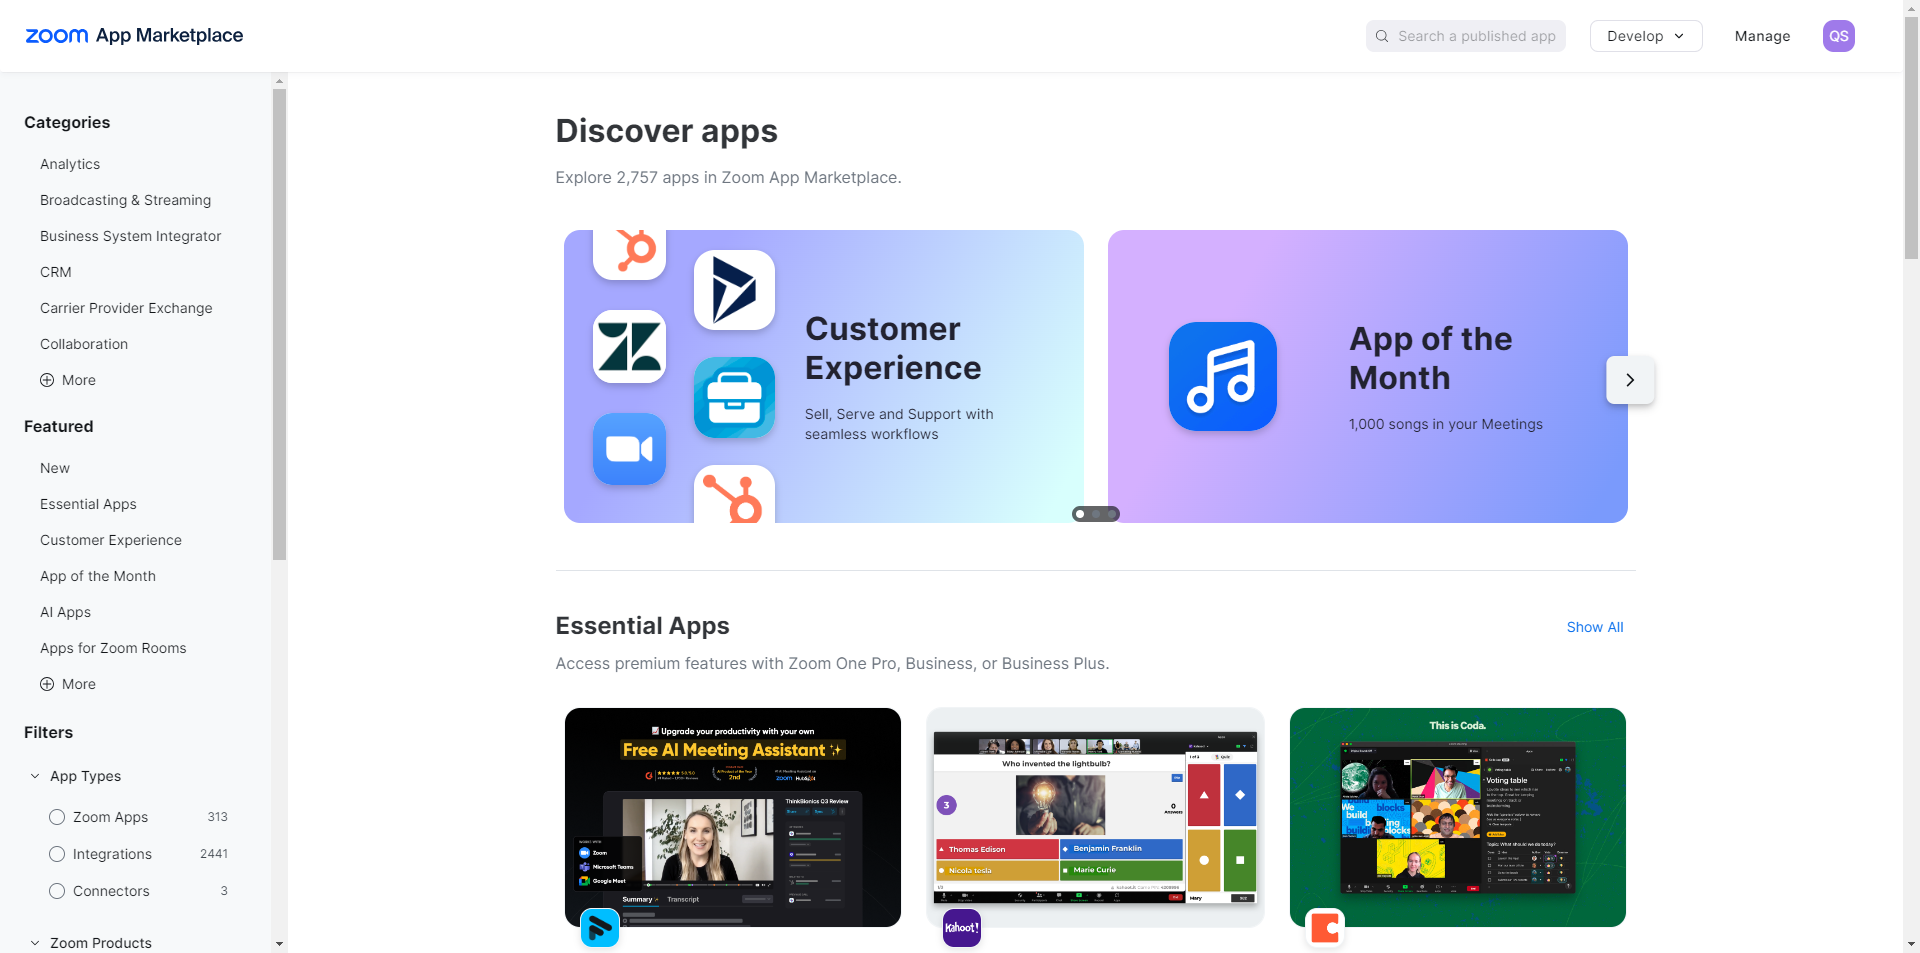
In this page you can see the multiple option, now click on Develop dropdown, showing at the top right corner, when you click on develop button drop down list will be open, now here you can see the Build App option available.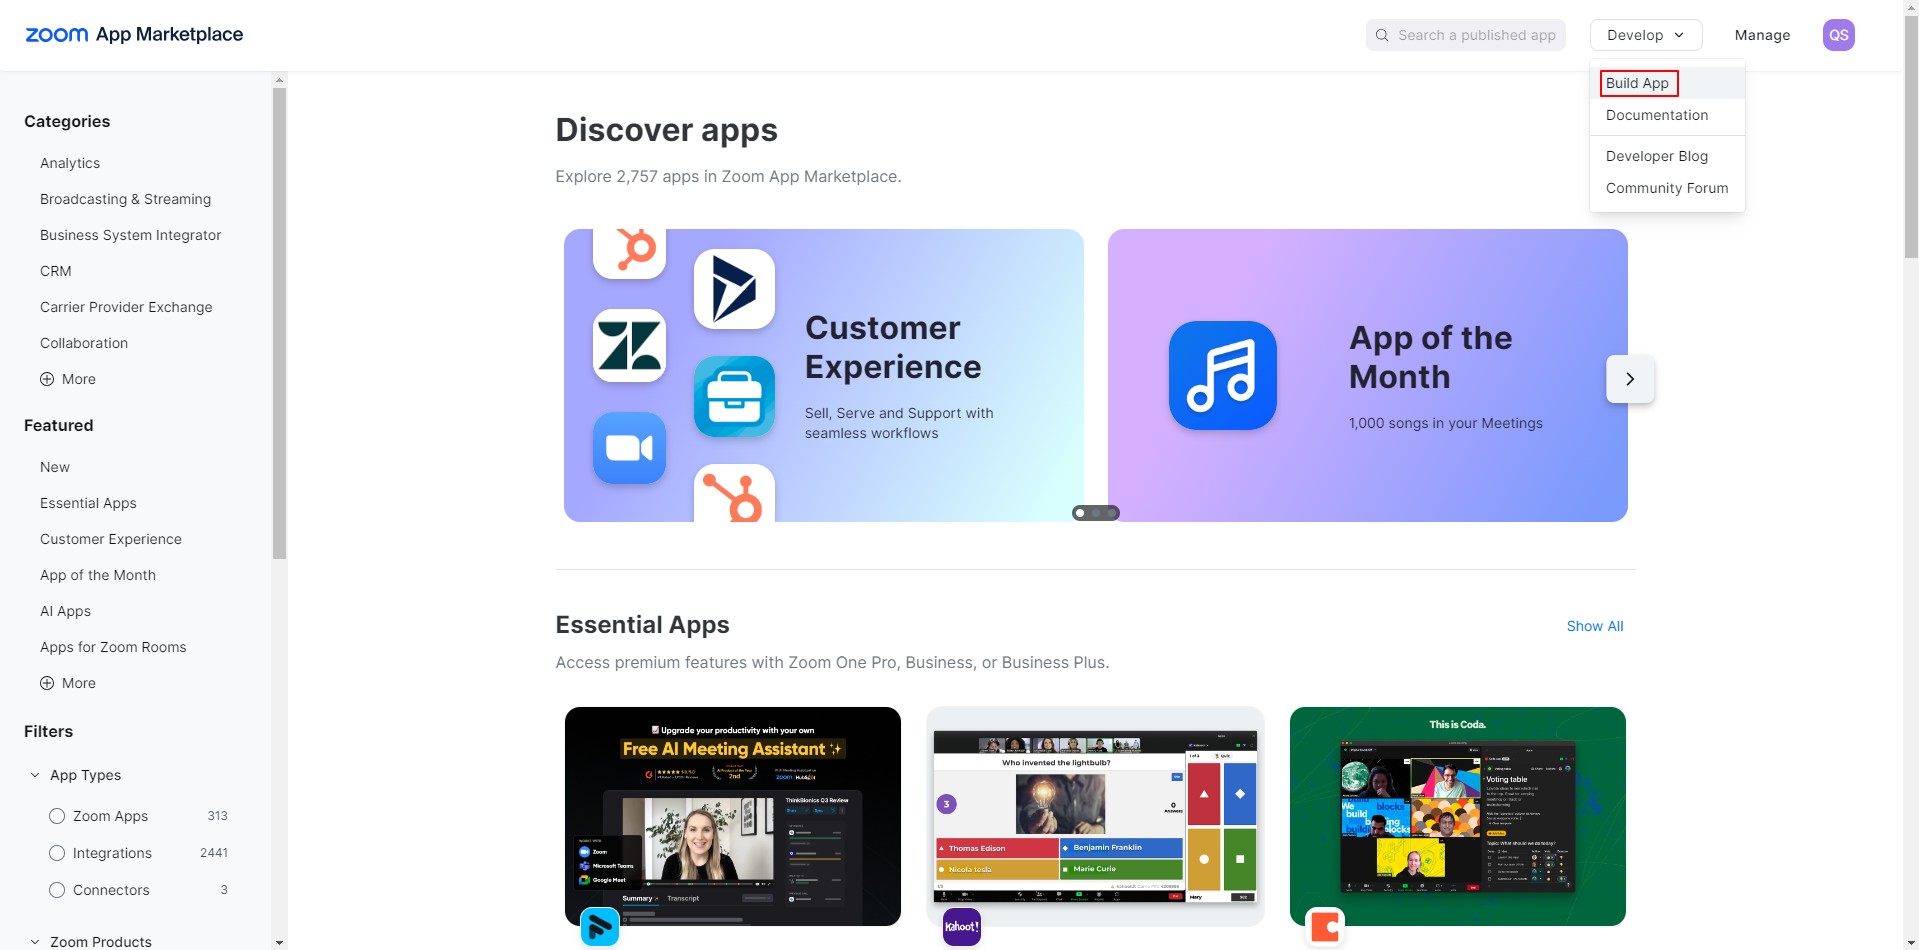
Simply click on Build App option and after click on it you have get option to choose what kind of app you want to create 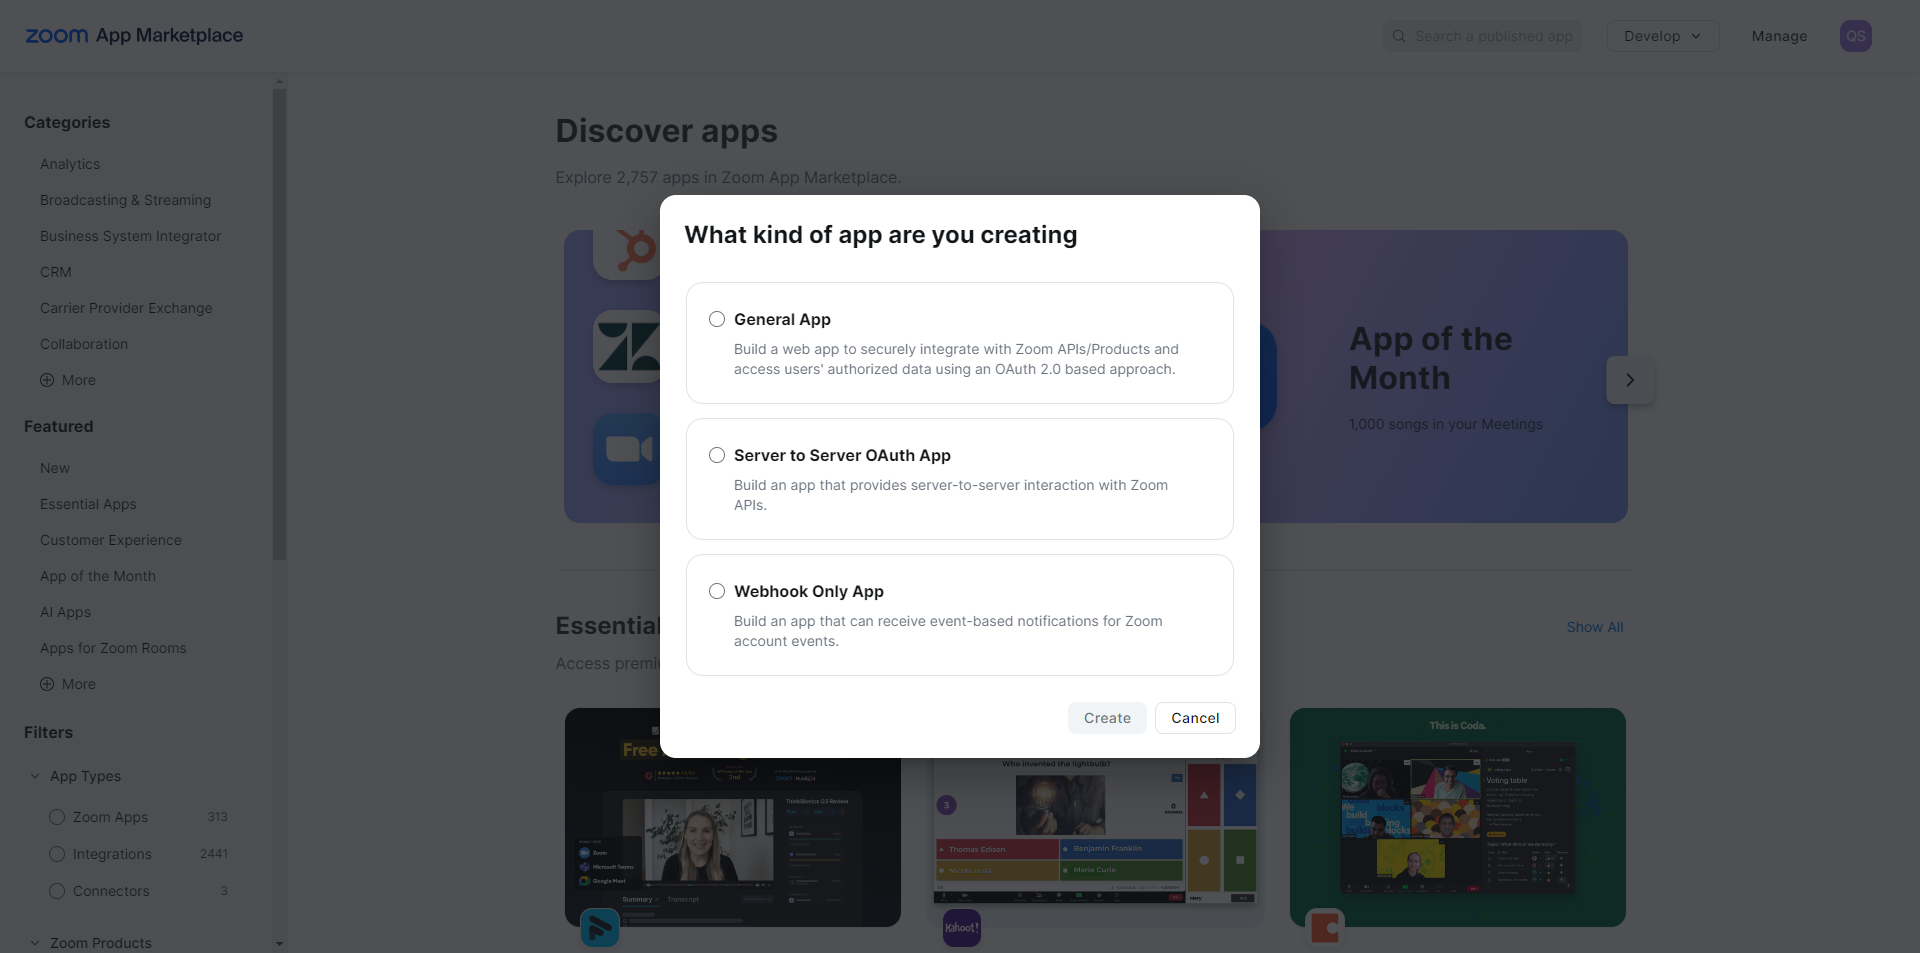
Please select General App then click on Create button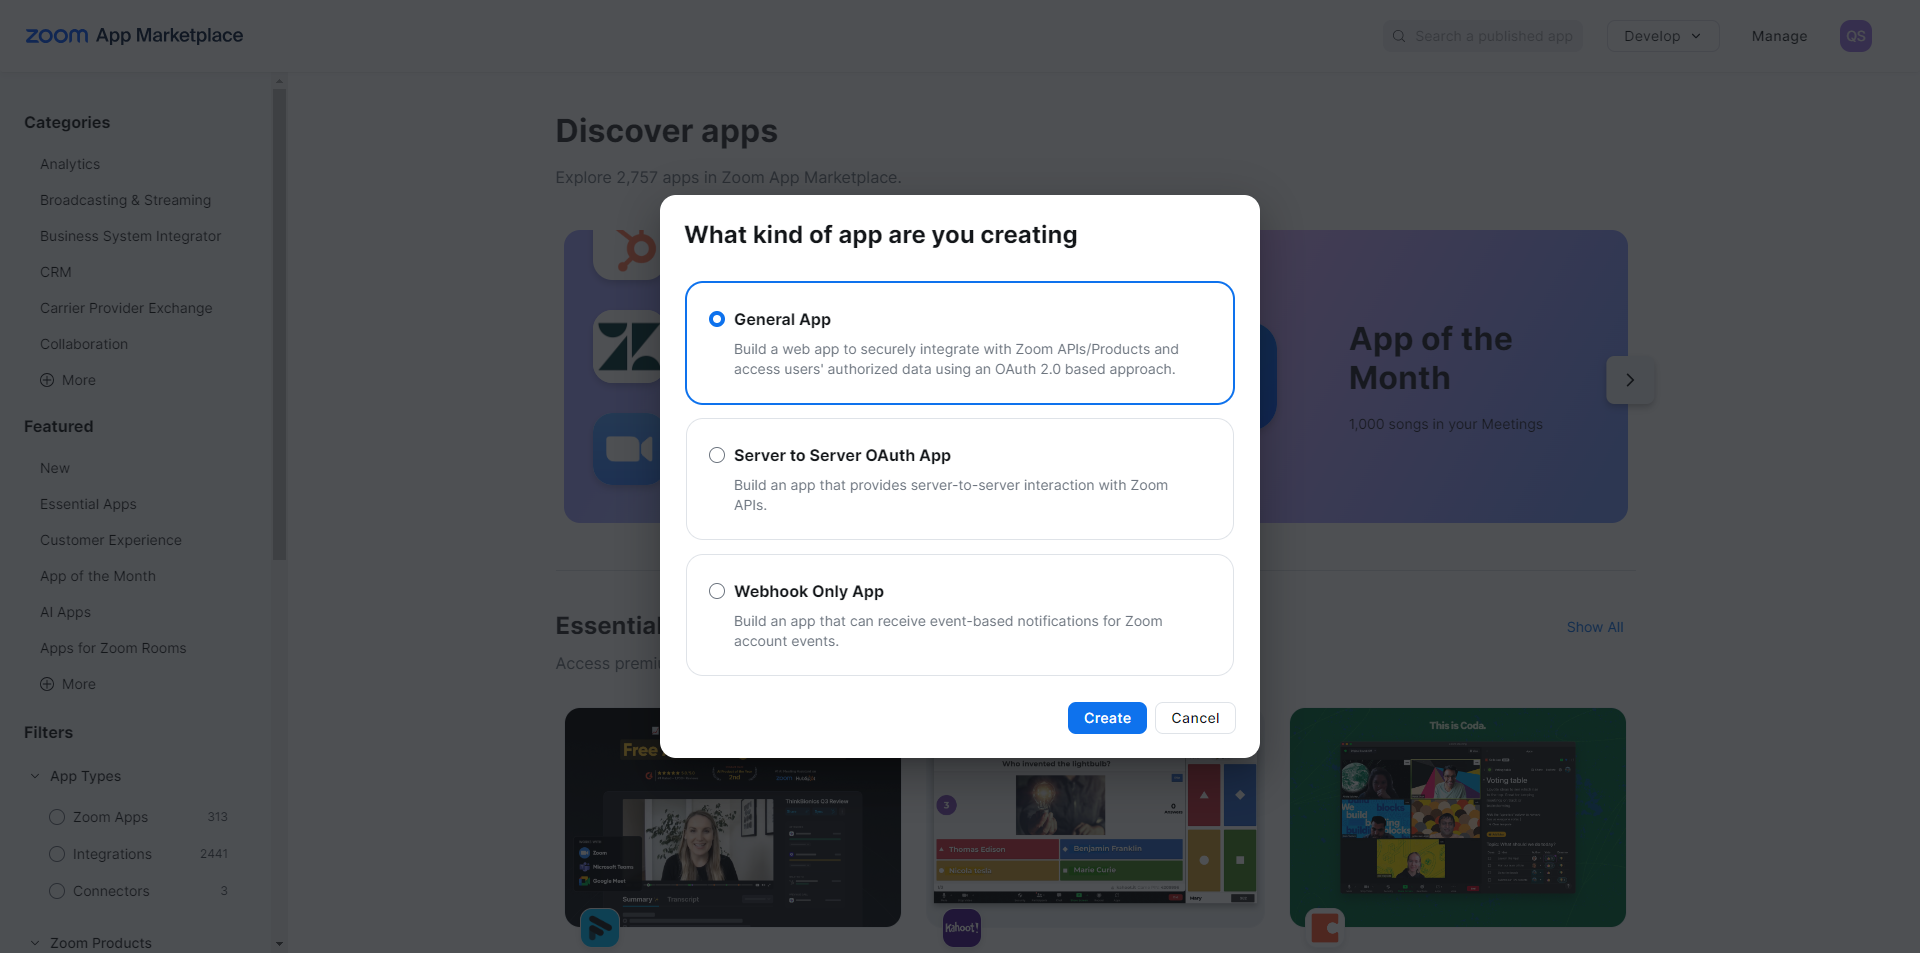
After clicked on create button, you need to enter the Basic Information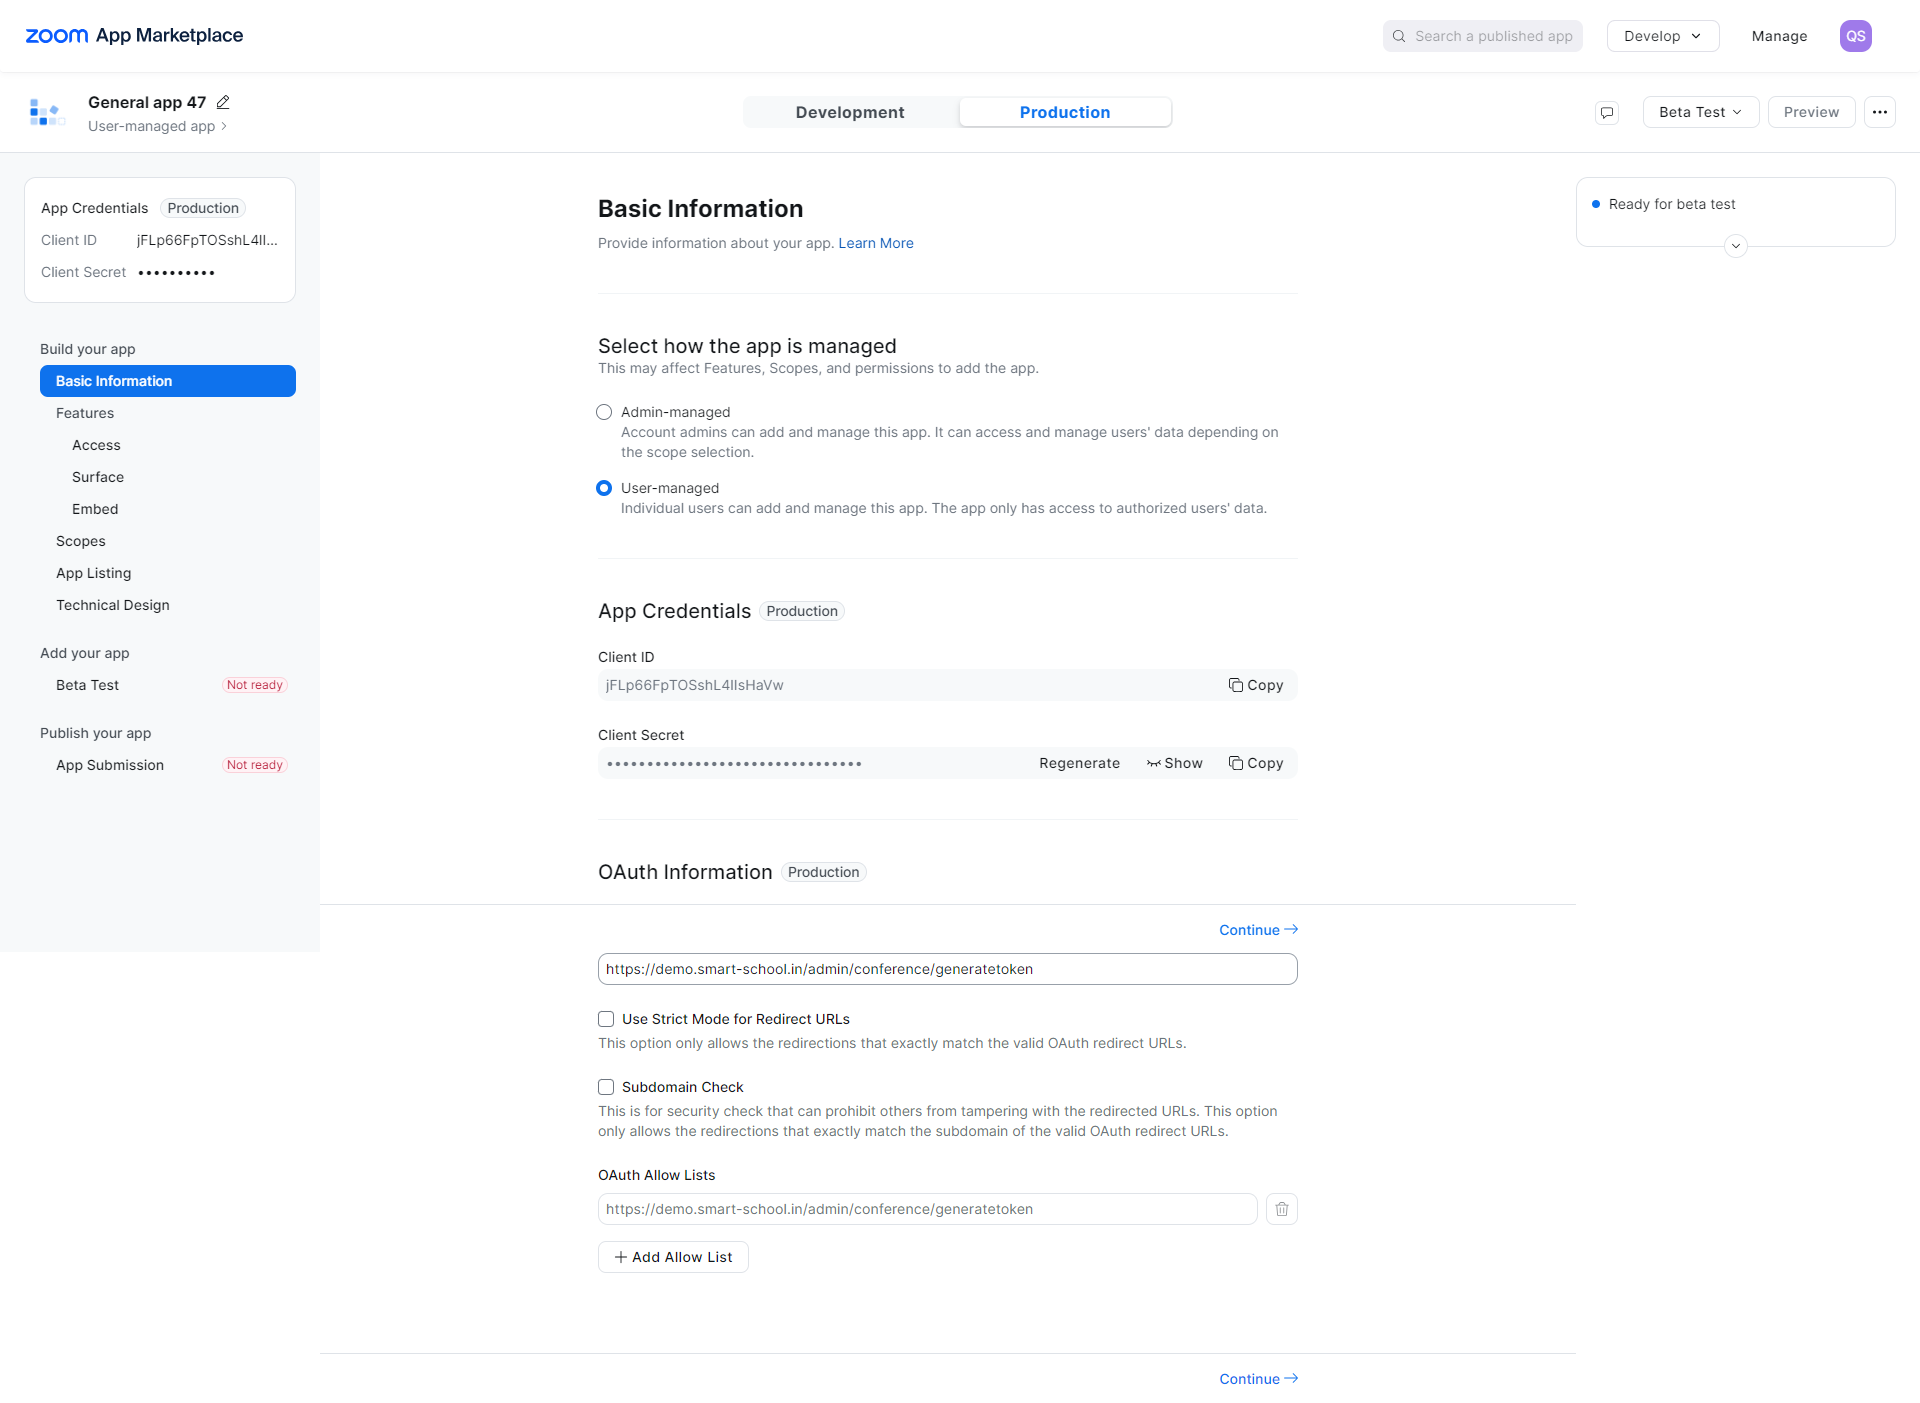
Now click on the Continue button at the bottom right so it will redirect to the Access page then click on continue button 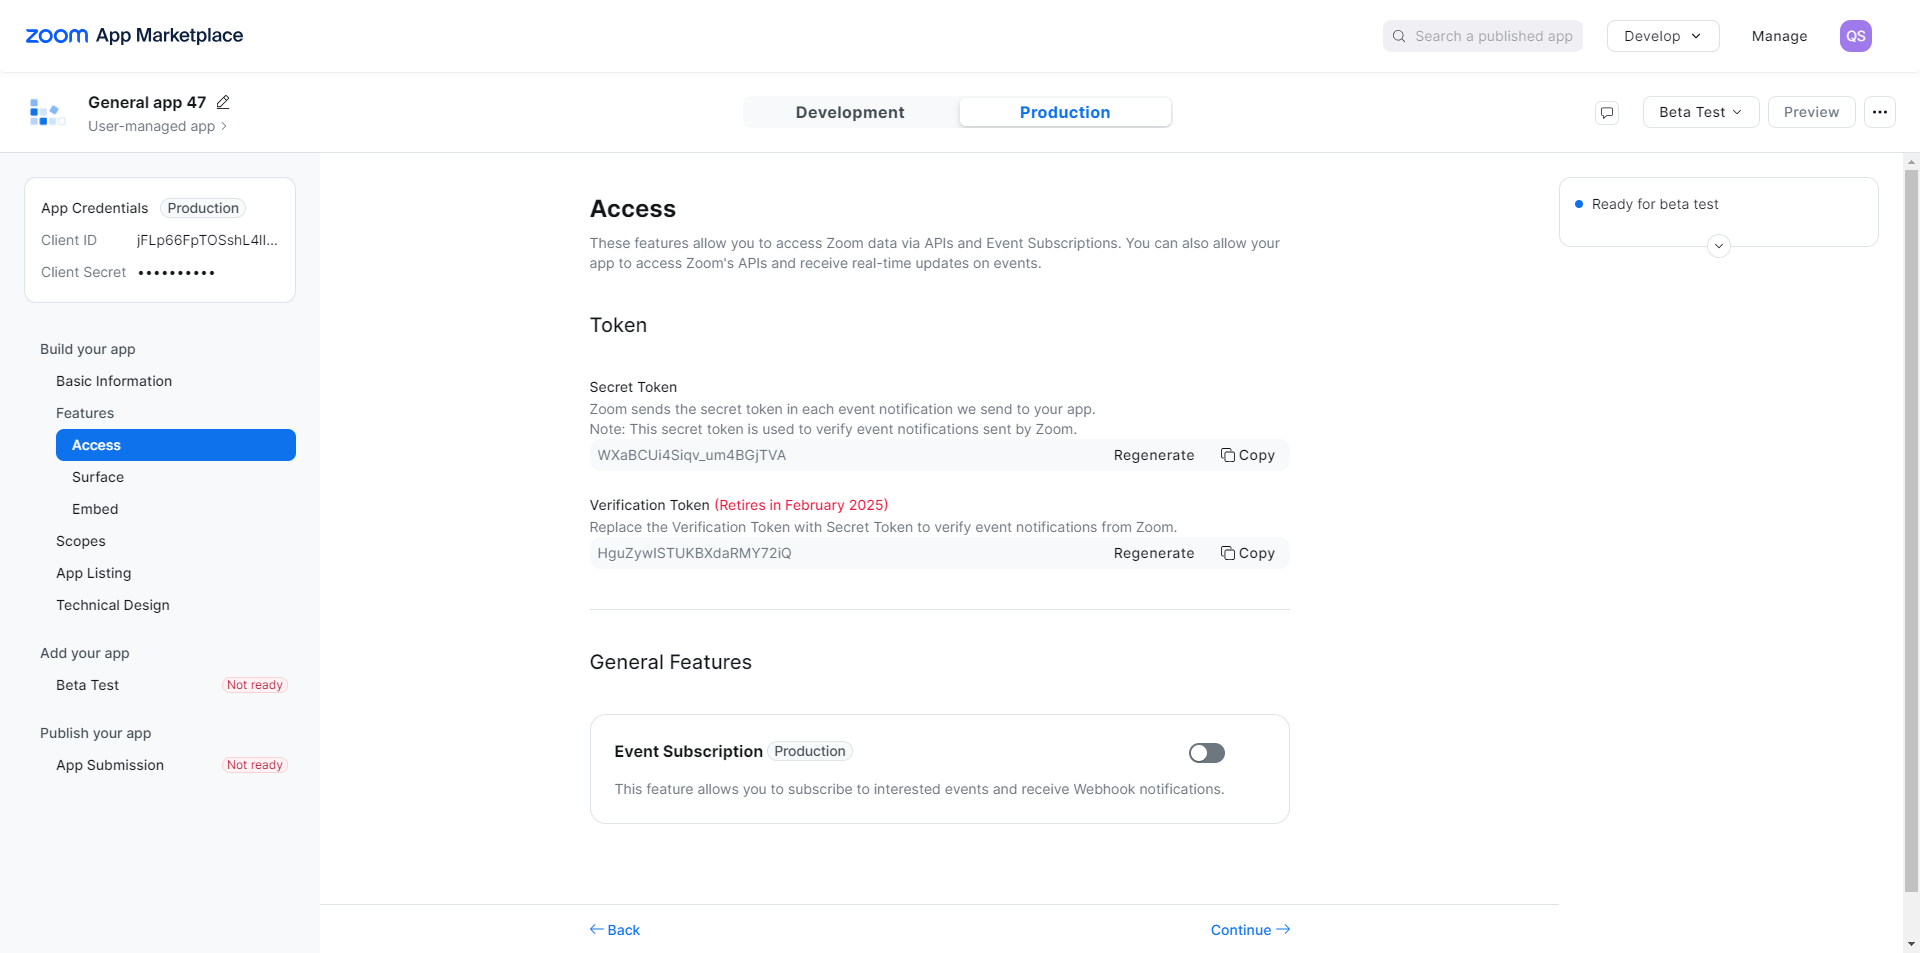
Here Surface page will be open and select the Meetings and click on Continue button 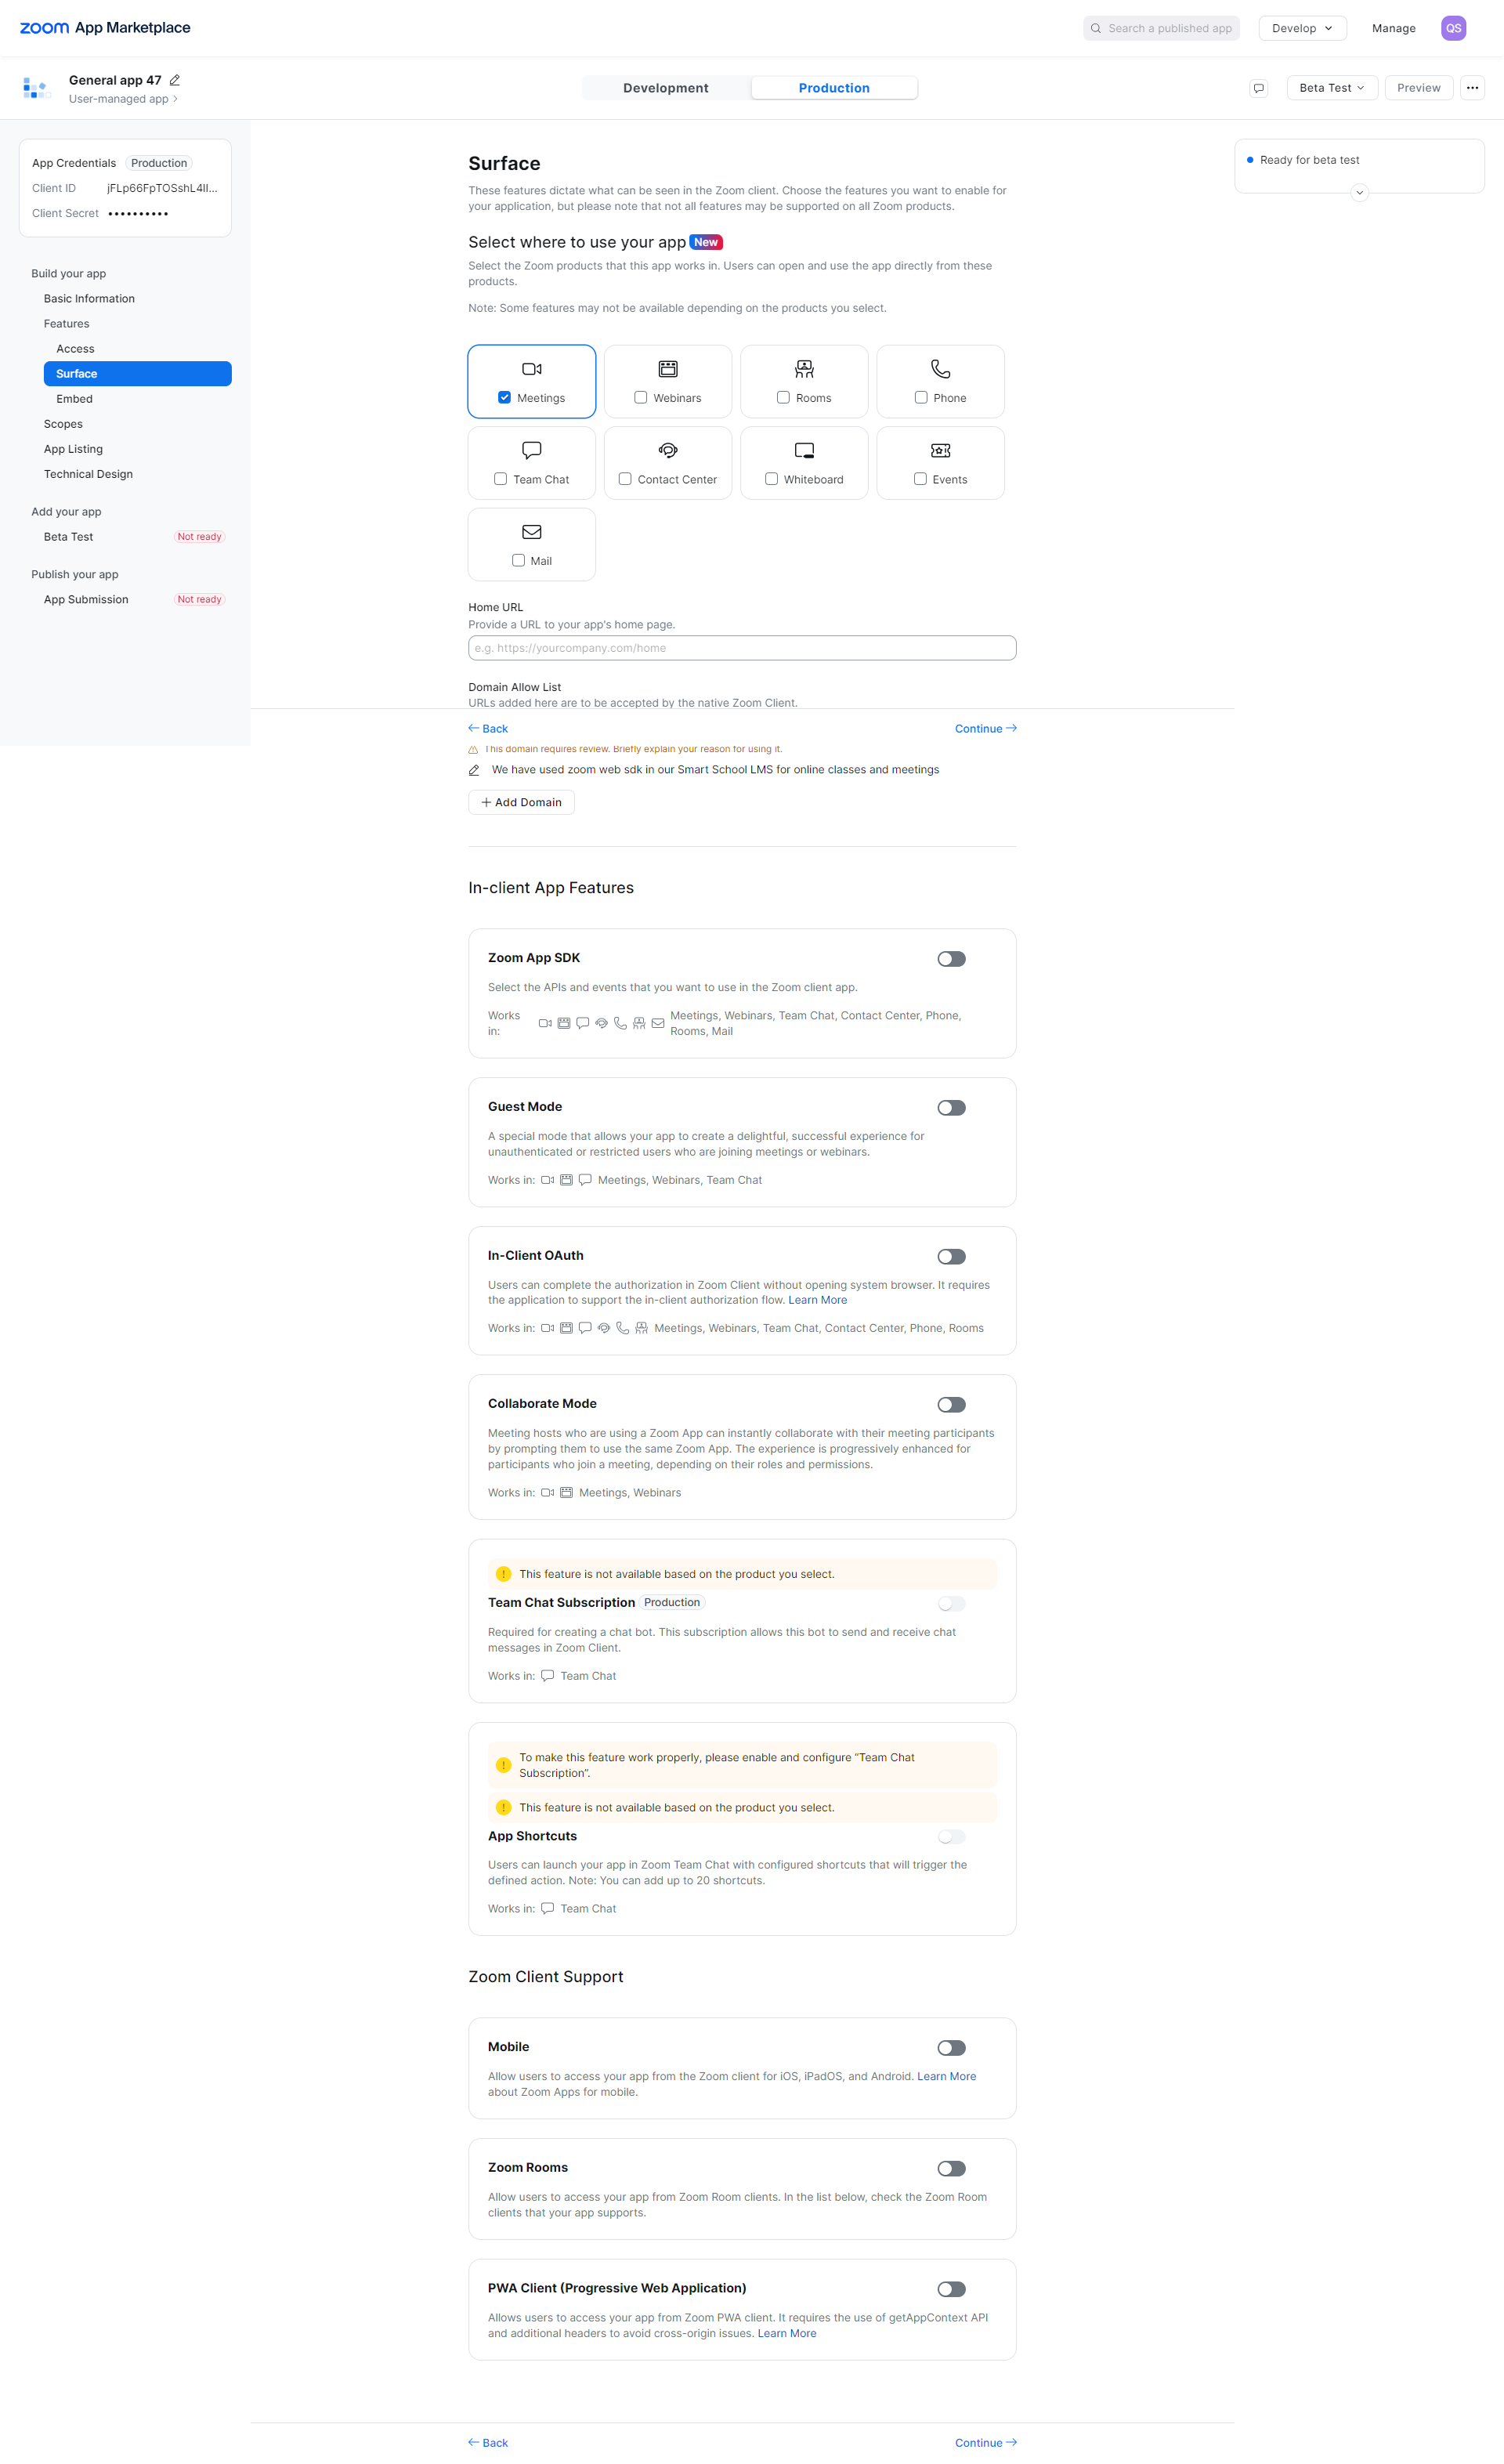
After click on continue Embed page will be open 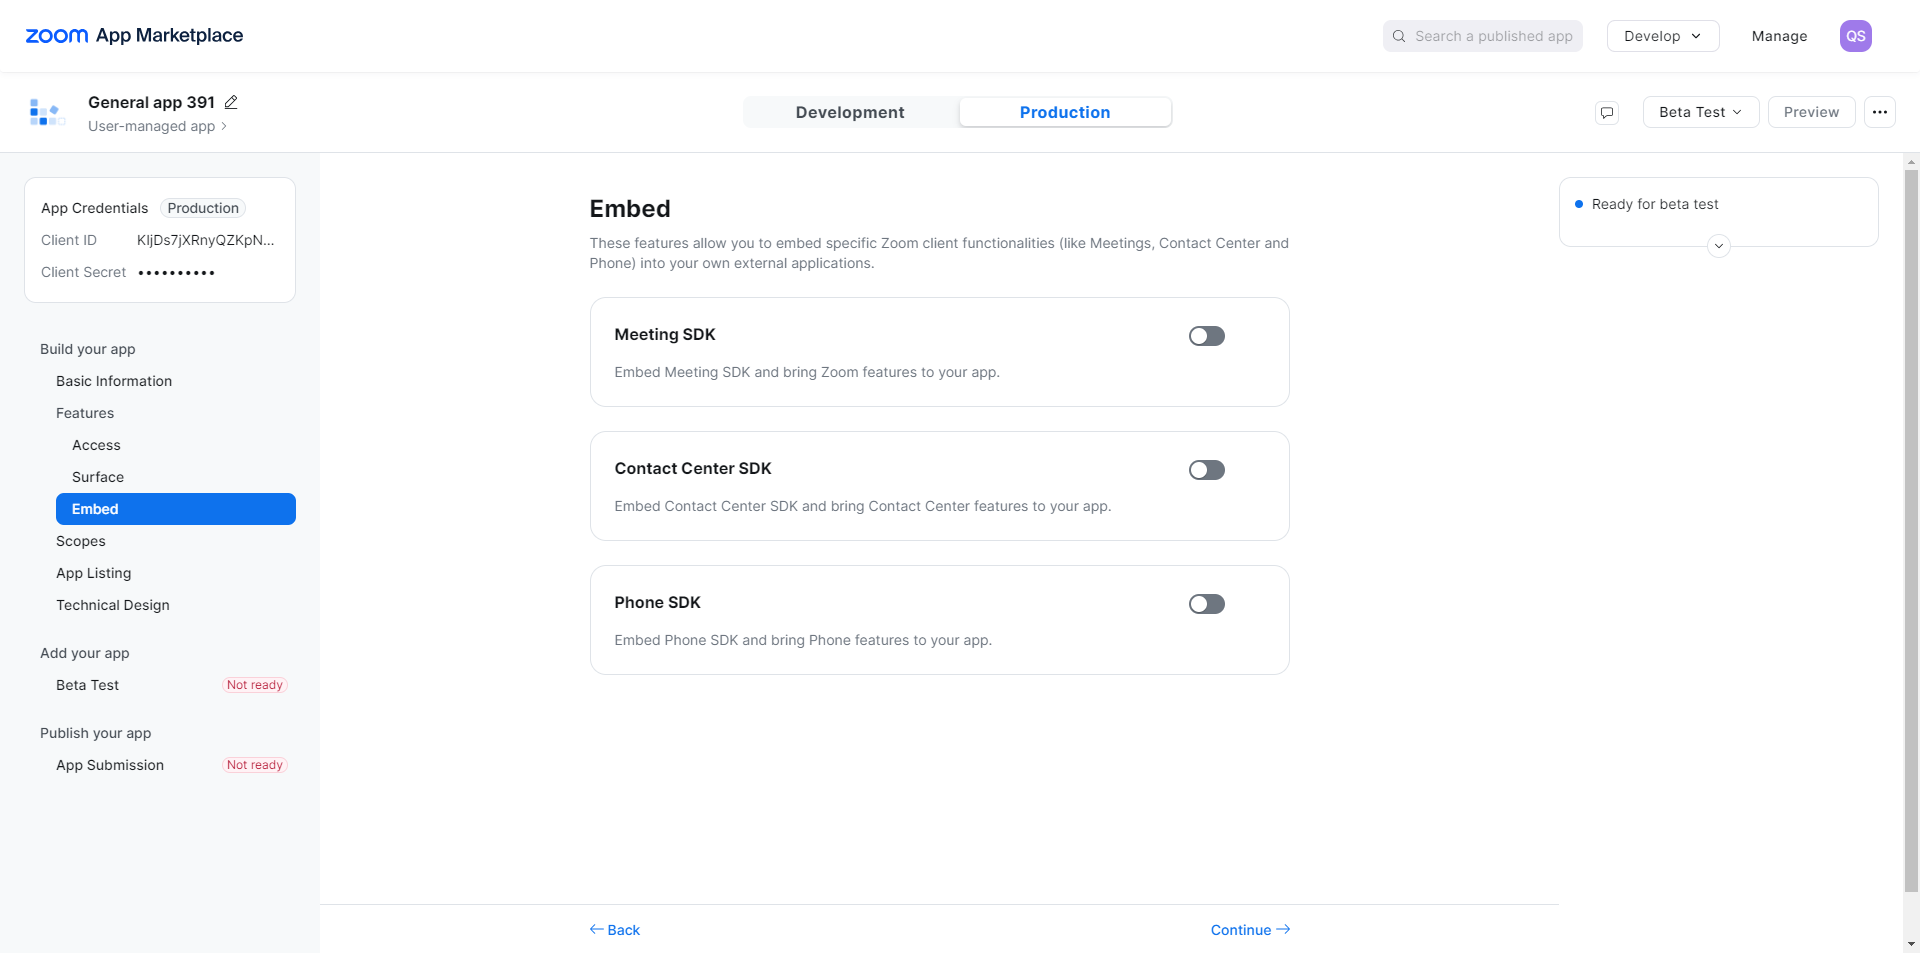
Now enabled the Meeting SDK and the page will open in below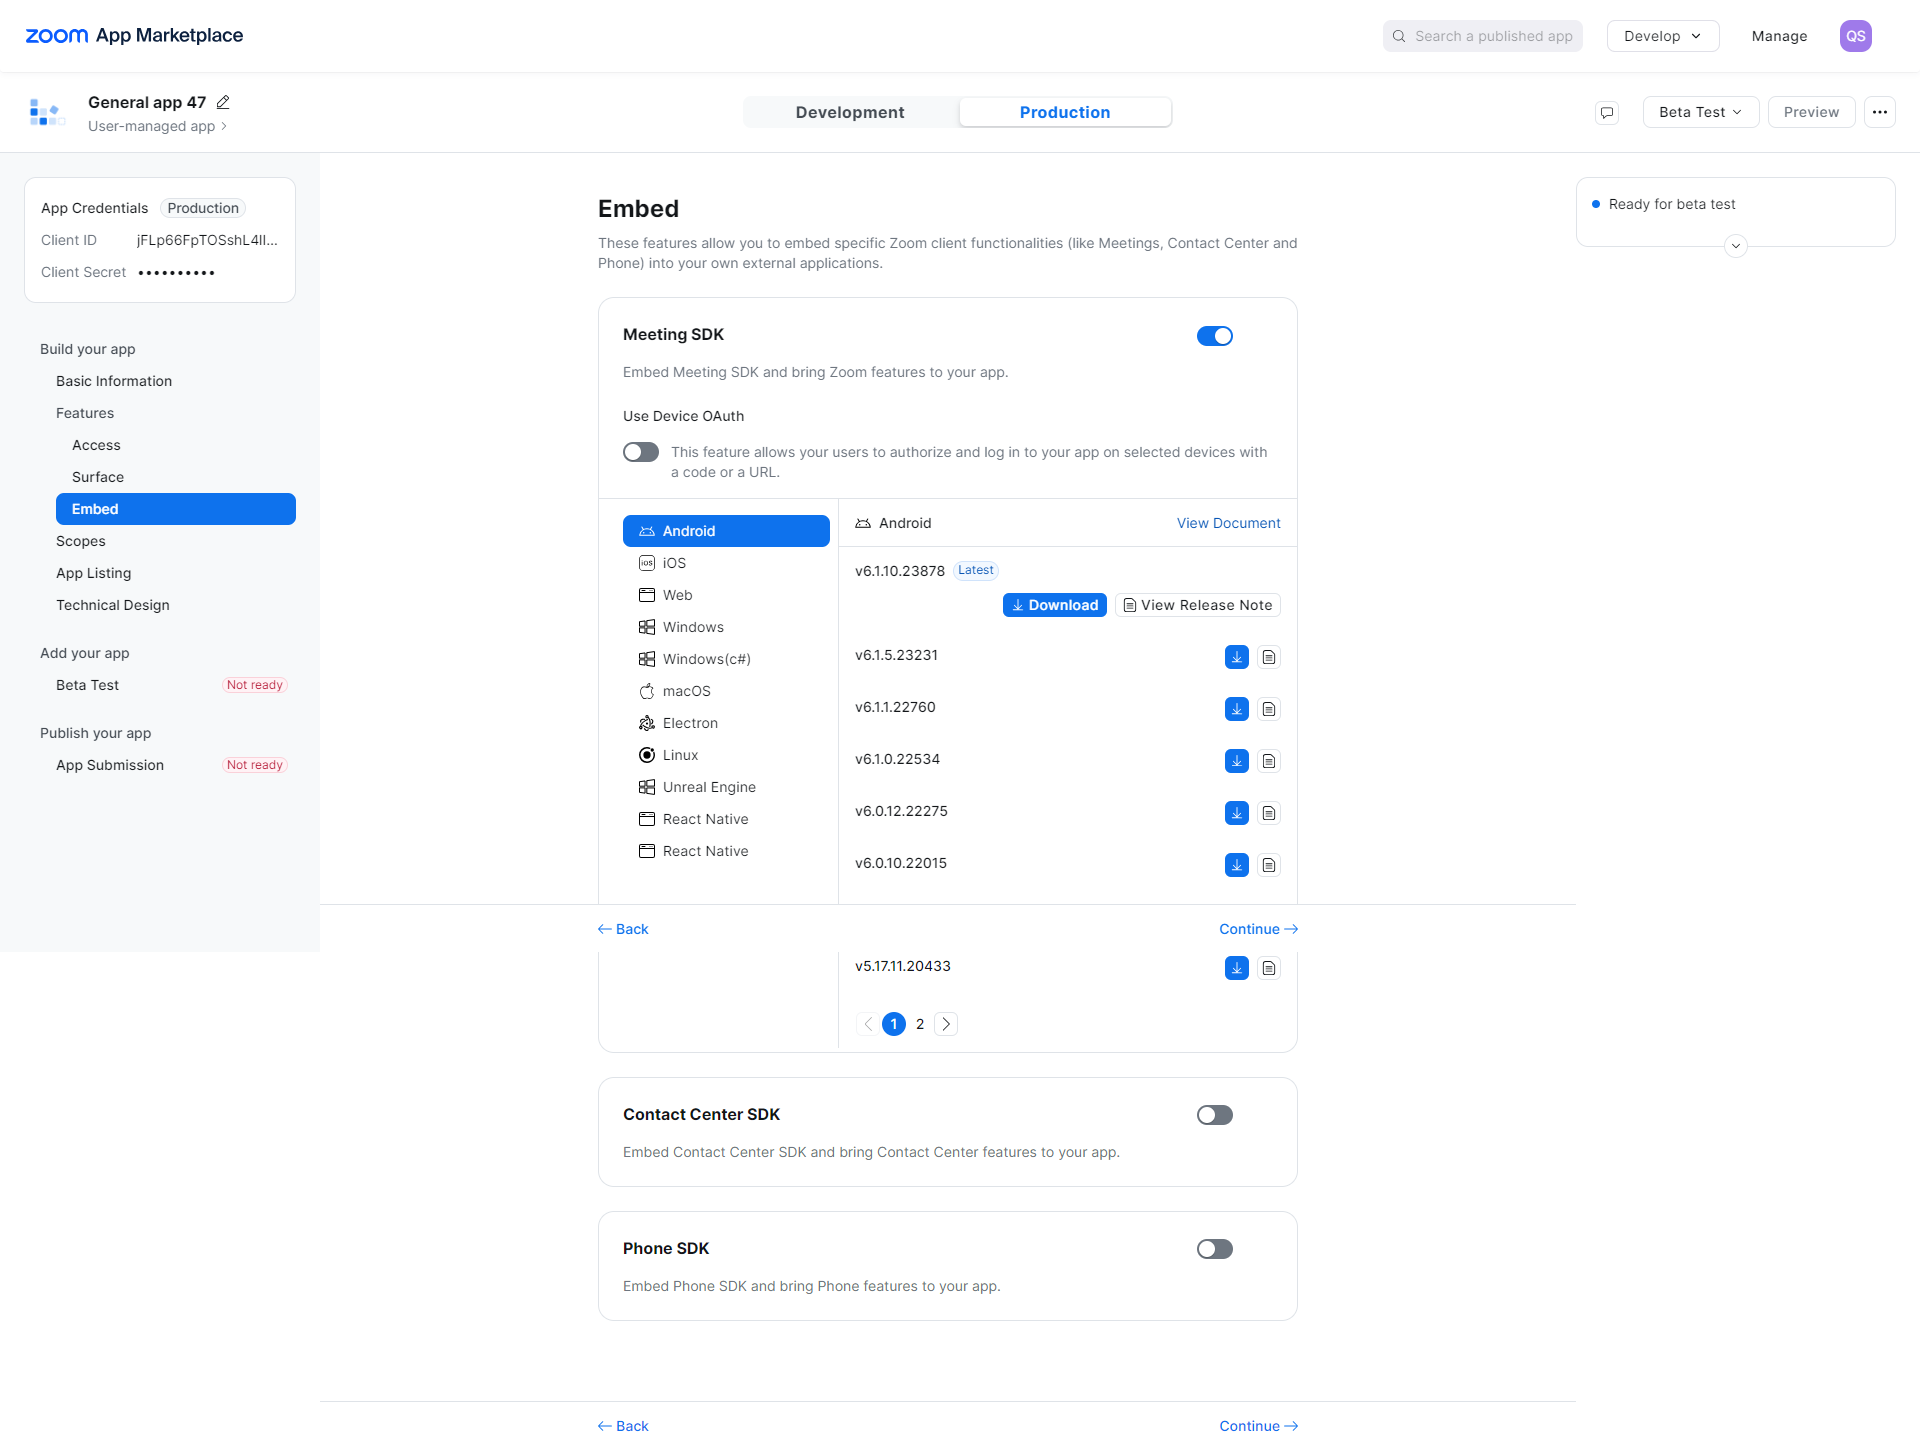
then click on Continue button, Scope page will be open, here click on Add Scope button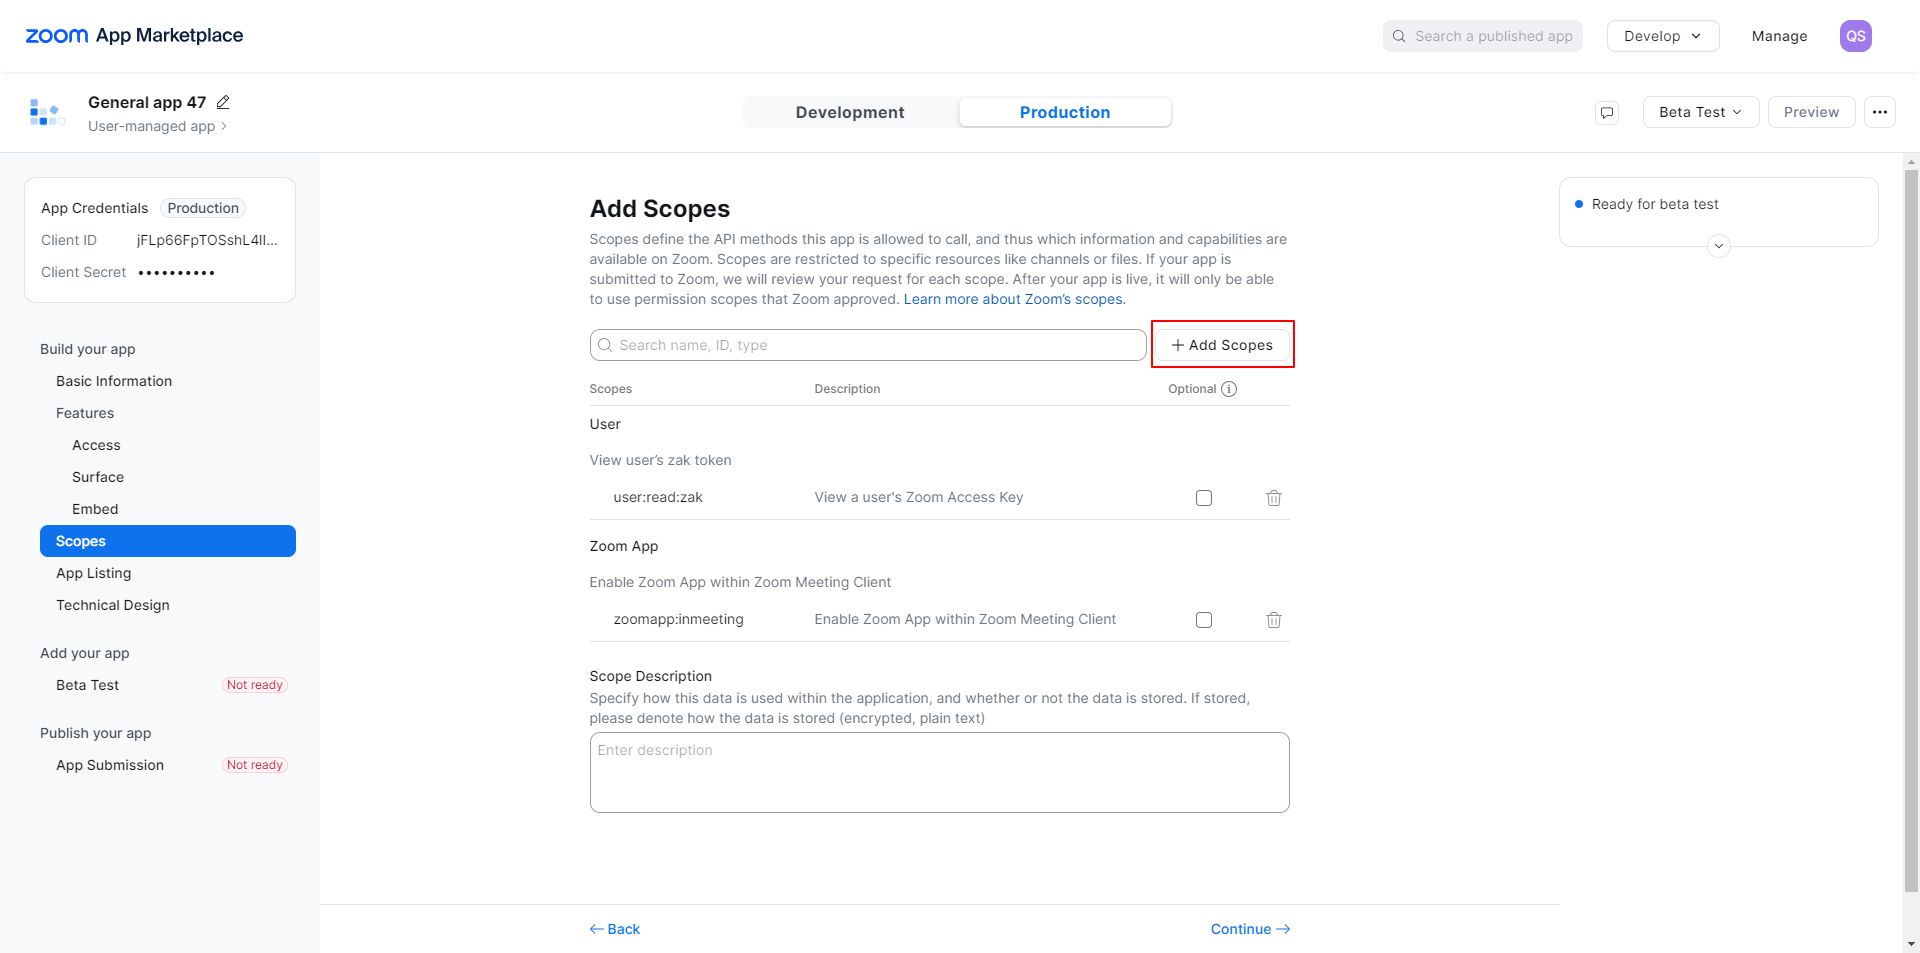
After clicking on Add Scope, an Add Scope window will open. First, ensure that User > View user's zak token is selected by default.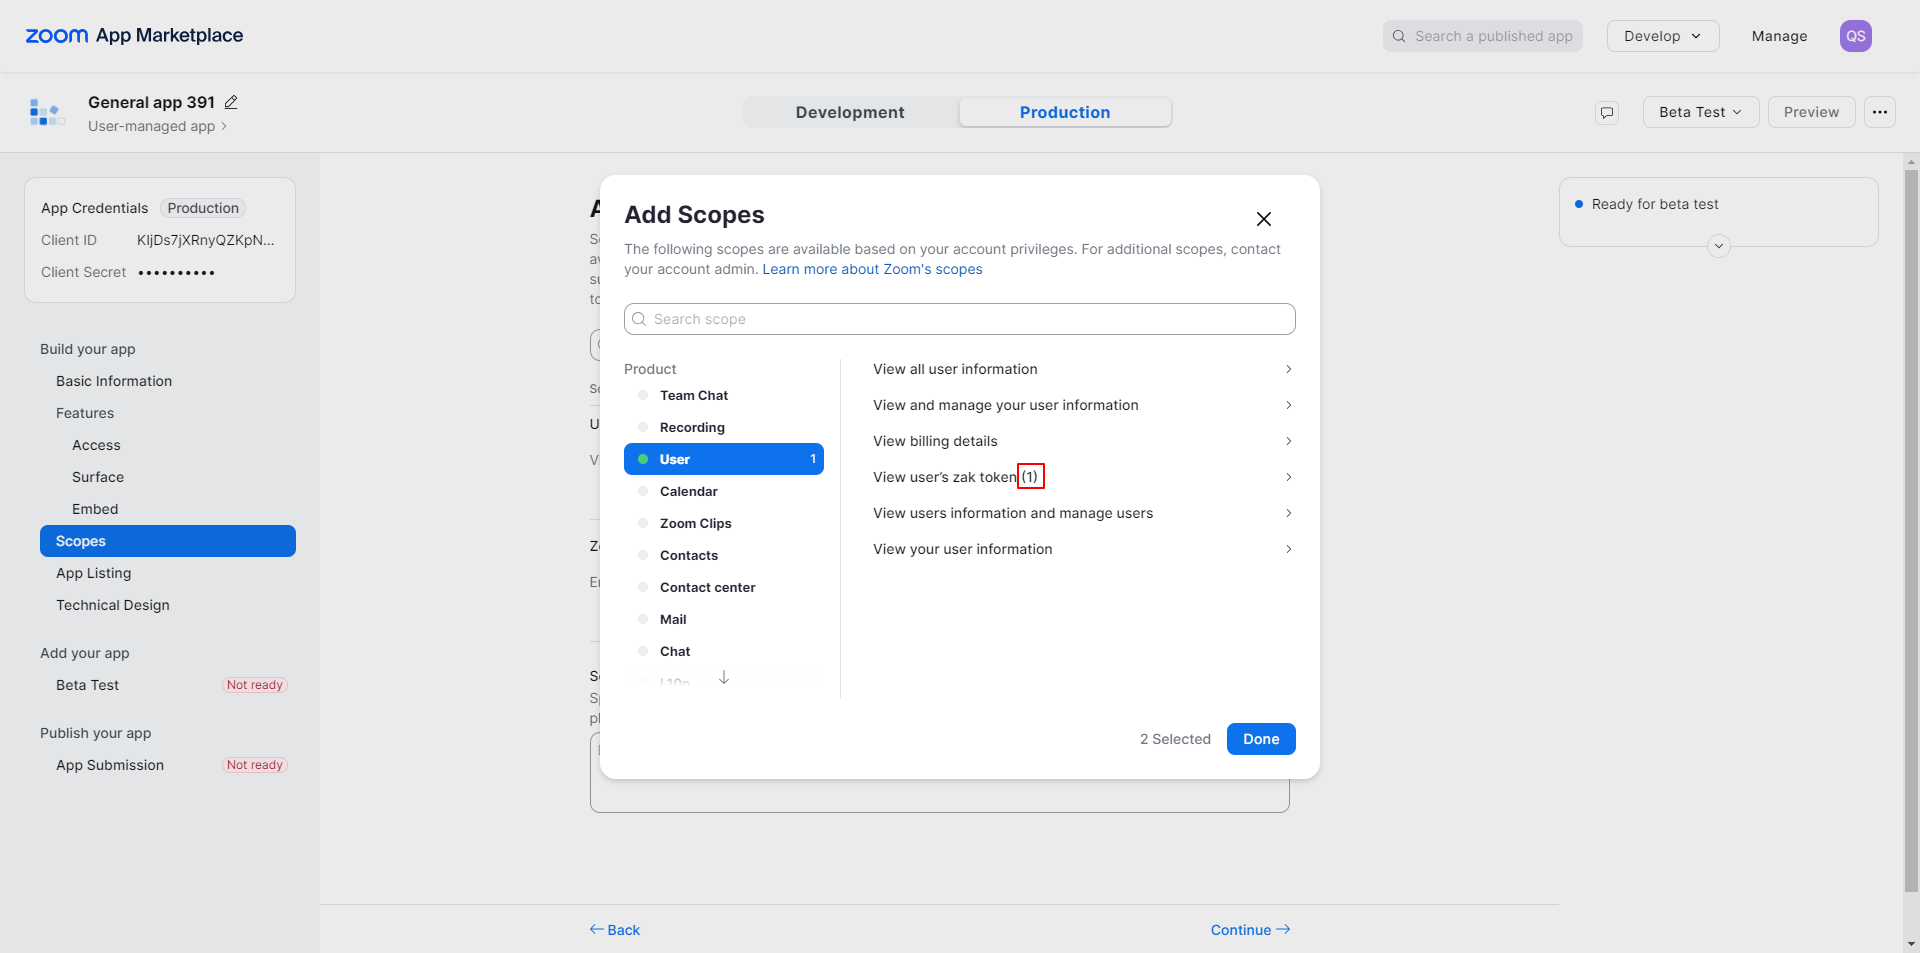
then click on Meeting, in meeting here you can see the options, kindly follow the image option and select the all check box's under of them.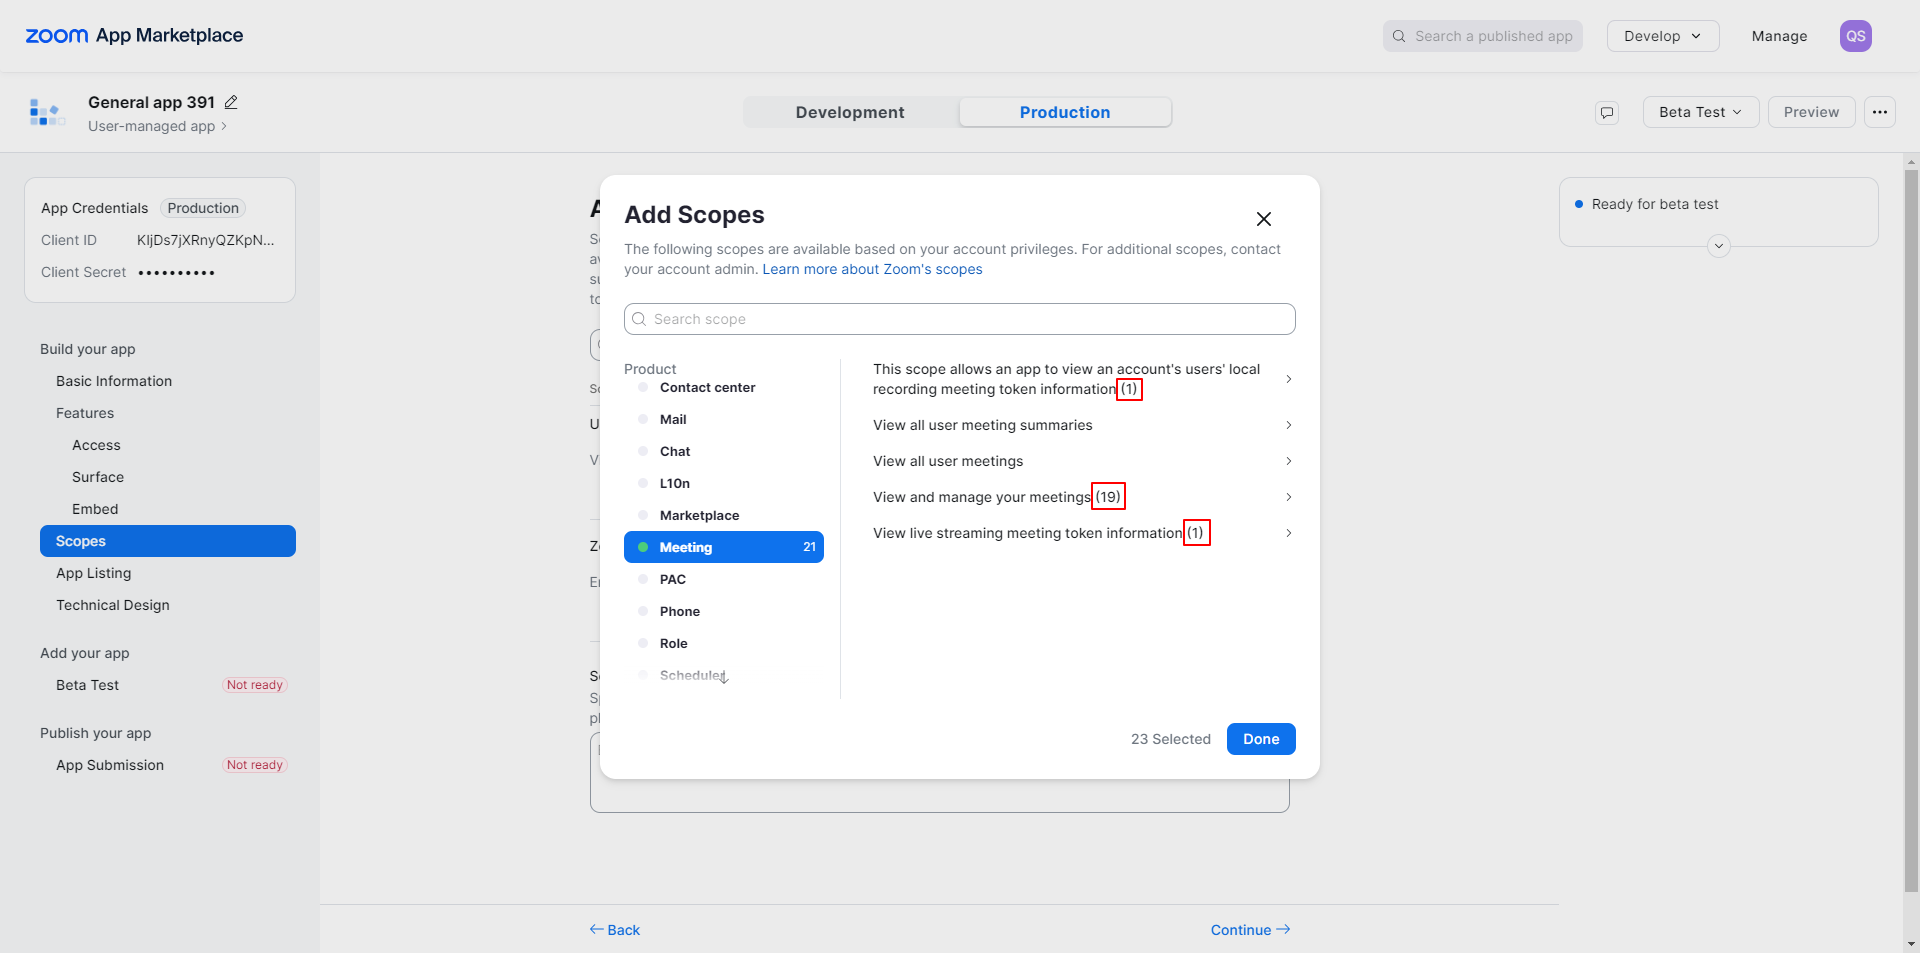
then ensure zoom app should also be checked in below 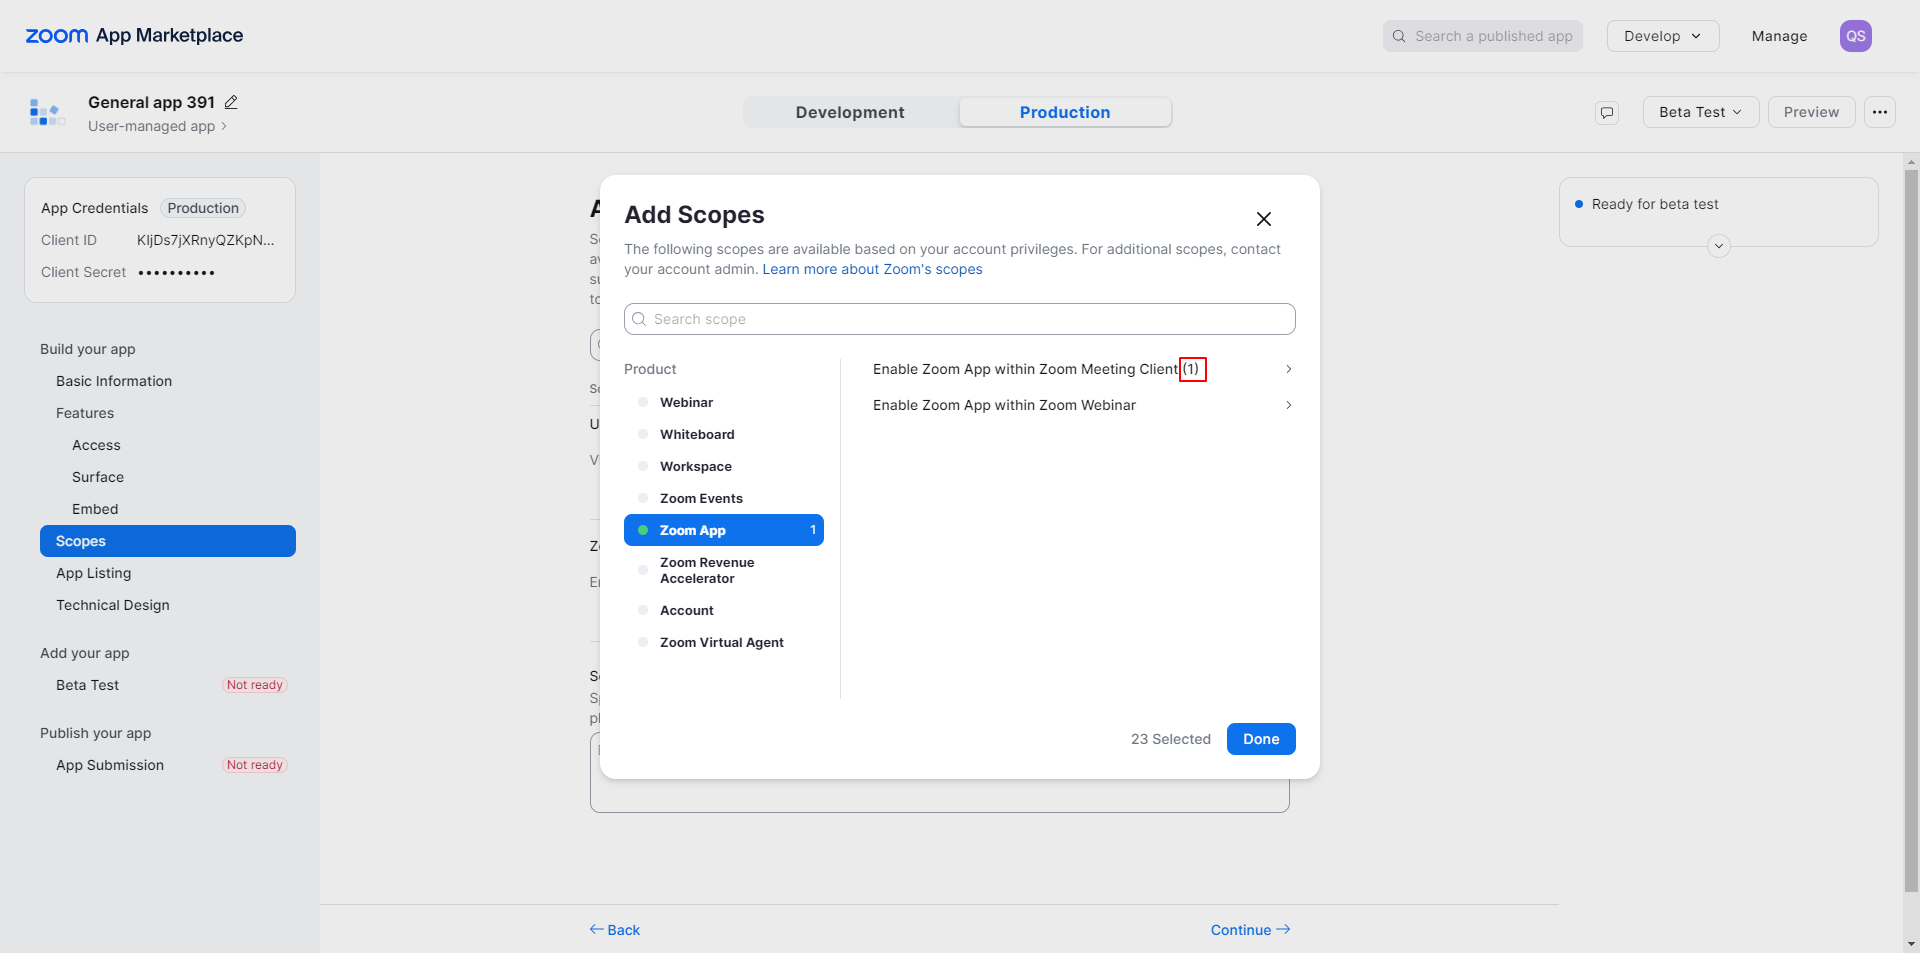
now click on done all Scope will be added successfully.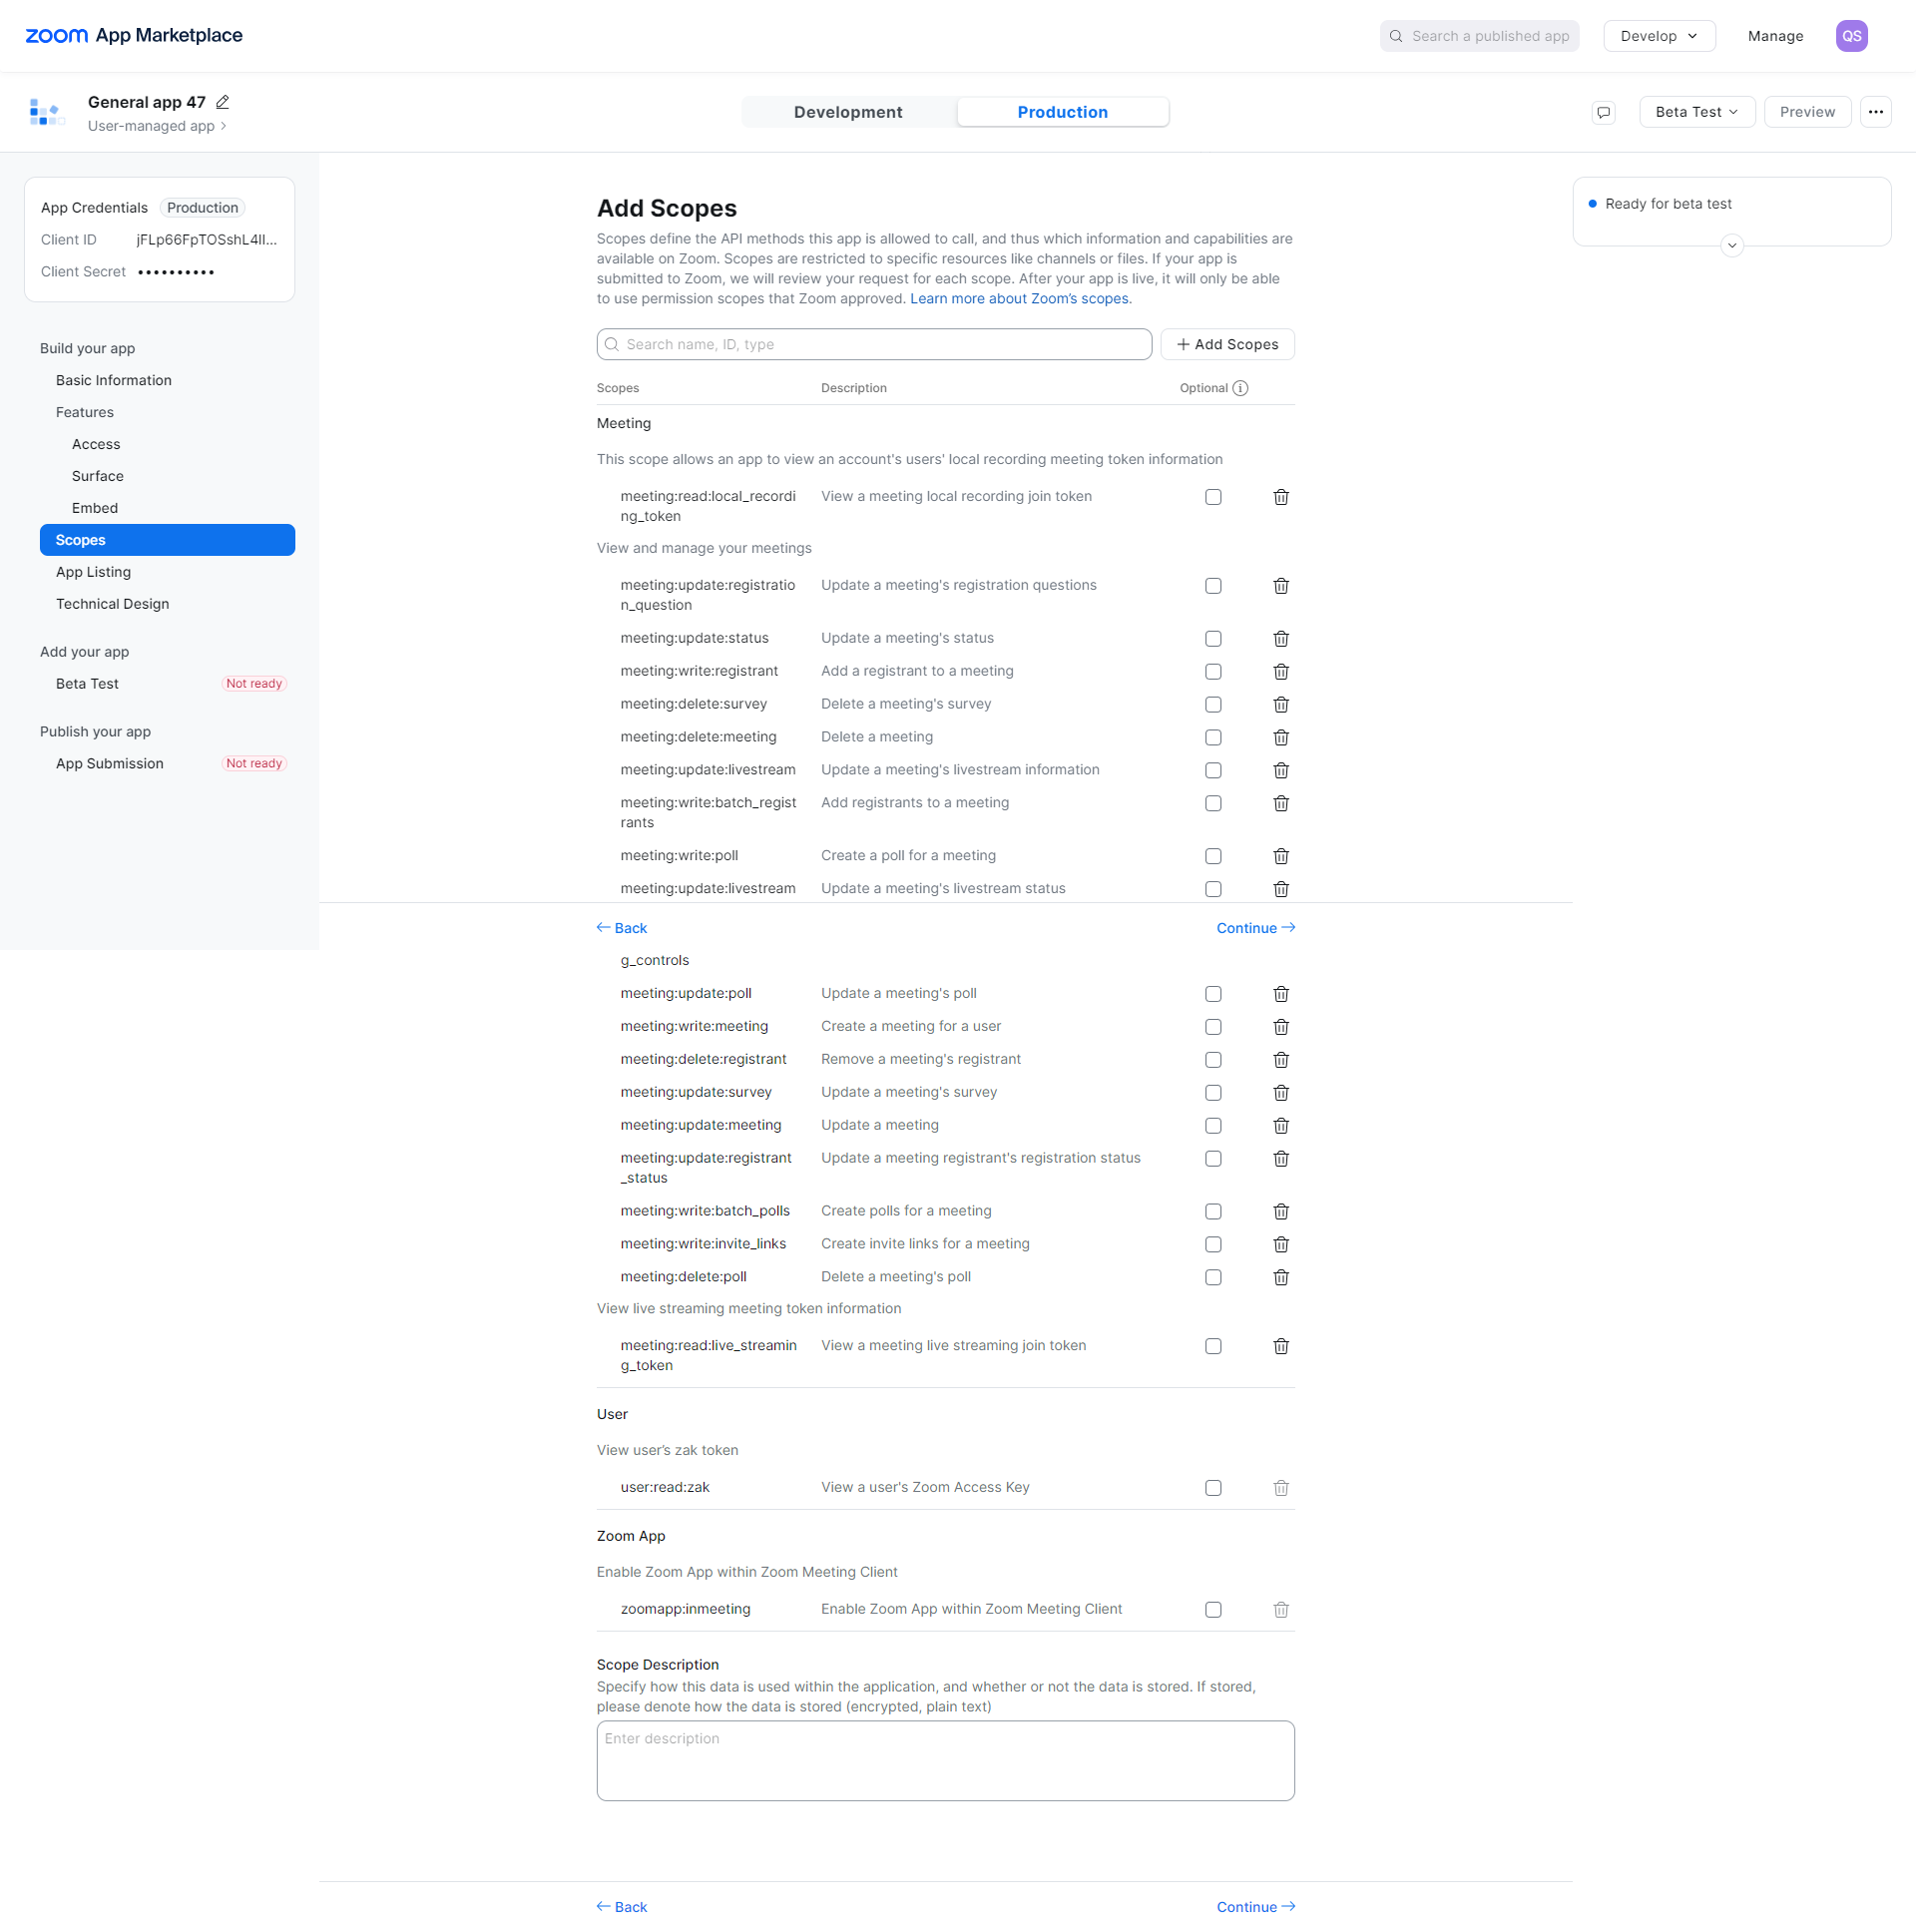
Now click on the Continue button. The App Listing page will open. On this page, enter the relevant details as desired.
then click on continue button Link & Support page will be open, here enter your URL's depending upon your requirement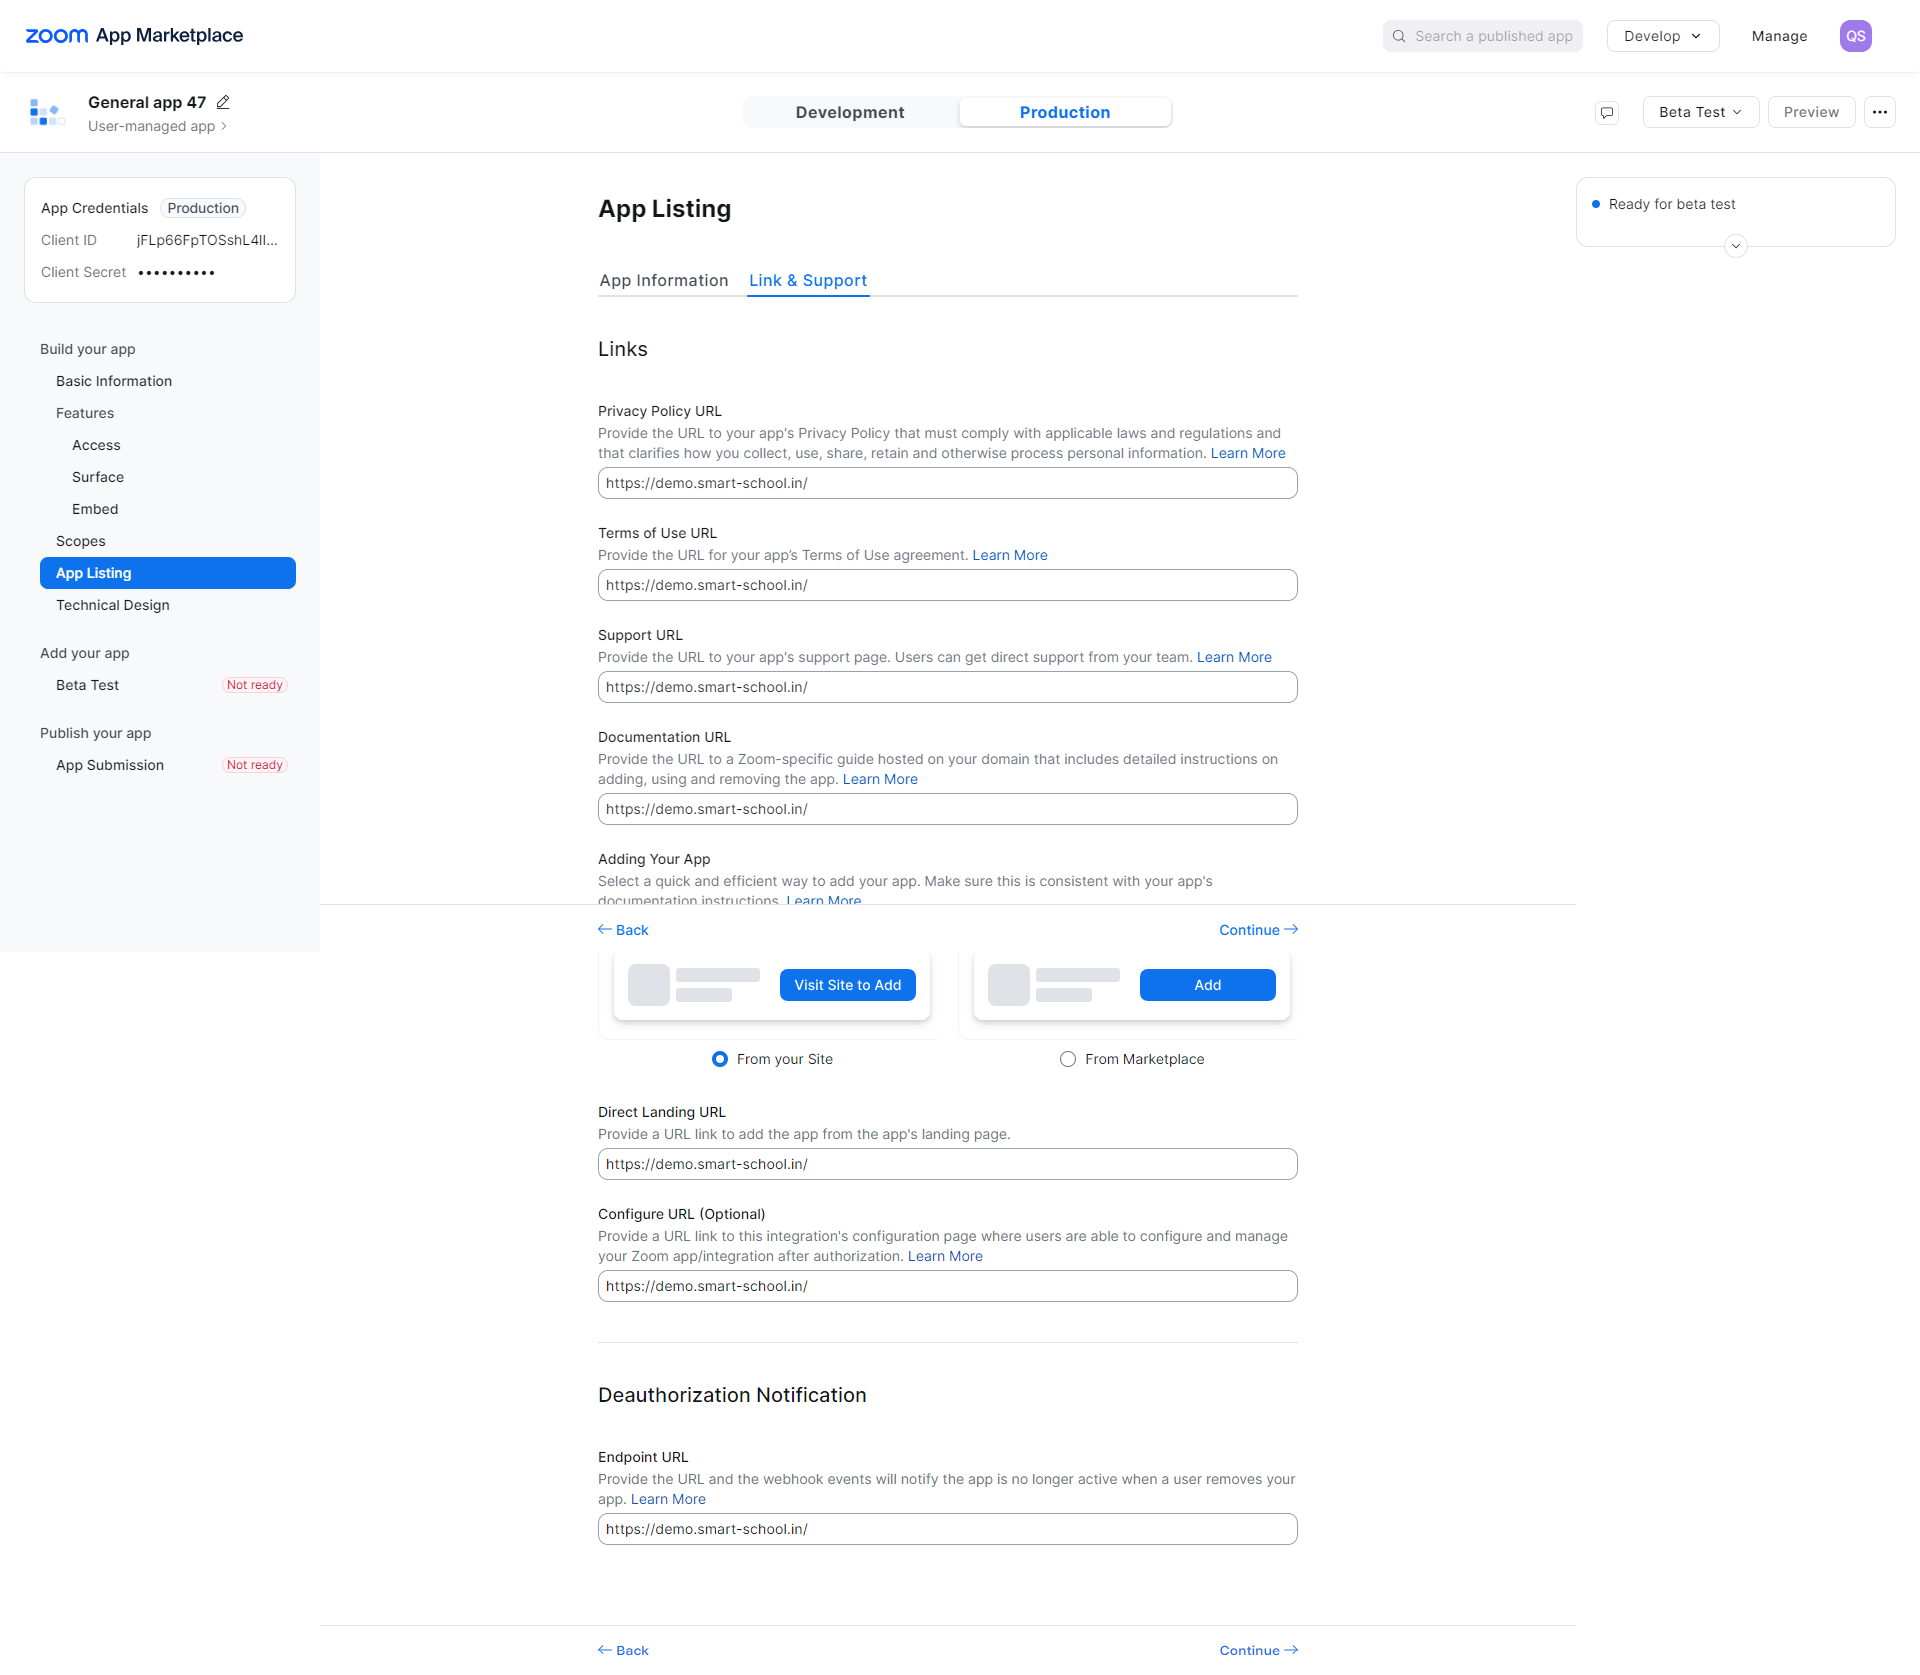
Now click on the Continue button again. The Technical Design page will open. On this page, first update the document in the architecture diagram section, then provide the relevant answers for the application development. 
After that, click on the Continue button then give the relevant answer for the security.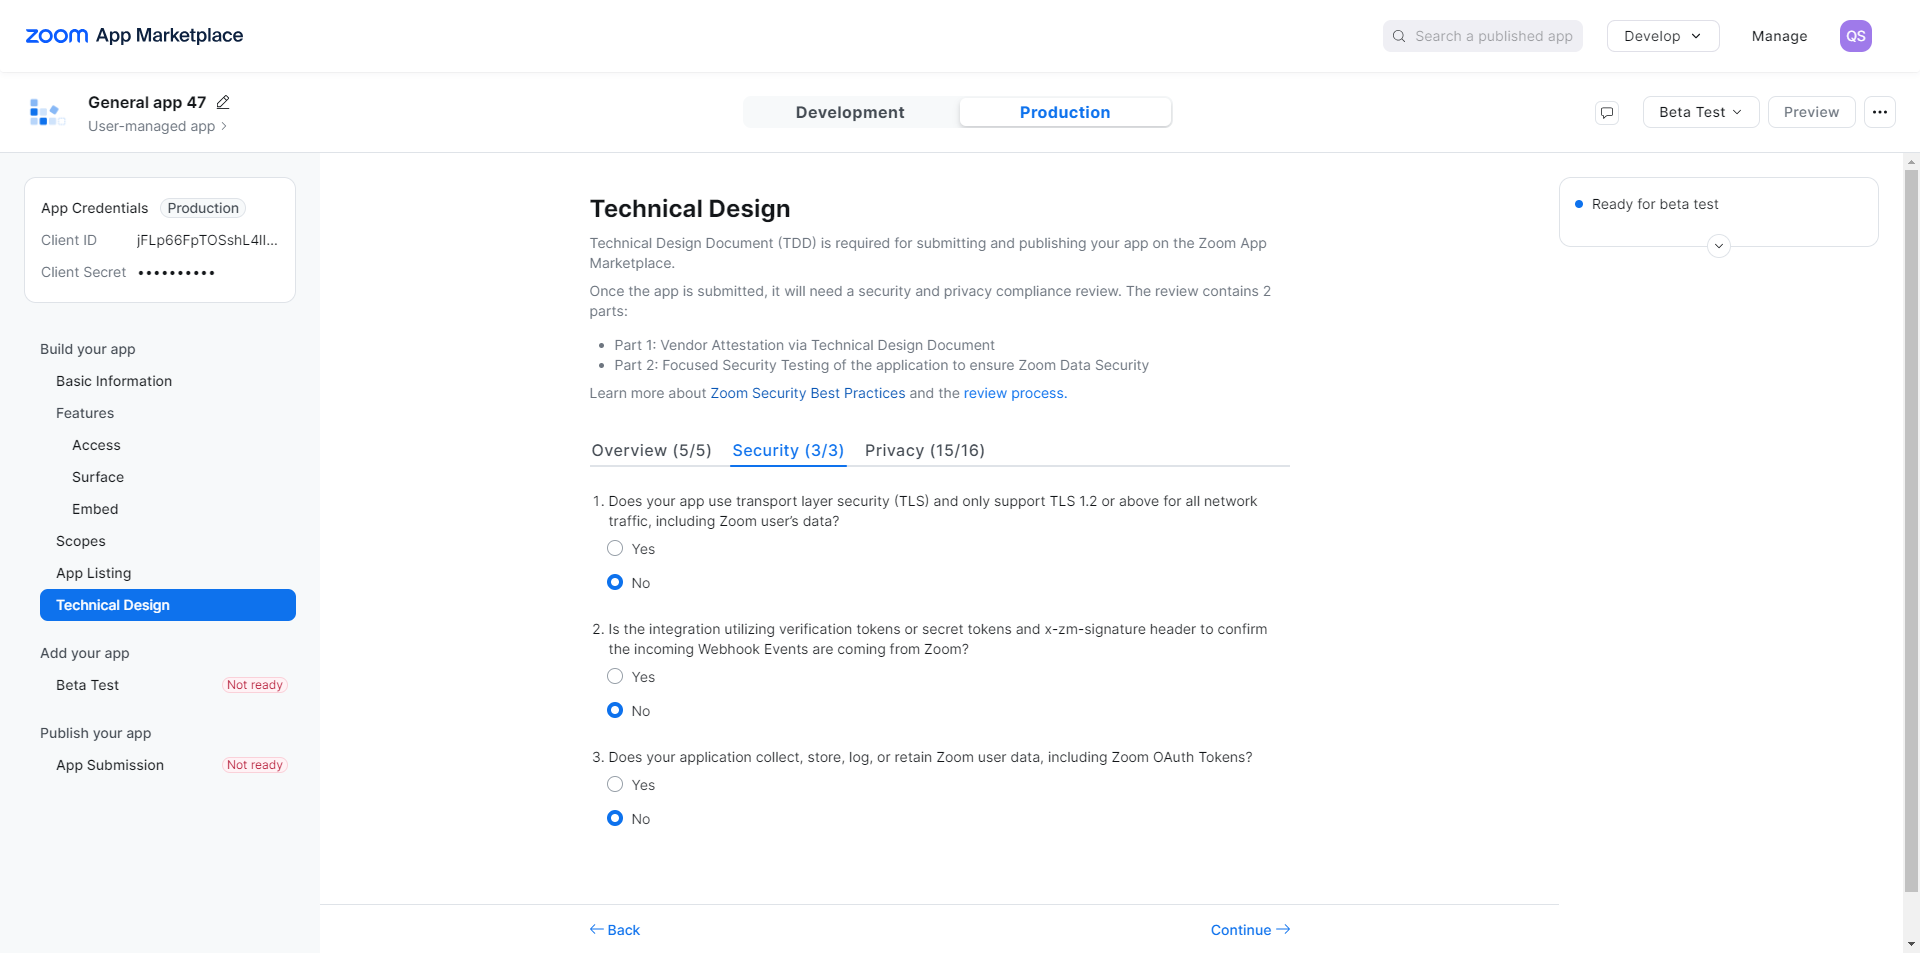
then again click on continue privacy page will be open, here give the relevant answer for the privacy.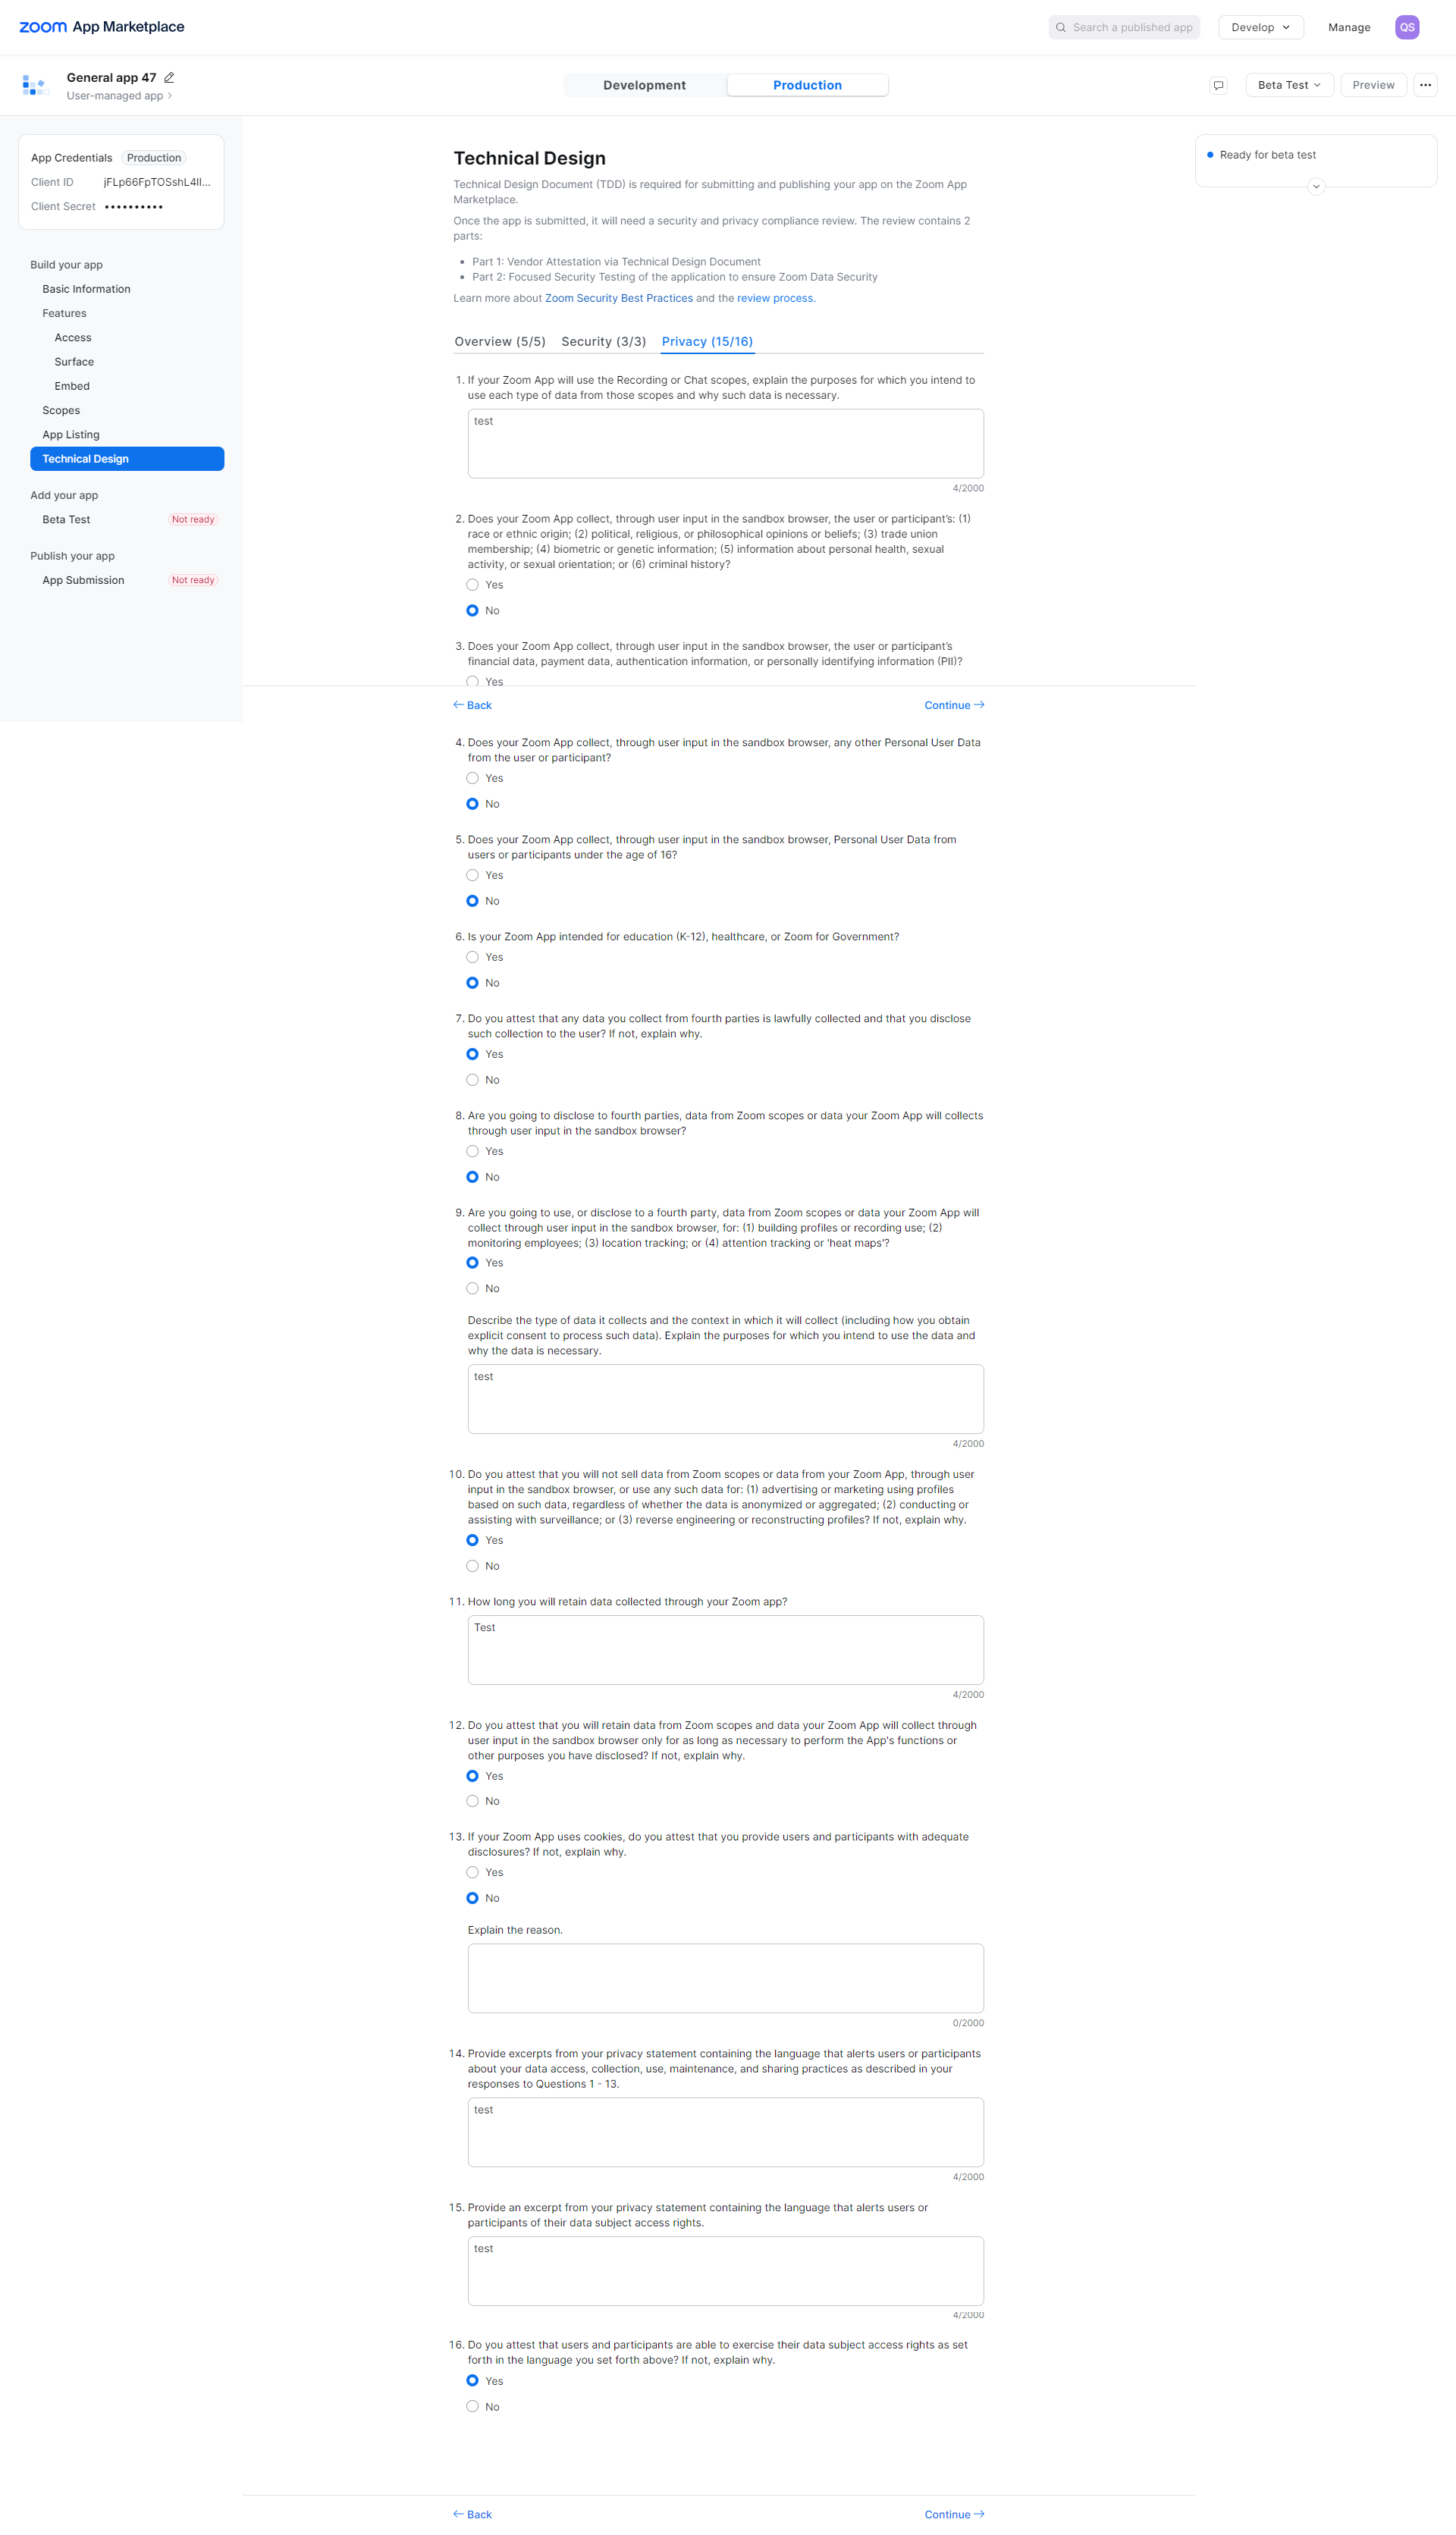
now click on Continue button Beta Test page will be open from here you can regenerate the Authorization URL if you made any changes in previous settings.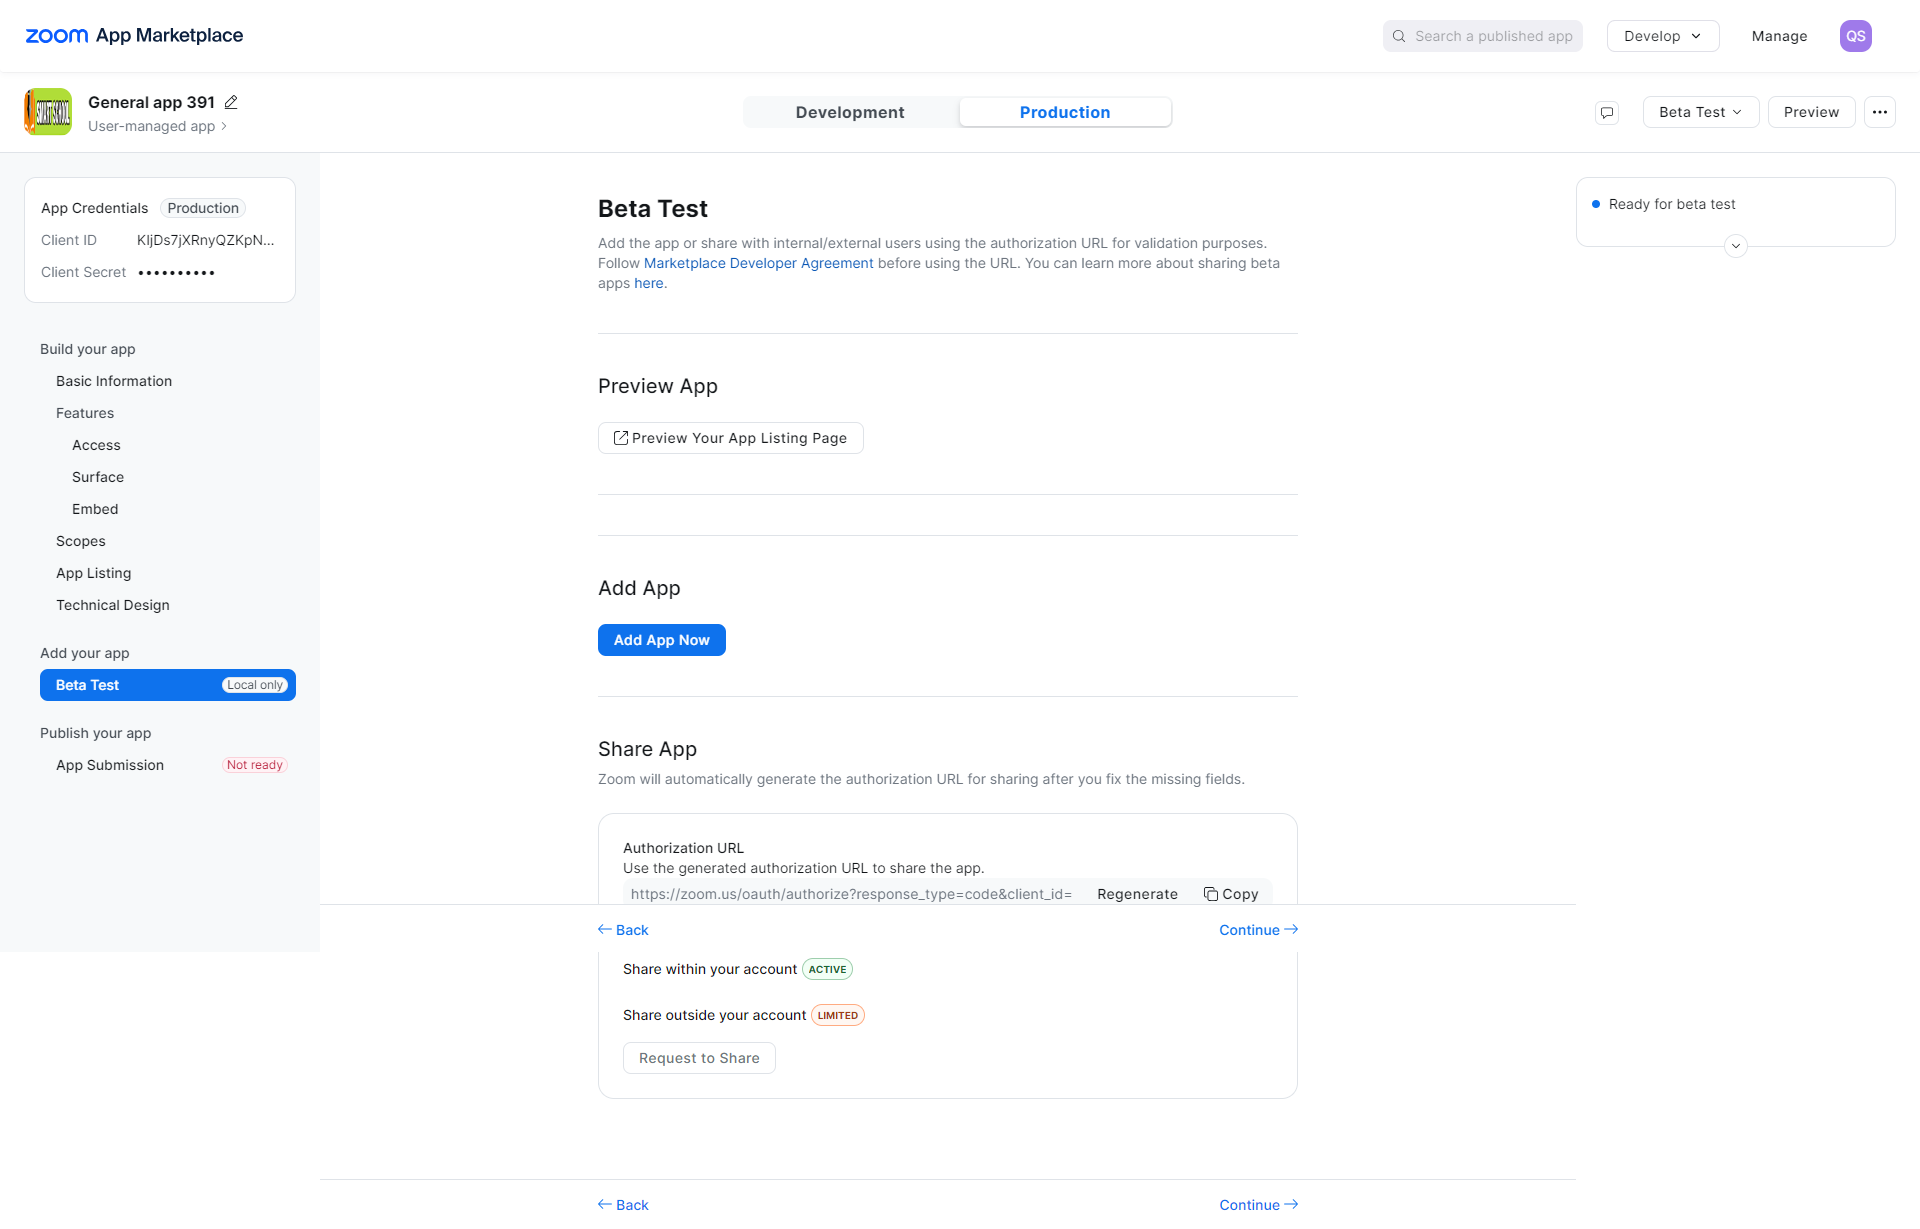
now click on continue button App Submission page will be open here follow the instructions and then click on Submit button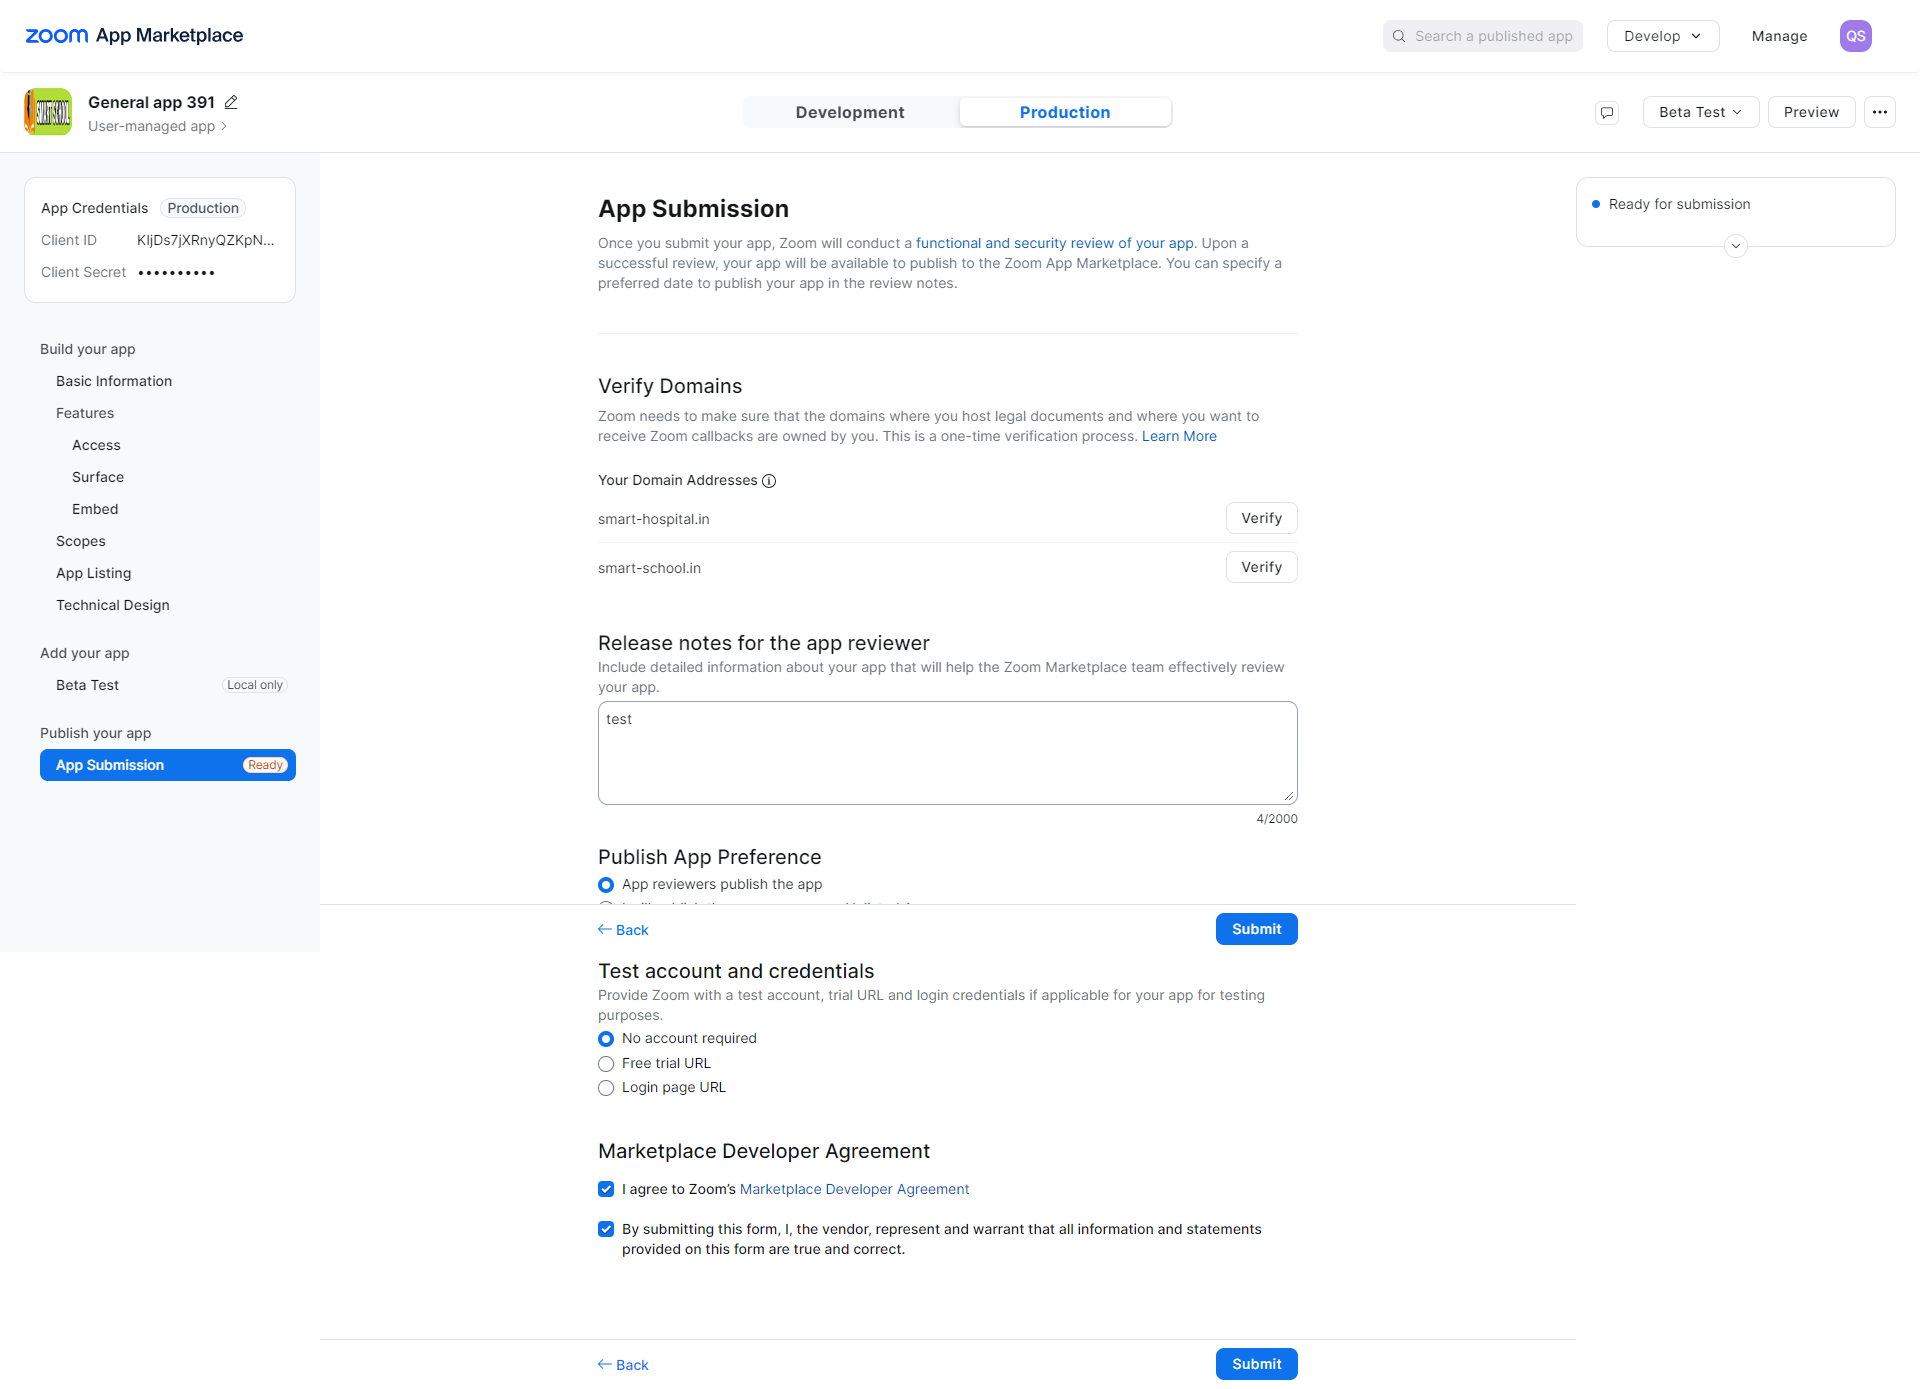
After click on submit button you have successfully generated zoom api credentials
About zoom live class
The Zoom Live Class module utilizes the https://marketplace.zoom.us/ meetings service to create live classes for students and live meetings for staff members. In this module, teachers or authorized persons can create live classes for students based on the timetable period, and further, students can join these classes from the student panel. Any authorized staff can create staff meetings, and concerning staff can join these meetings. To use this module, users must have the Zoom app installed on their devices. In Smart School, the Zoom Live Class module only creates Classes and Meetings using the Zoom API, and users can start or join these classes or meetings. All processing and management are done by https://marketplace.zoom.us/ If you are using a Zoom paid account (like a 10 host license), then you should create individual host user Zoom API credentials and add them to Smart School's Zoom Live Class in the 'Add Credential' option present in the teacher account. Since Zoom doesn't provide the ability to start multiple Live Classes simultaneously for a single host, even if you are using a Zoom paid account, you should create multiple host accounts in Zoom to run multiple simultaneous Live Classes, each started by a separate host.
Zoom Live Class Module Workflow: First, we will add Zoom account API credentials on the settings page and set the zoom API. Next, we will create a Zoom Live Class or meeting, and then we can start the live class or meeting. Students can join the live class, and staff members can join the meeting. Furthermore, we can check the join report for the live class or meeting
Note: Zoom Live Class is Smart School addon so to use it you should purchase separately and install it in your Smart School.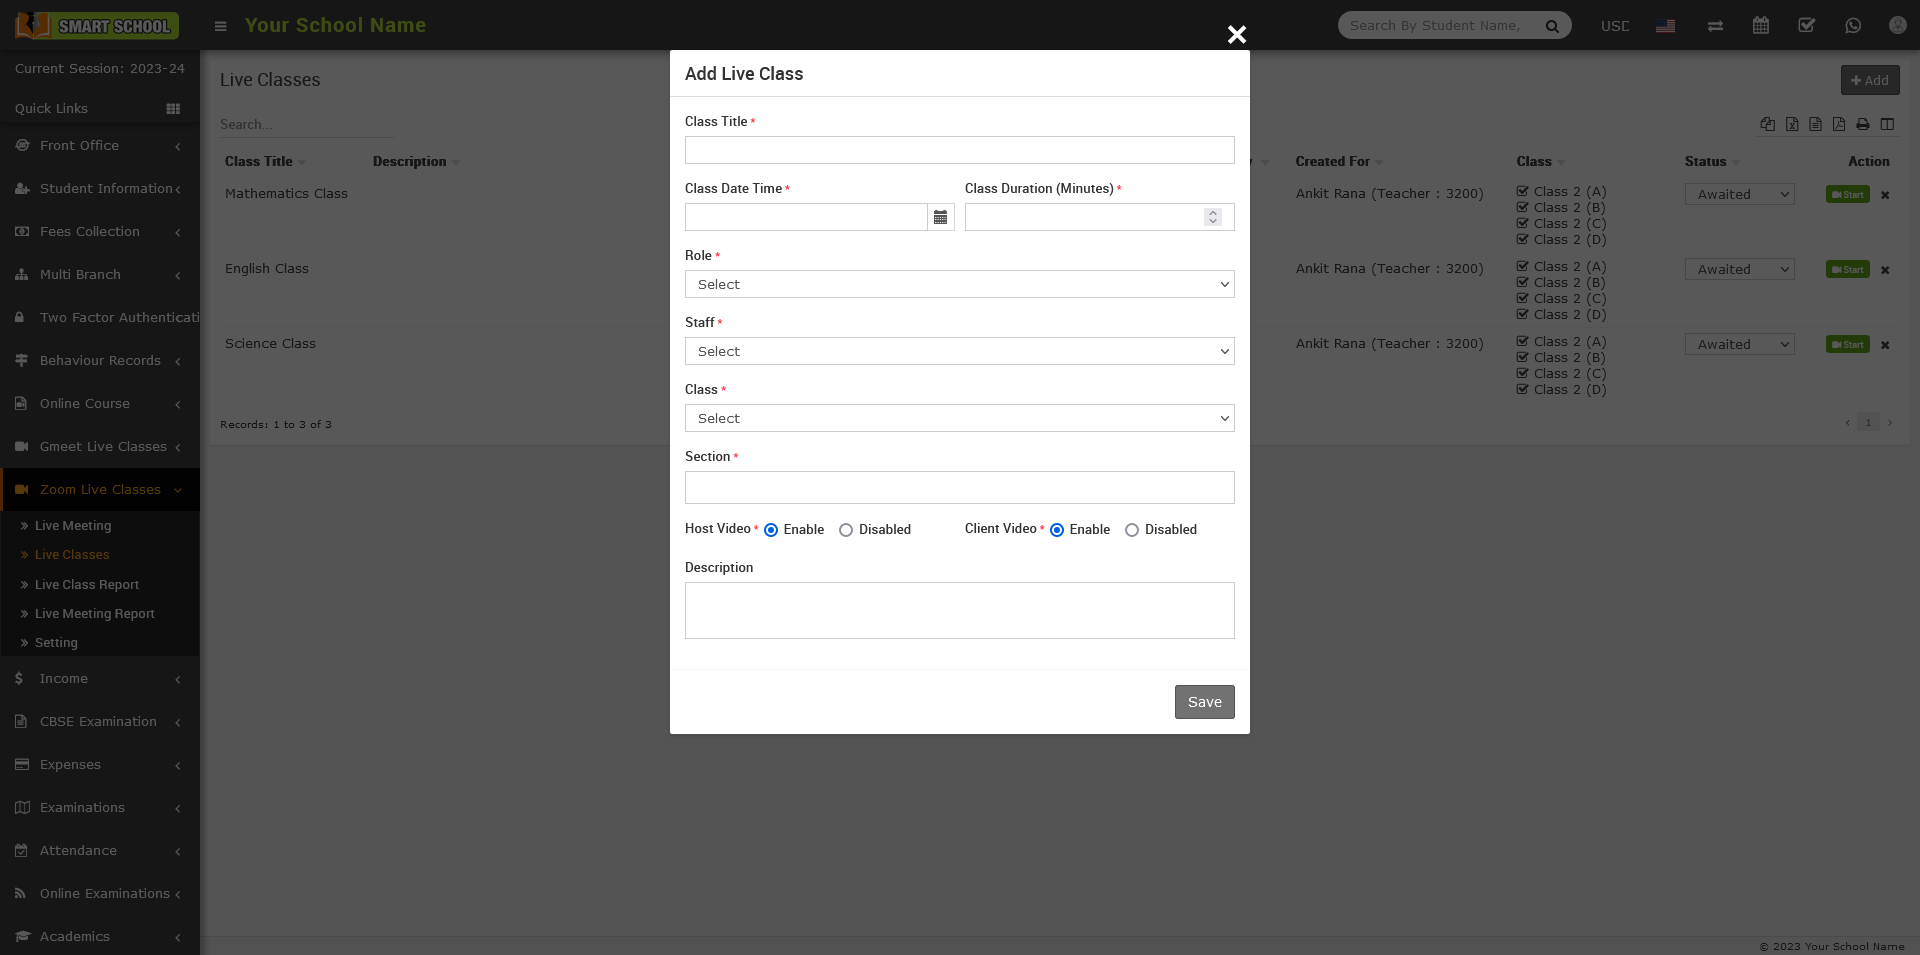
How to configure zoom live class?
Before creating Zoom Live Class or Live Meeting you must have Zoom account and Zoom API credentials. If you don’t have zoom account or API credentials then check this https://www.youtube.com/watch?v=voJOIavlKTk video tutorial.
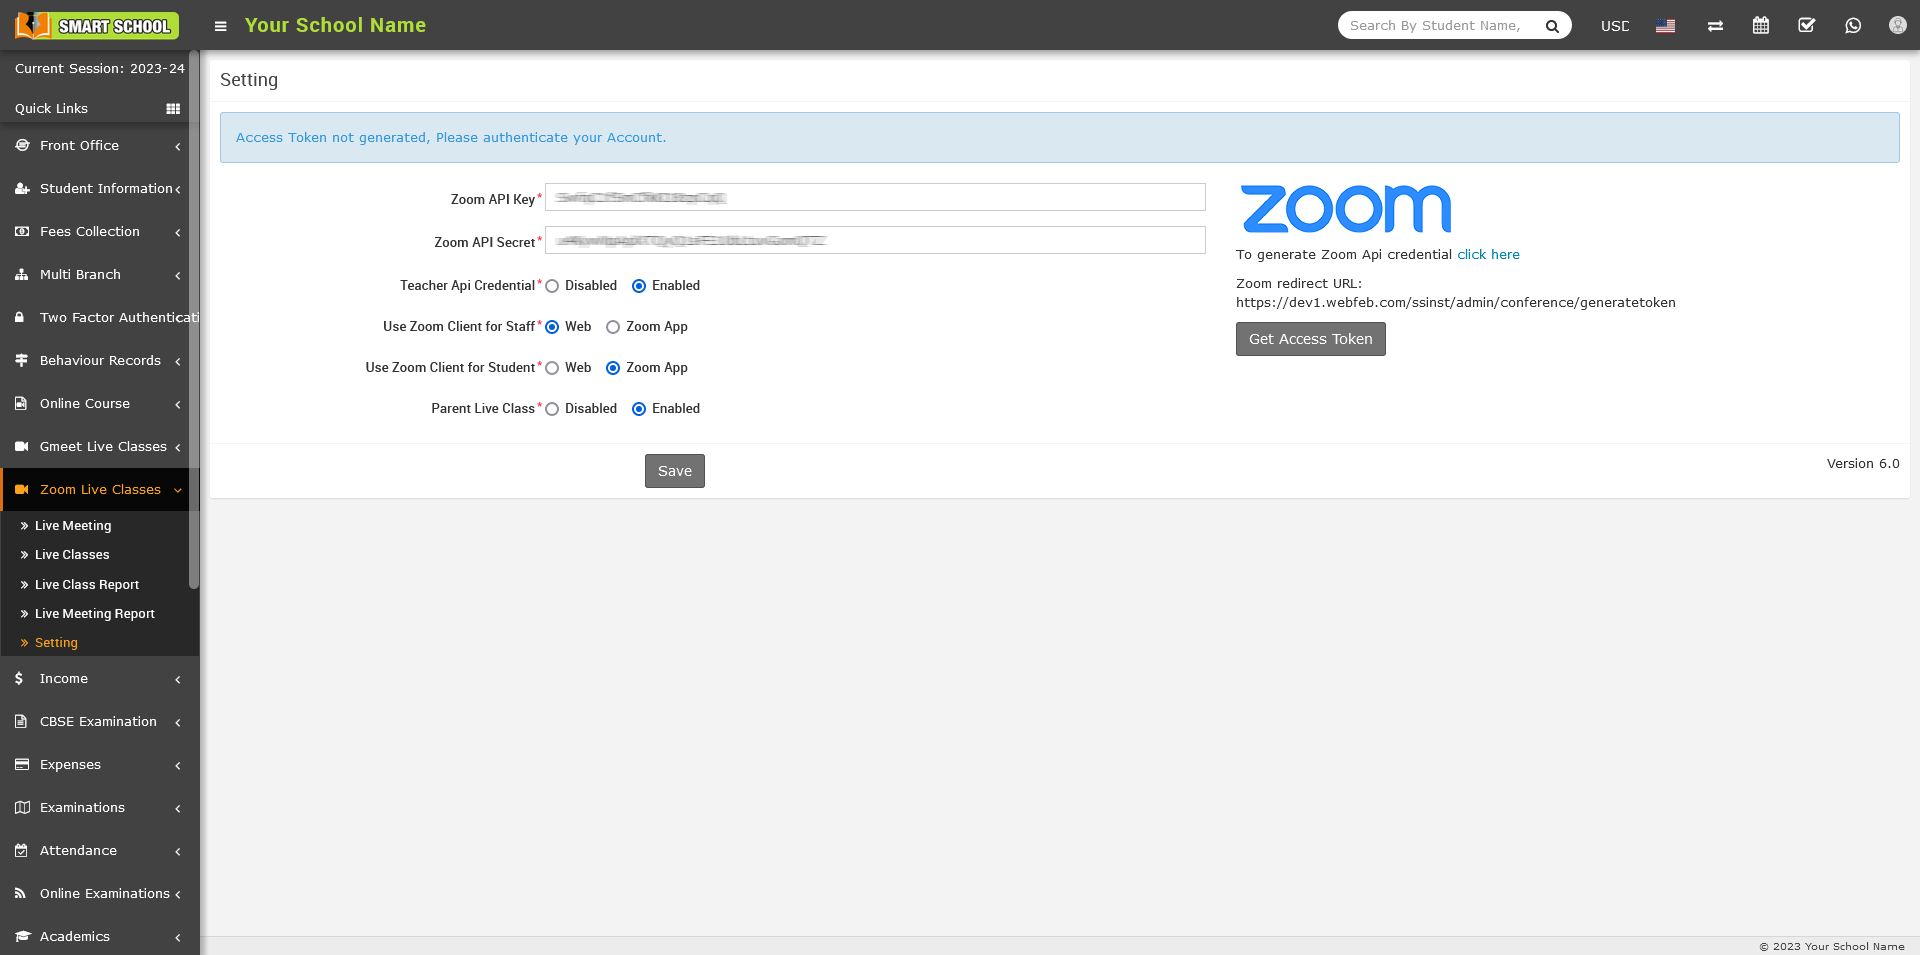
To configure Zoom Live Class, go to Zoom Live Classes > Settings, here enter Zoom API Key , Zoom API Secret details and check Teacher API Credential and Zoom Client App Enable/Disable and then click on Save button. Here, entered API credentials is known as Global API Key in Smart School so we will recommend to use zoom paid plan API credentials otherwise in free plan you can run only single class or meeting at once.
If you disable Teacher API Credential option then teacher will have to use global API key and will not be able to create their own API Credential and if you enable Teacher API Credential option then teacher can add their own API credentials from their teacher account by clicking on Add Credential button to create Live class by using self API Key
If you enable Zoom Client App option then user will have to install Zoom Client App in their machine and if you disable Zoom Client App option then user does not have to install anything, Classes and Meeting will start on Zoom Web SDK. Zoom Web SDK is not as mature as Zoom Client App so may be some features will not work properly or missing in Zoom Web SDK so it is highly recommended to use Zoom Client App to avoid Zoom Web SDK issues and use full featured Zoom services.
Note -
- If you are using Zoom Web SDK (Zoom Client App disabled) then your smart school must be running on SSL (https) otherwise you will get error messages and Zoom Classes or Meeting will not start.
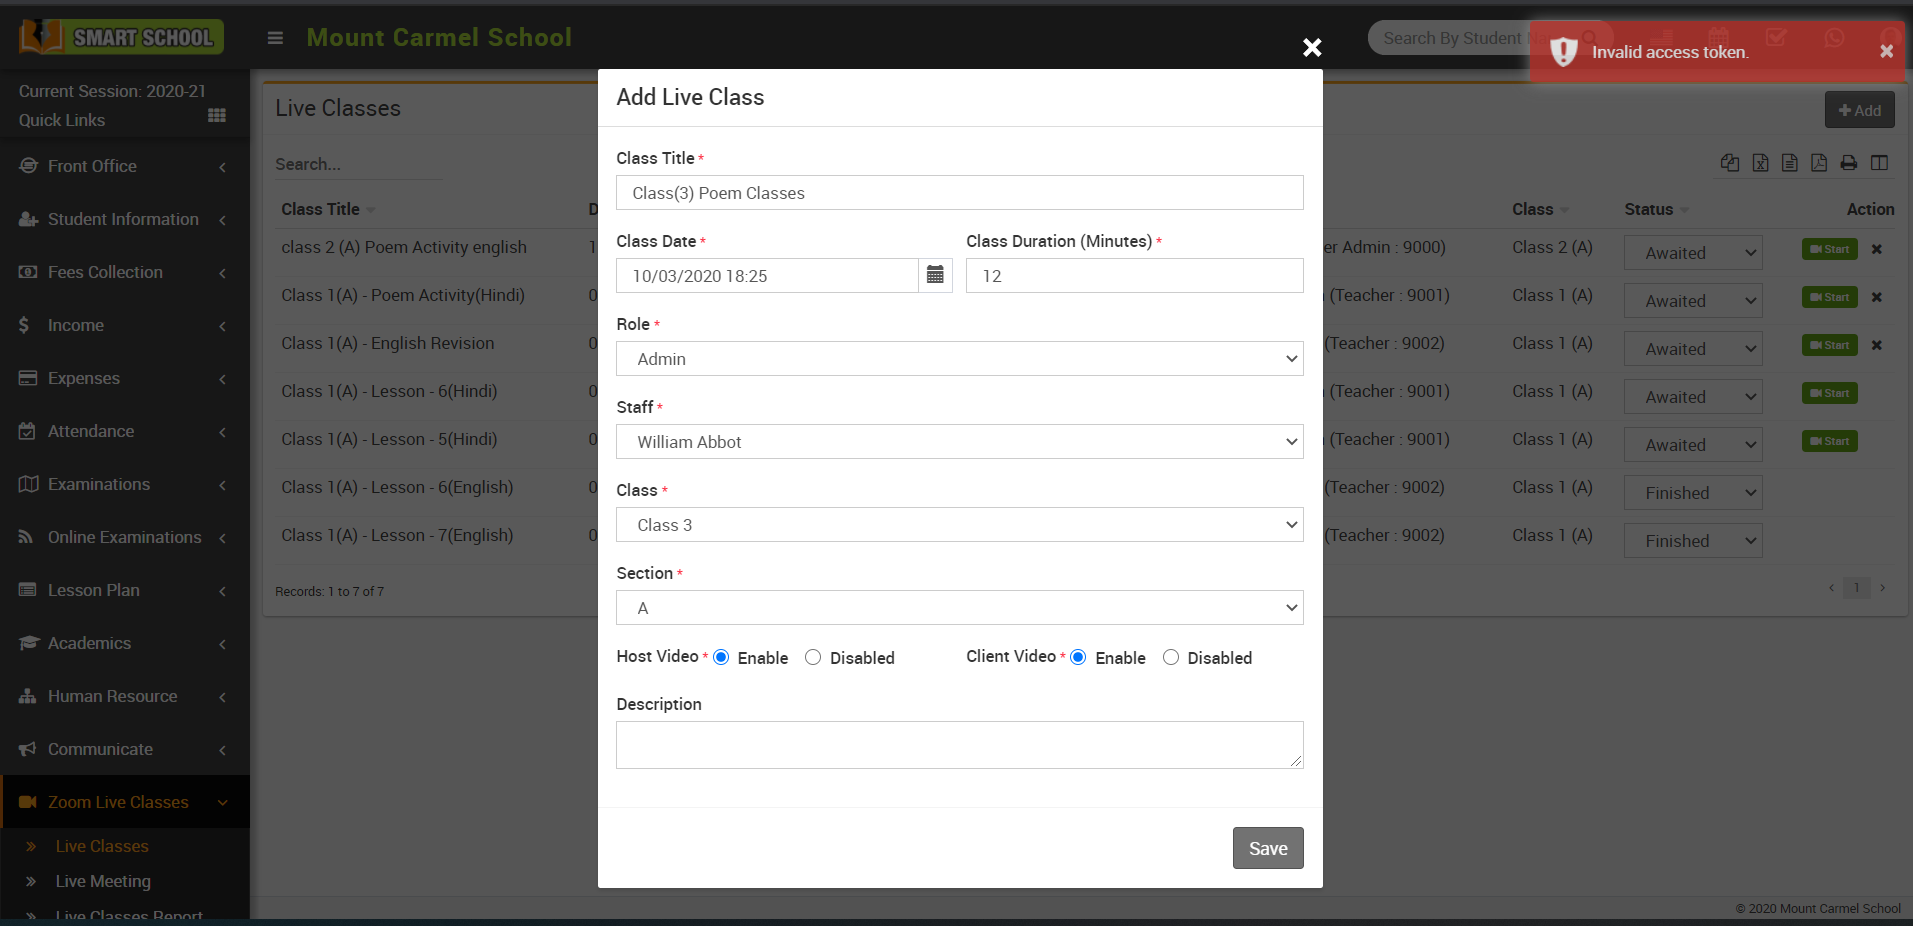
- If you are getting "Invalid access token" error message while creating Zoom Live Class or Meeting that means you are using incorrect API credential for your Zoom account so check your API credential you have entered.
How to enable/disable teacher API credential?

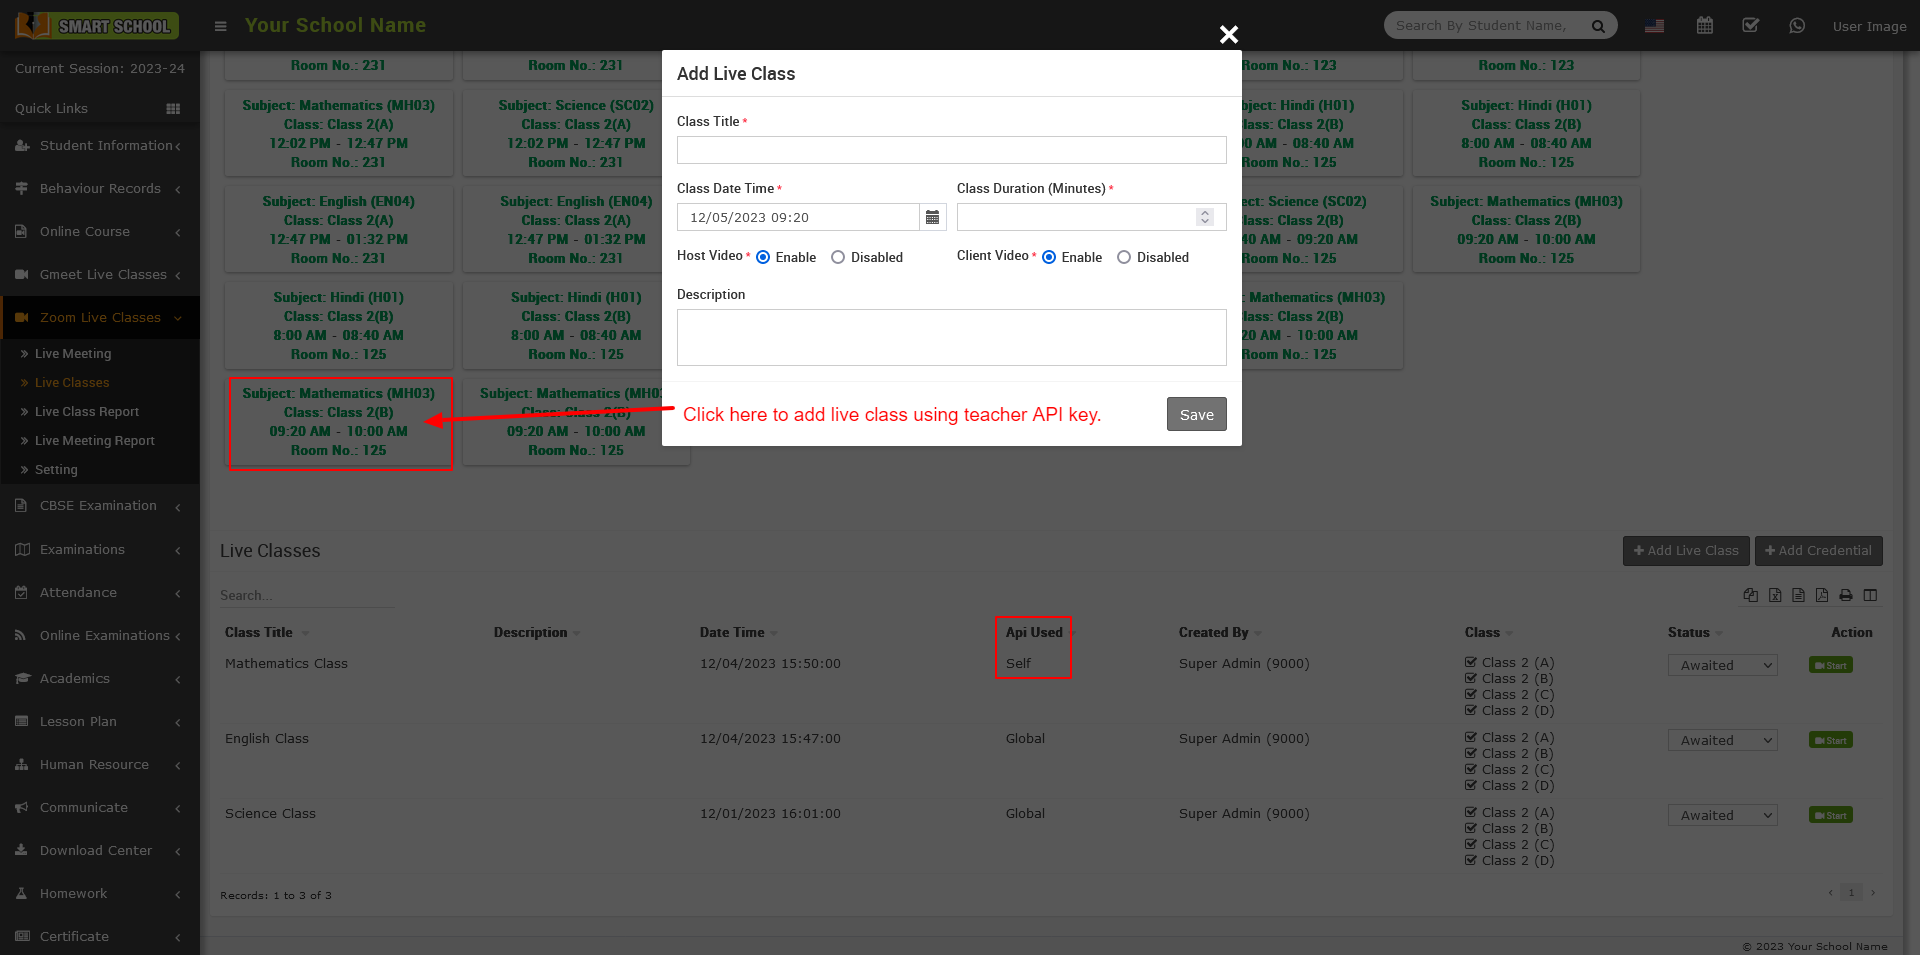
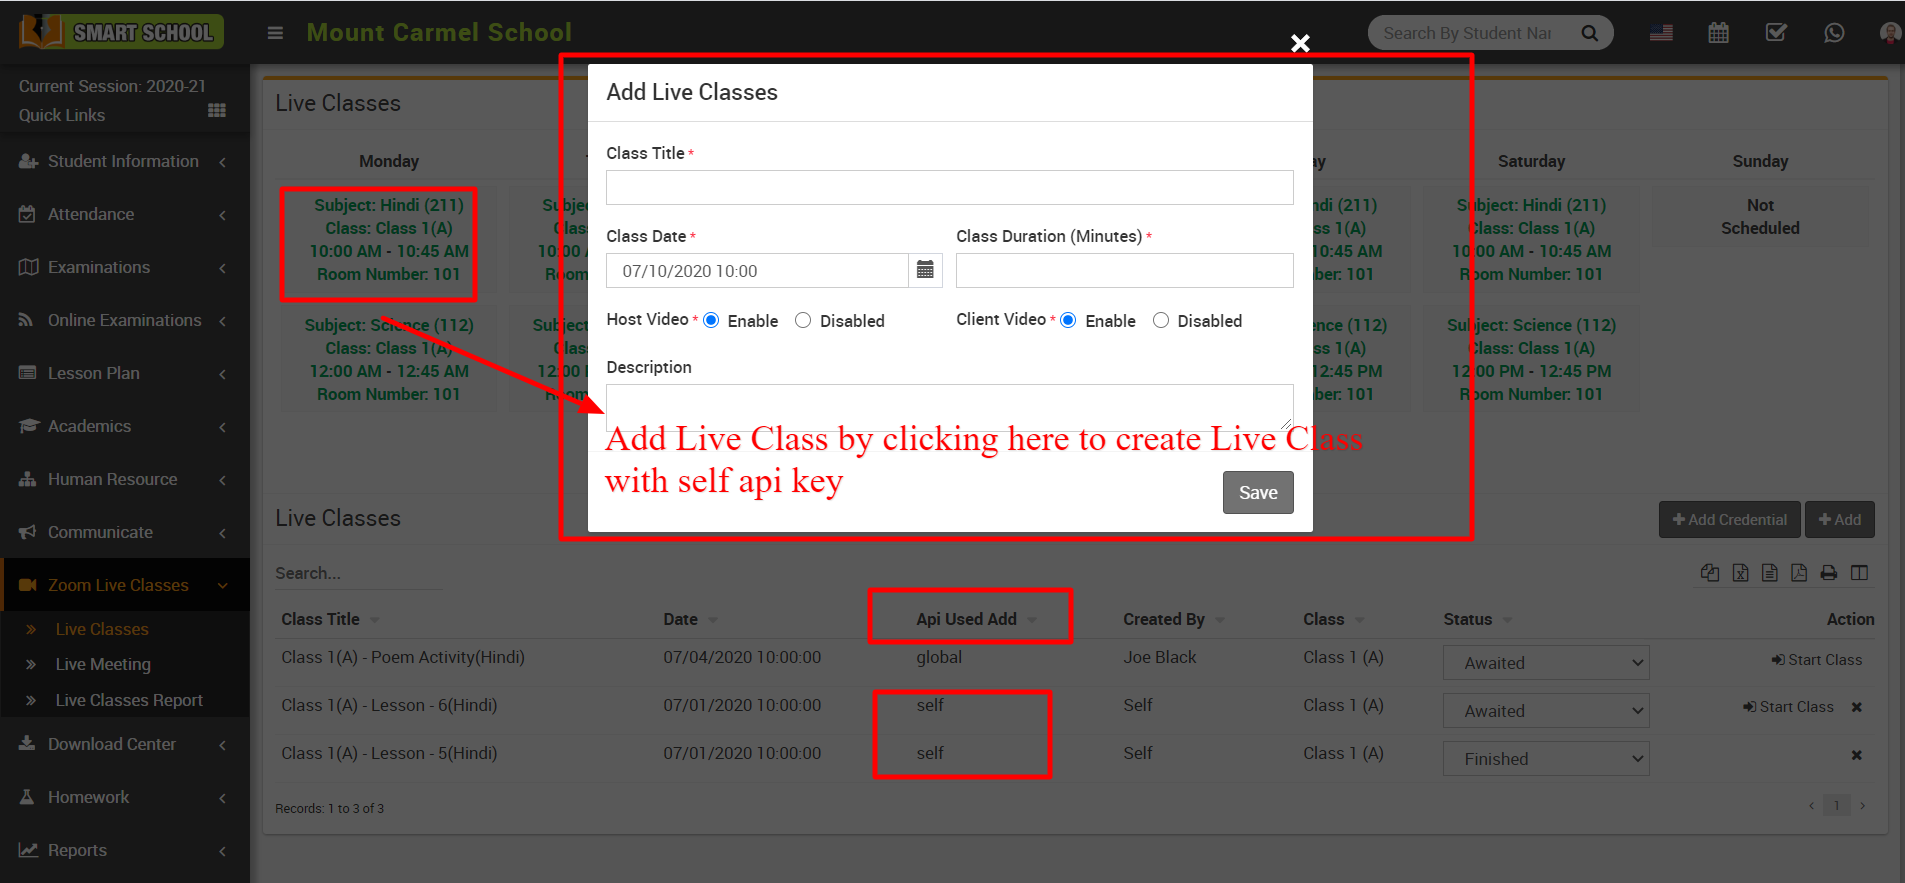
Note- To create Zoom Live Class using Teacher api key credential, please note that it must be created from Timetable otherwise if Live class created from Add Class button so it will always use global api key.
To create Live Class with self api key login to teacher account go to Zoom Live Classes here first add teacher Zoom Api key and Secret key from Add Credential.
.png)
Now click on created Timetable it will open Add Live Class window, enter here Zoom Live Class details and click on Save button so it will listed at Live Classes record list and will show Api Used as Self.
How to enabled / disabled the parent for zoom live classes?
To enabled and disabled the parent from the zoom live classes, Go to the Zoom Live Classes > Setting.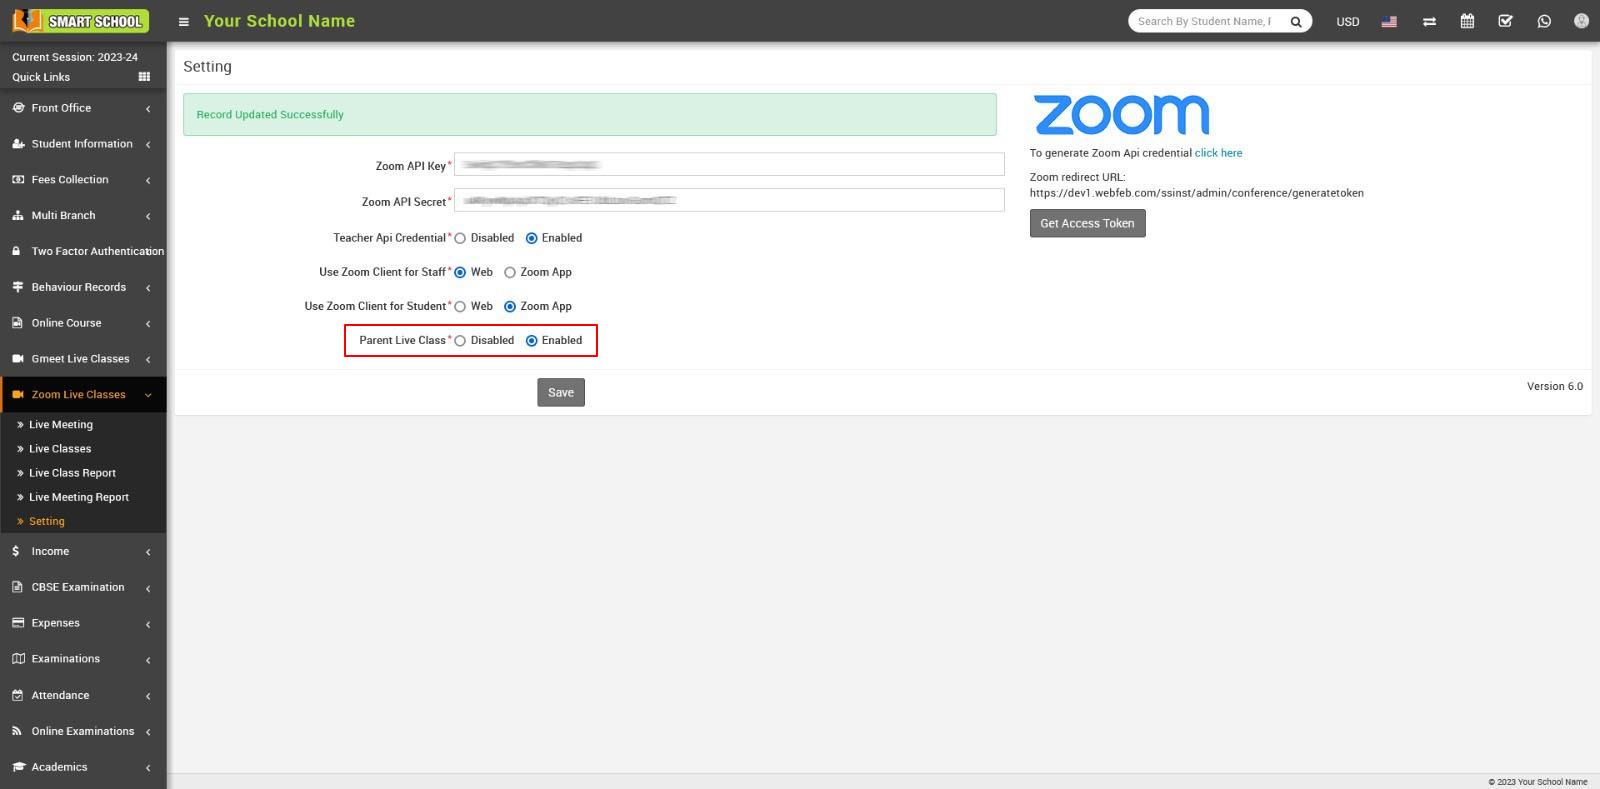
On this page, you can view the "Parent Live Class" option, which can be Enabled or Disabled by the superadmin. When the superadmin disables the live class option, parents will not be able to join the live class.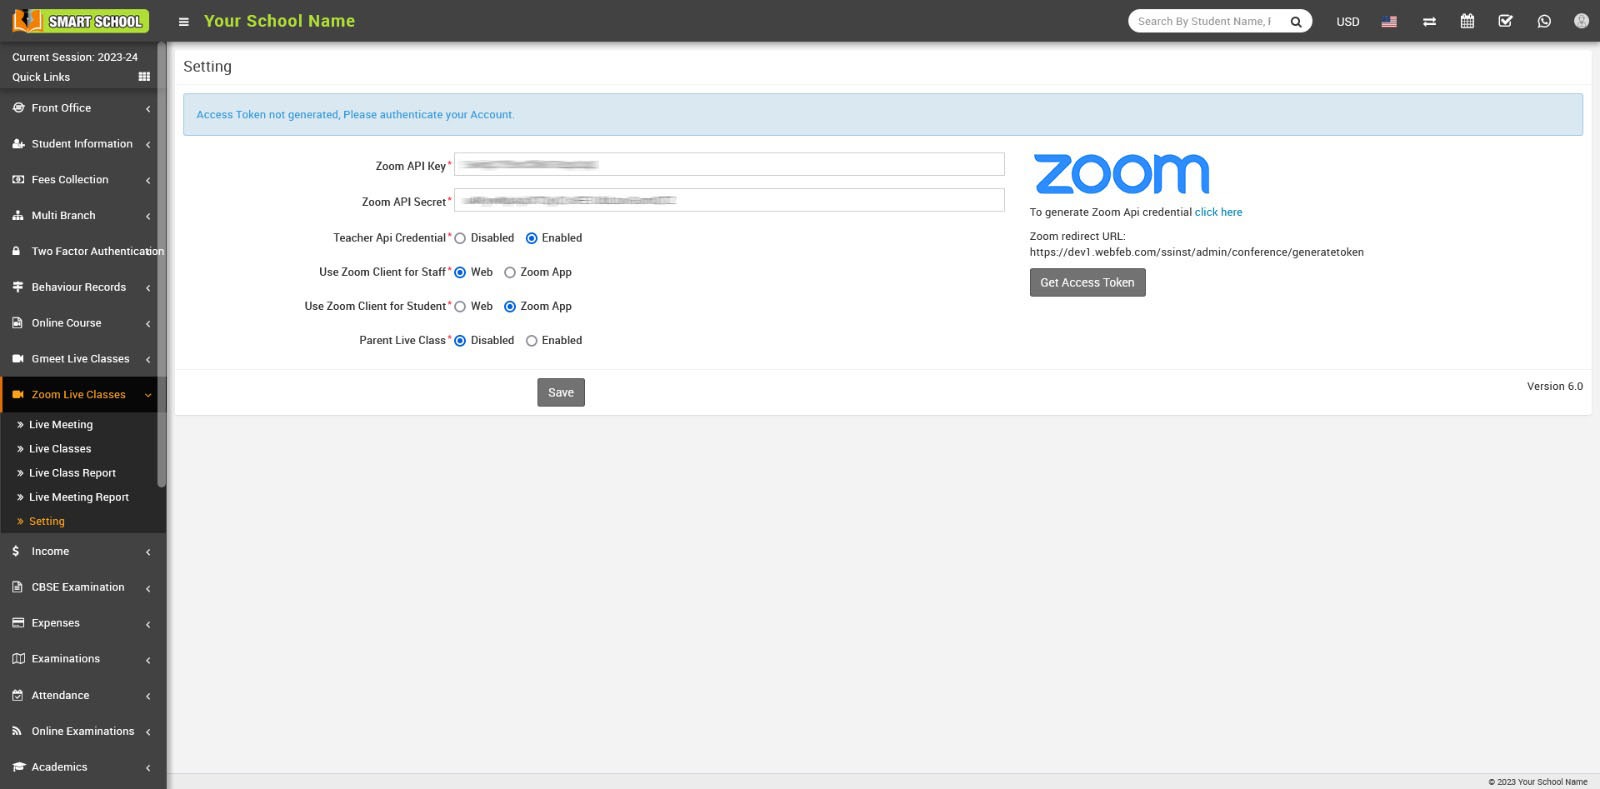
the Join button will not be shown in the Zoom Live Class module at the parent side.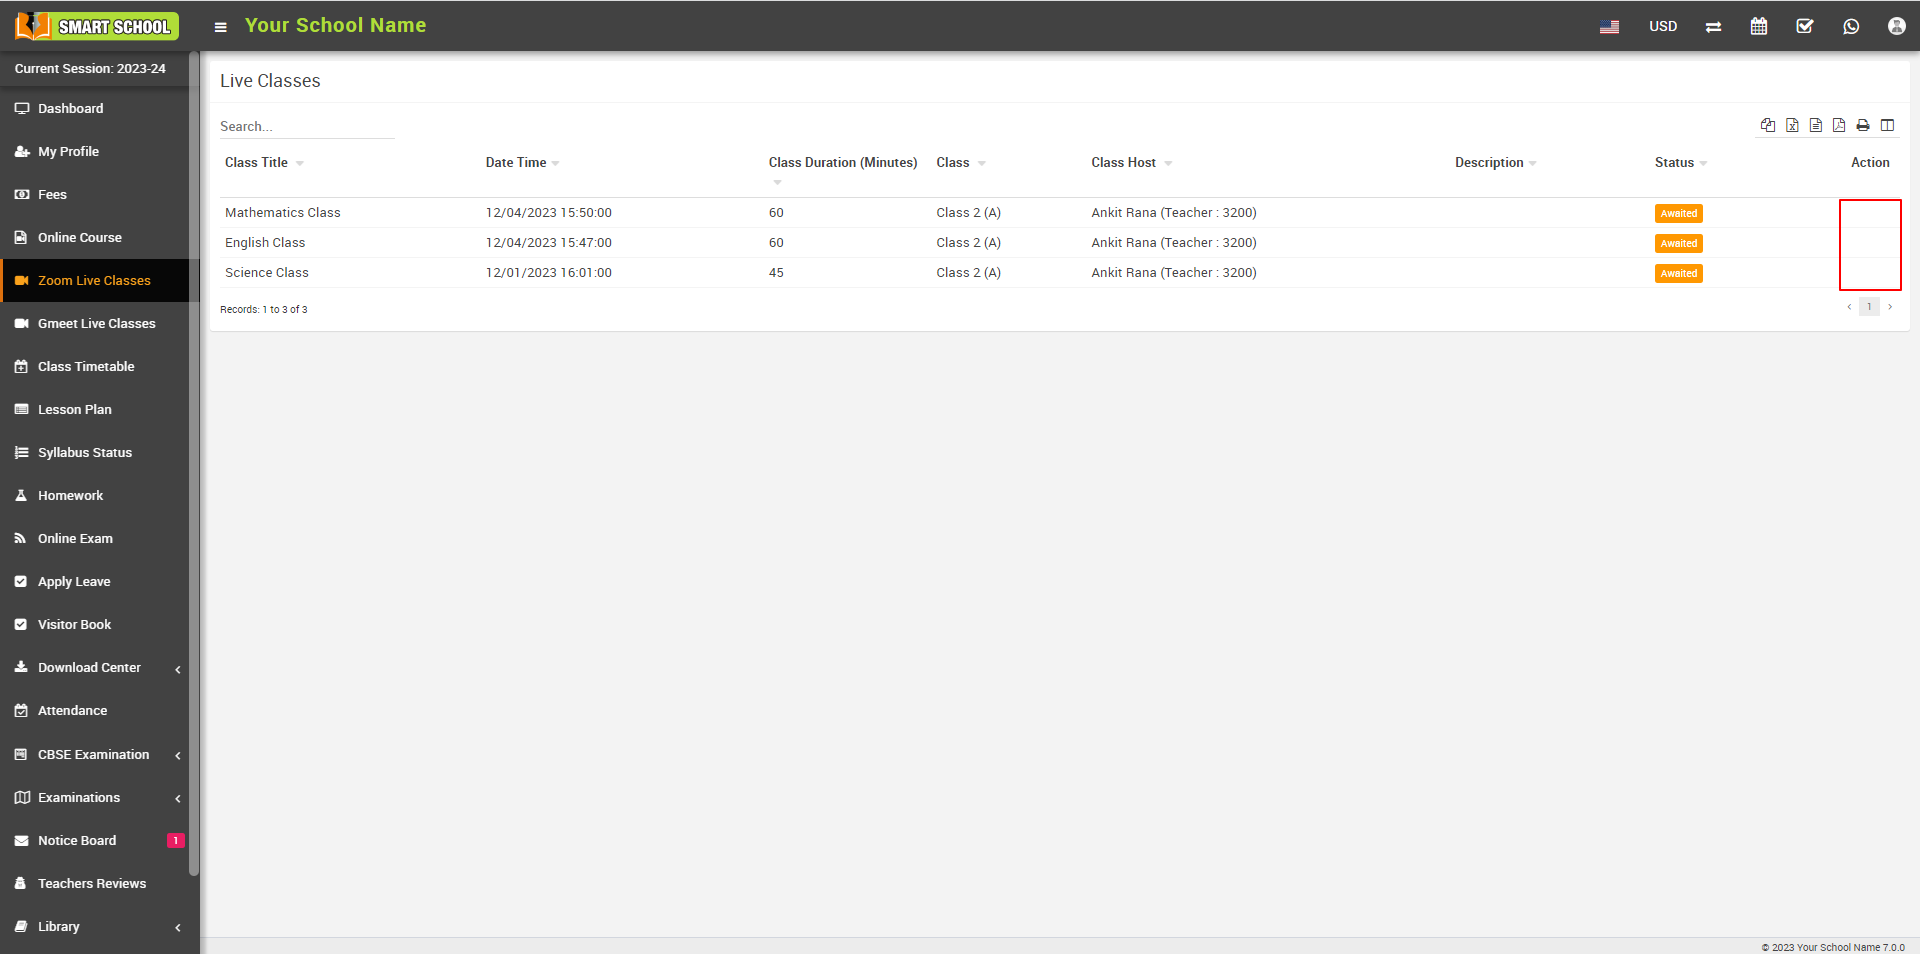
Conversely, when the superadmin enables the live class option, parents will be able to join the live class 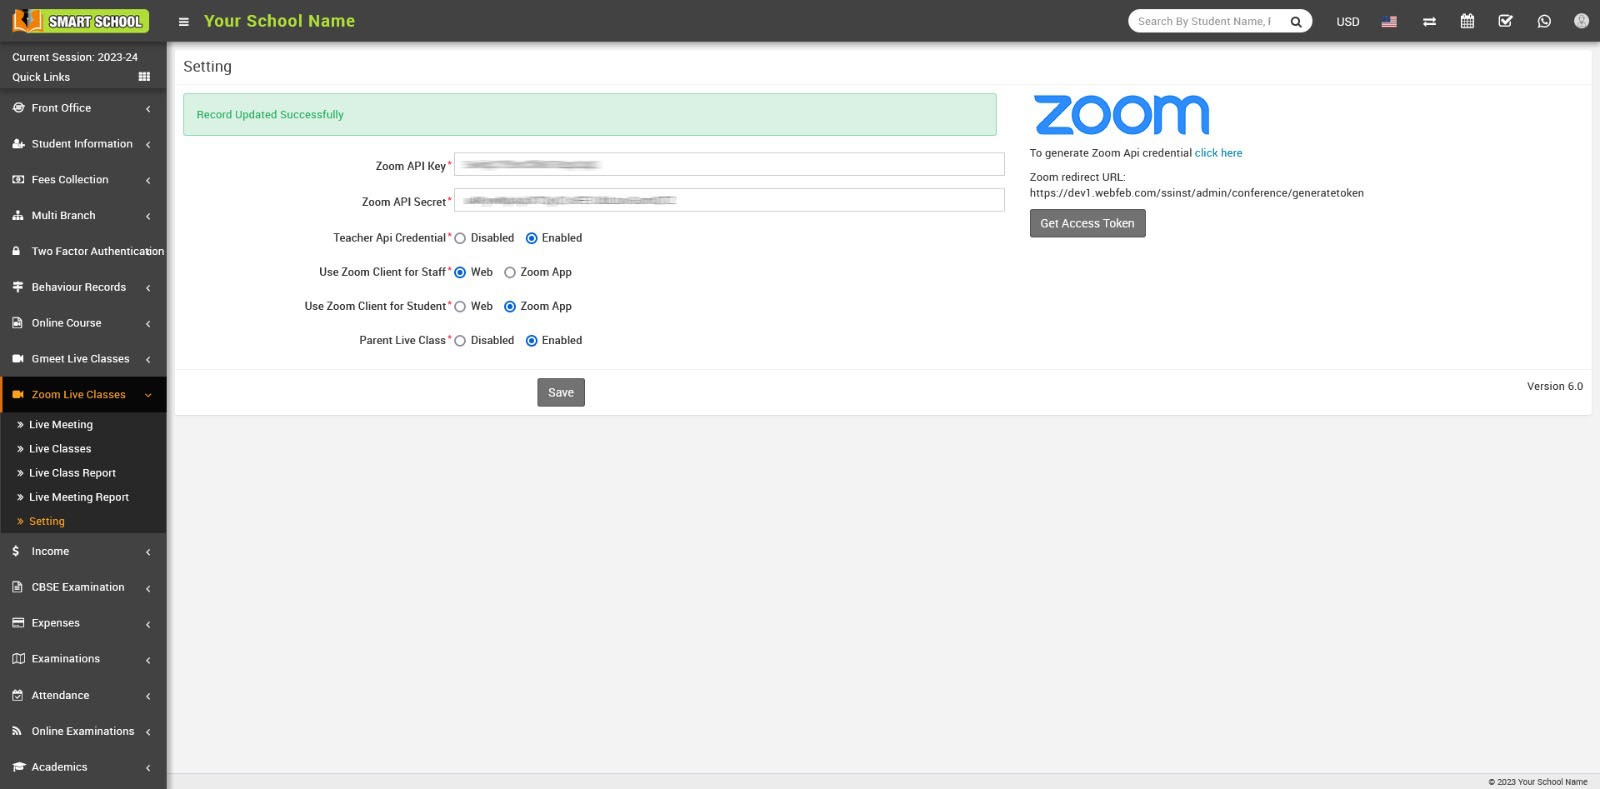
and the Join button will be shown in the Zoom Live Class module at parent side.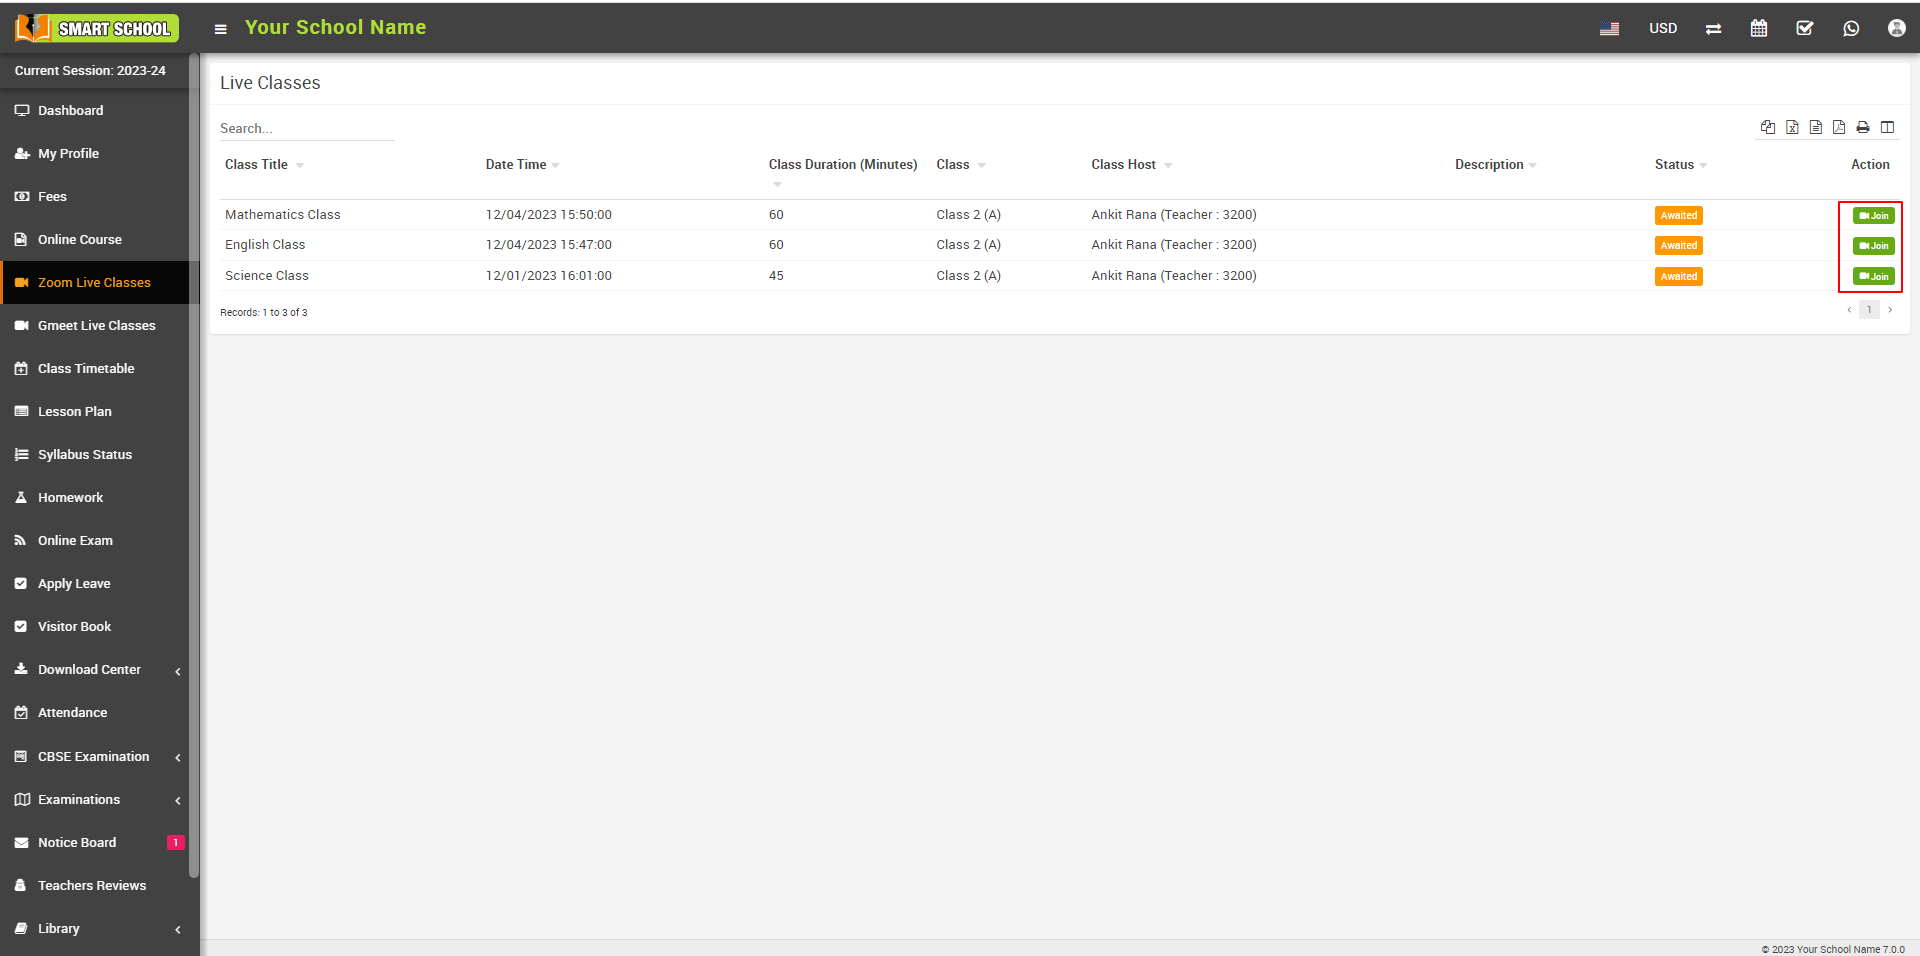
How to create zoom live classes?
Zoom Live Class is designed for teachers and students, allowing teachers to create live classes for instructing students in real-time. Additionally, Zoom Live Class can be utilized for Parent-Teacher Meetings. When adding a class title, simply include your title, such as 'PTM – Parent Teacher Meeting
In Superadmin/Admin login to create Live Class go to Zoom Live Classes > Live Classes, click on Add button present at Live Classes page on top right corner.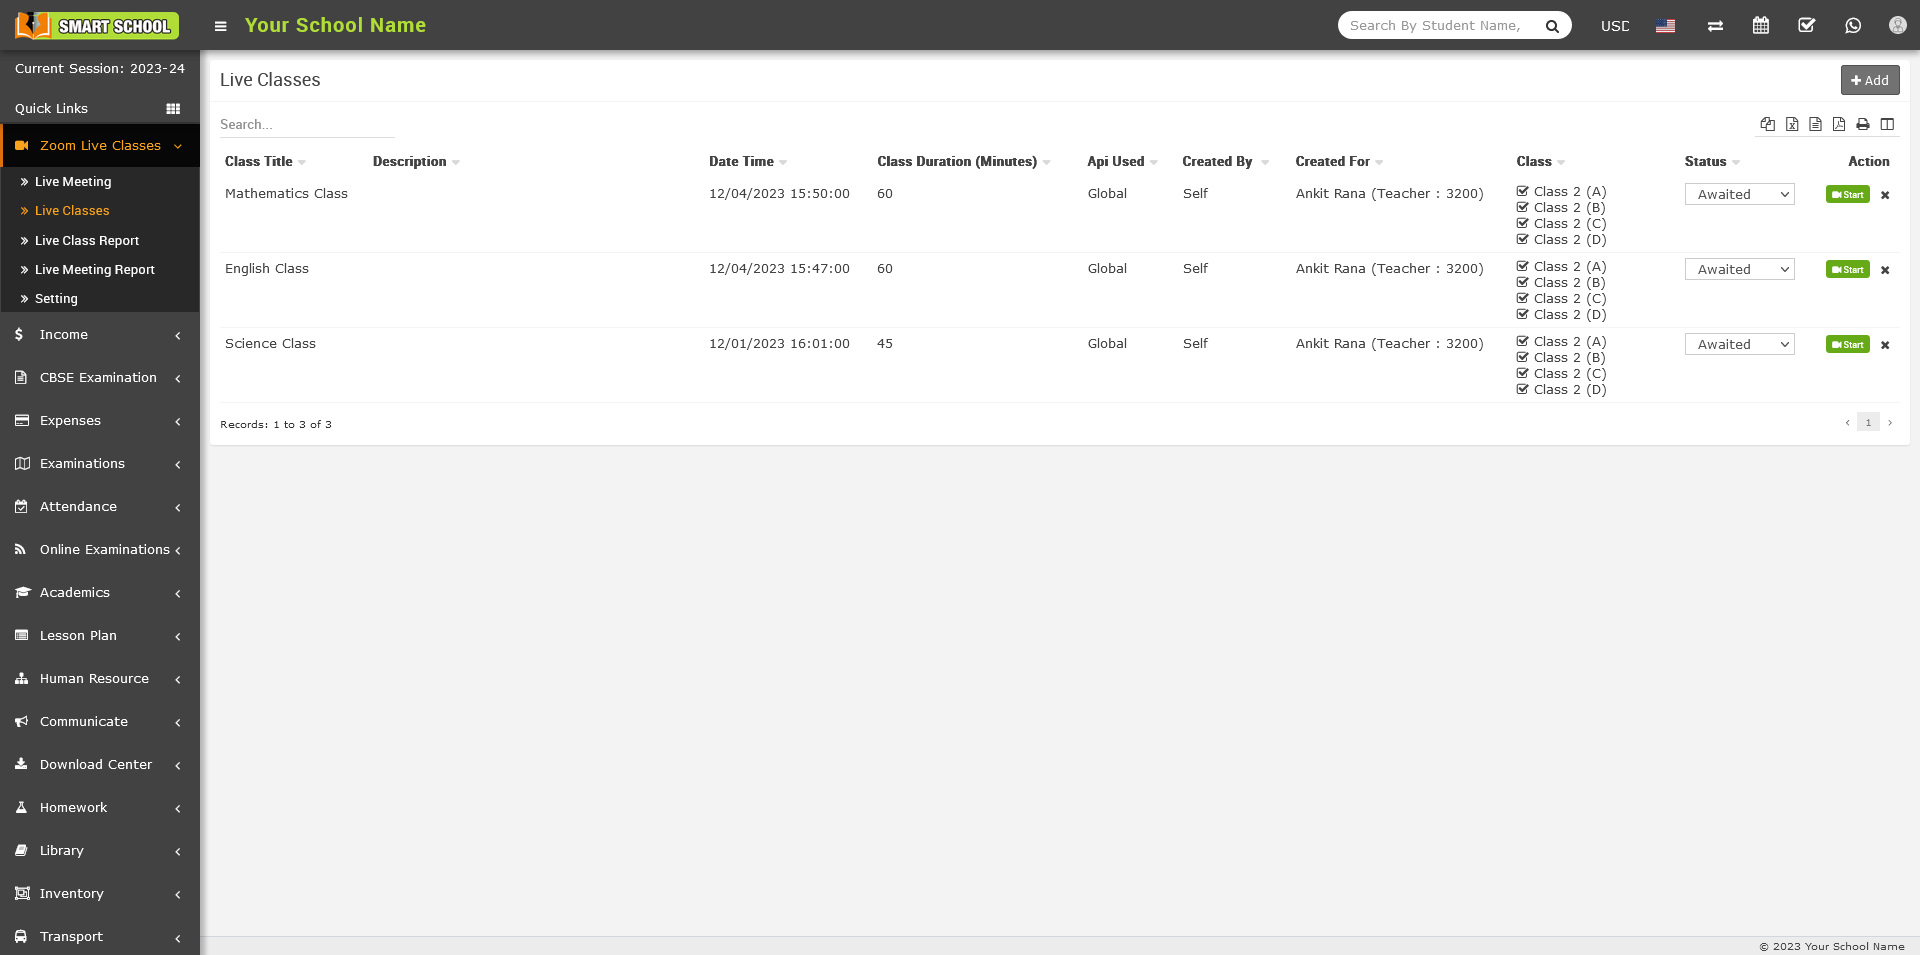
Here enter Class Title, Class Date, Class Duration (Minutes), Role, Staff (select teacher/staff who will take this class), Class, Section, Host Video, Client Video, Description details for live class then finally click on Save button.
Once you created Zoom Live Class you can see Live Class List according to date(decending) in the Live Classes page.
In Teacher login to create Live Class go to Zoom Live Classes > Live Classes, click on any period at timetable to open Add Live Class.
Here enter Class Title, Class Date, Class Duration (Minutes), Host Video, Client Video, Description details for live class then finally click on Save button.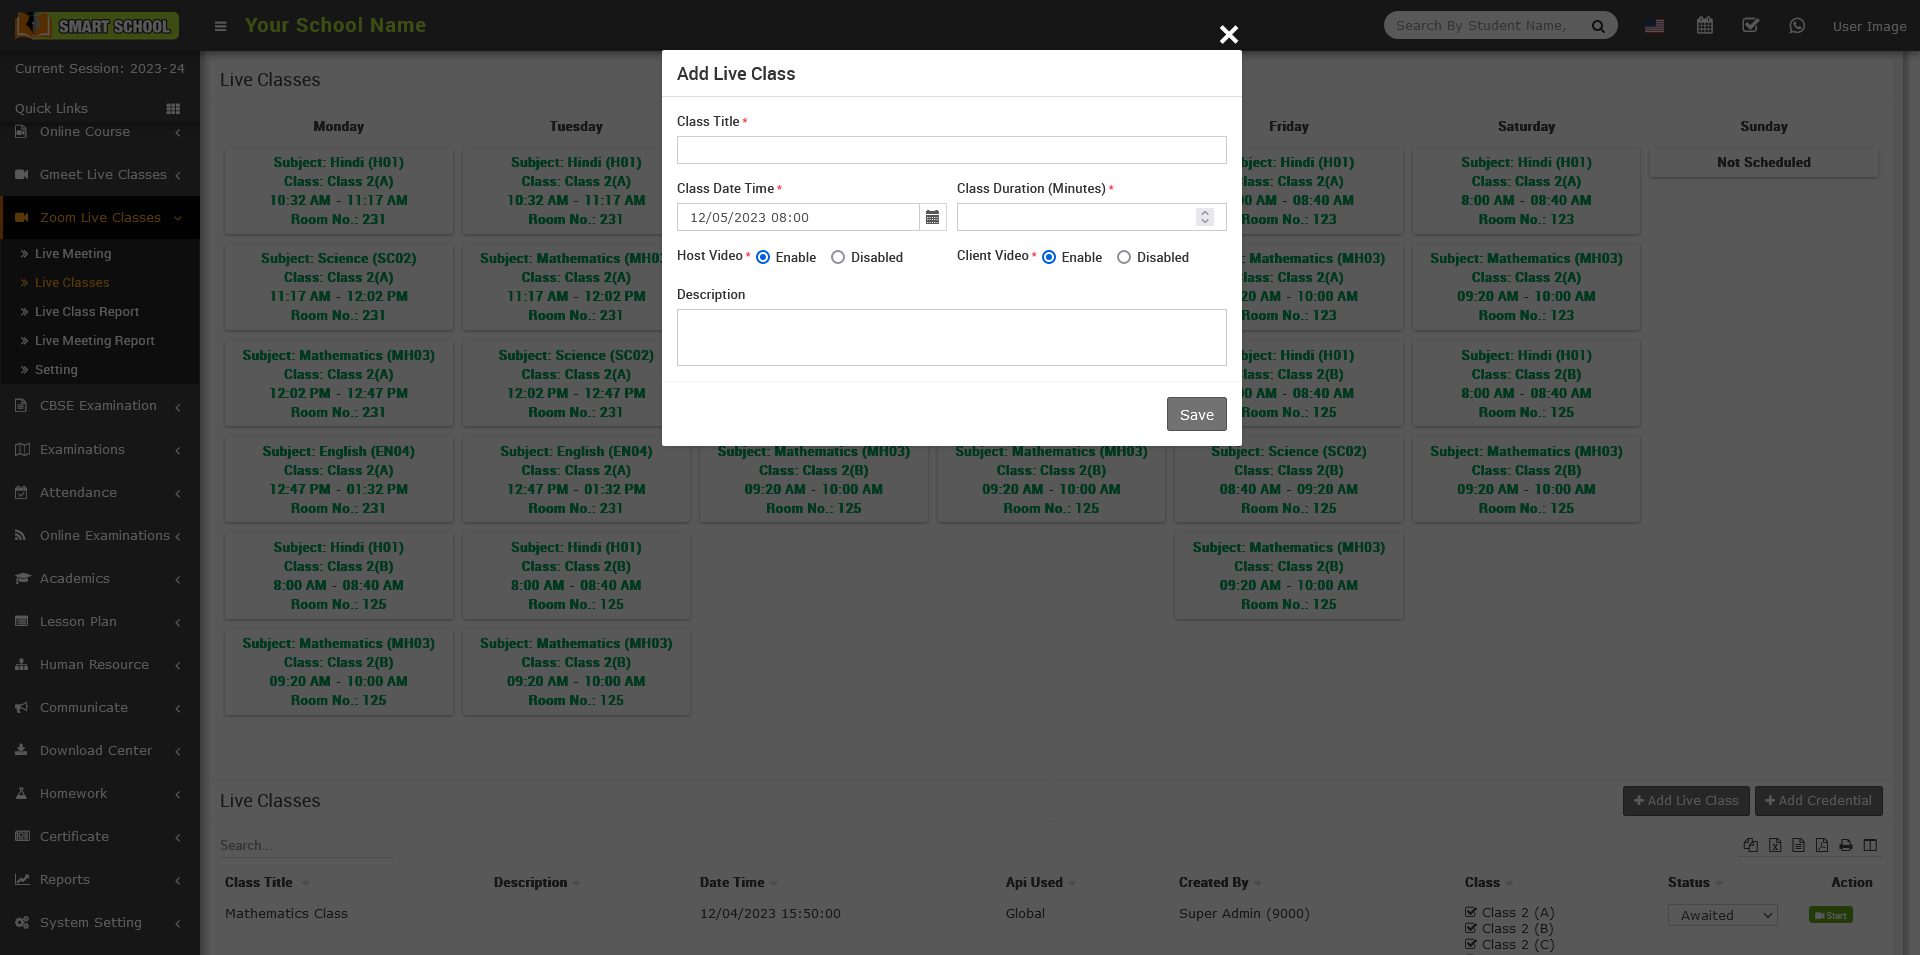
Or you can add it from Add button present on bottom area of this page.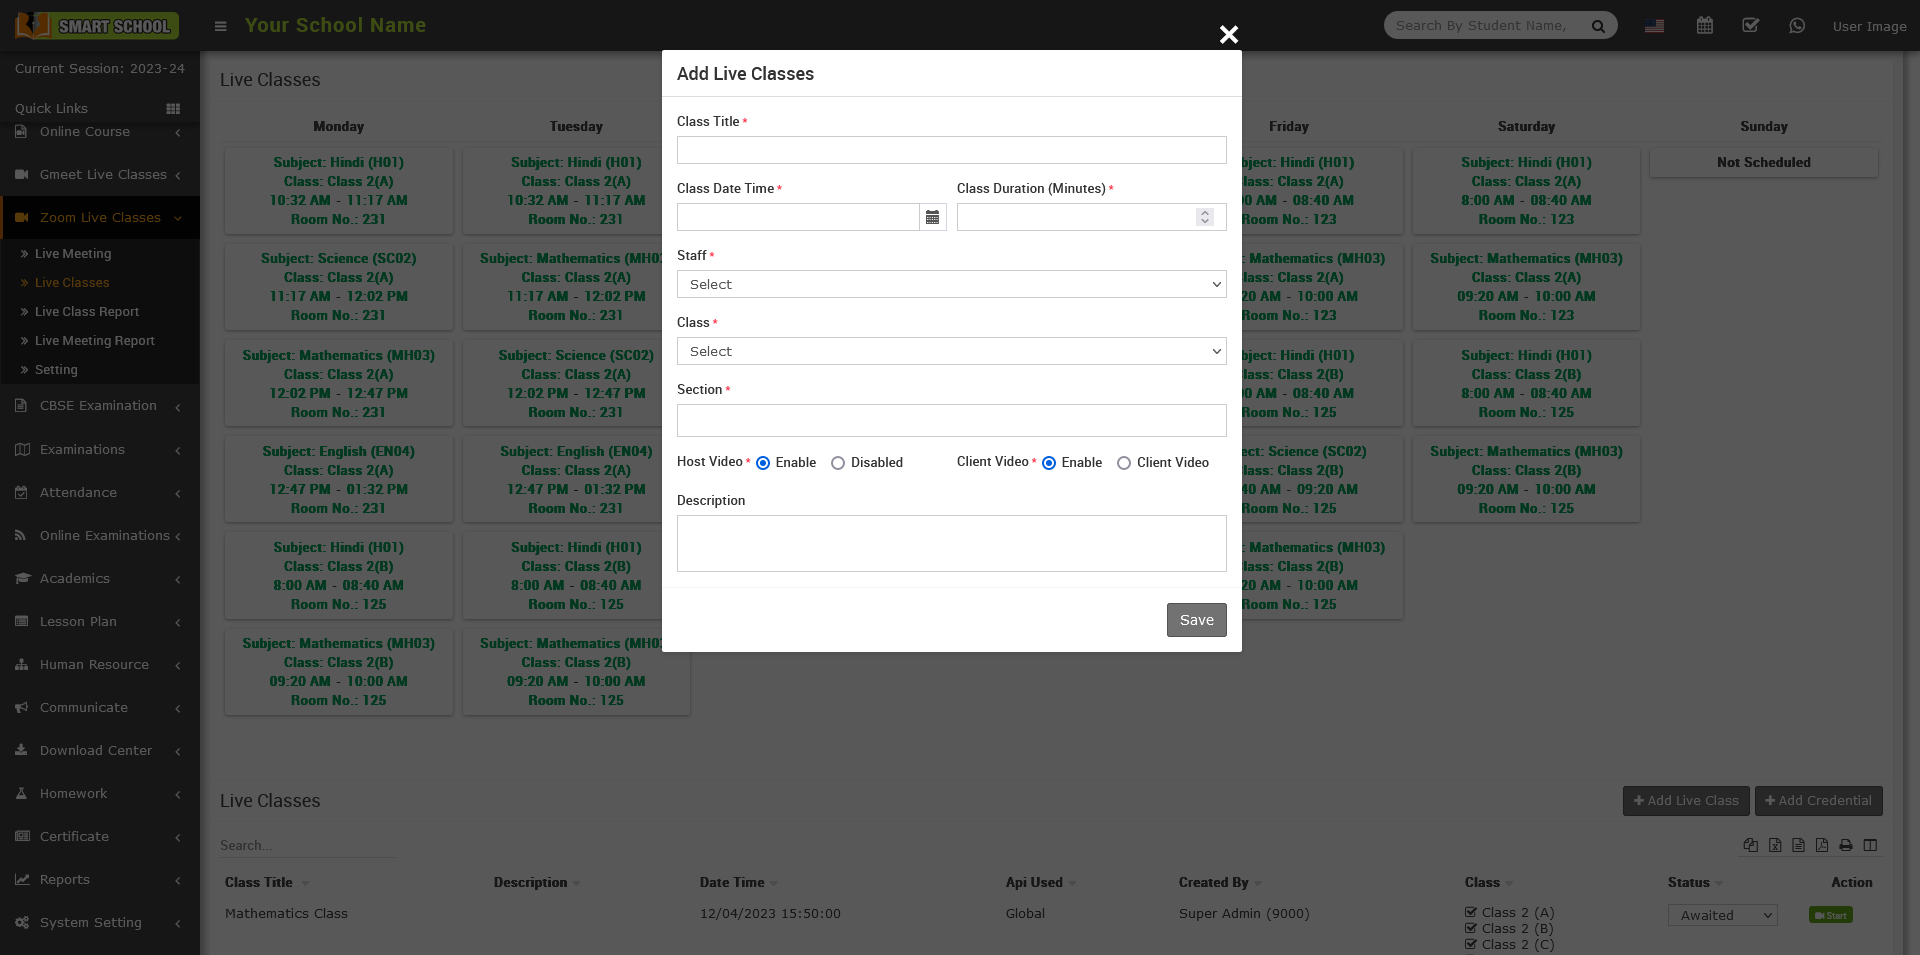
Teacher user can set their own zoom account api from Zoom Live Class > Live Classes > Add Credential, here enter Zoom API Key and Zoom API Secret details then click on Save button.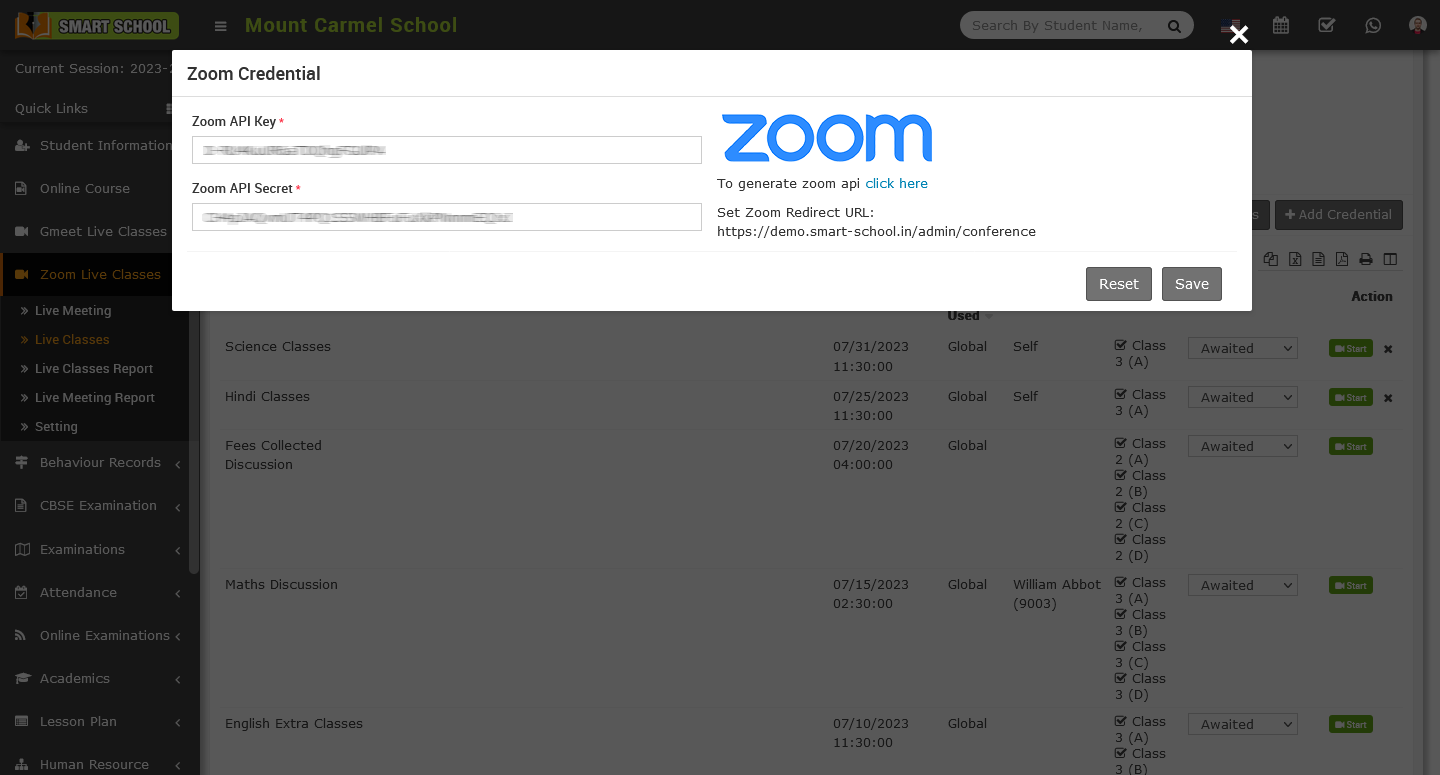
After creating Live Class teacher can Start Class or Delete their own created classes from Action column. Now click on Start Class button then control will redirect to Zoom App window.
How to join zoom live classes from student / parent side?
To join Live Class, login from your Student / Parent panel then from left sidebar menu click on Zoom Live Classes link. At Live Classes page you will see available Live Classes list here click on Join button. After click on Join button a modal opens with information Host , Date, Duration and Status. If Live Classes is not started then you will see status Waiting.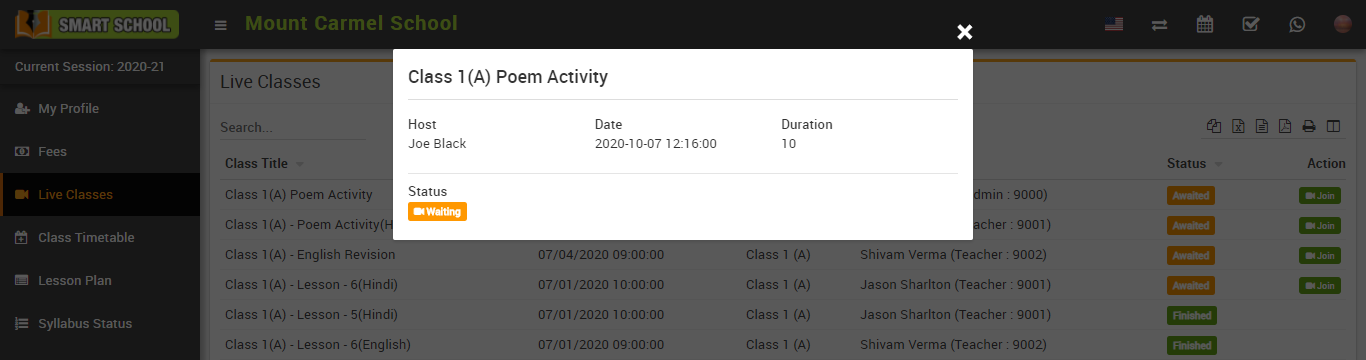
If live classes is started by teacher then you will see Join Now button in the bottom right corner of the modal. By clicking of Join Now button you will join the Zoom Live classes.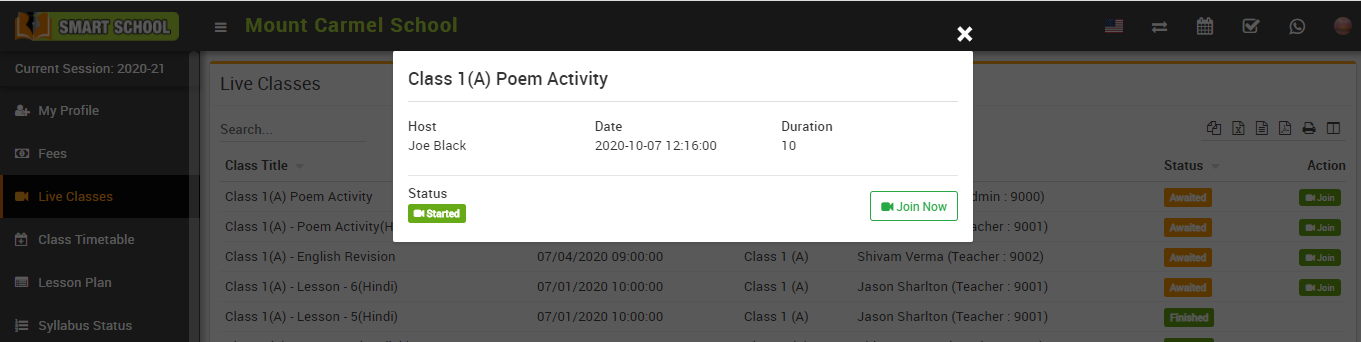
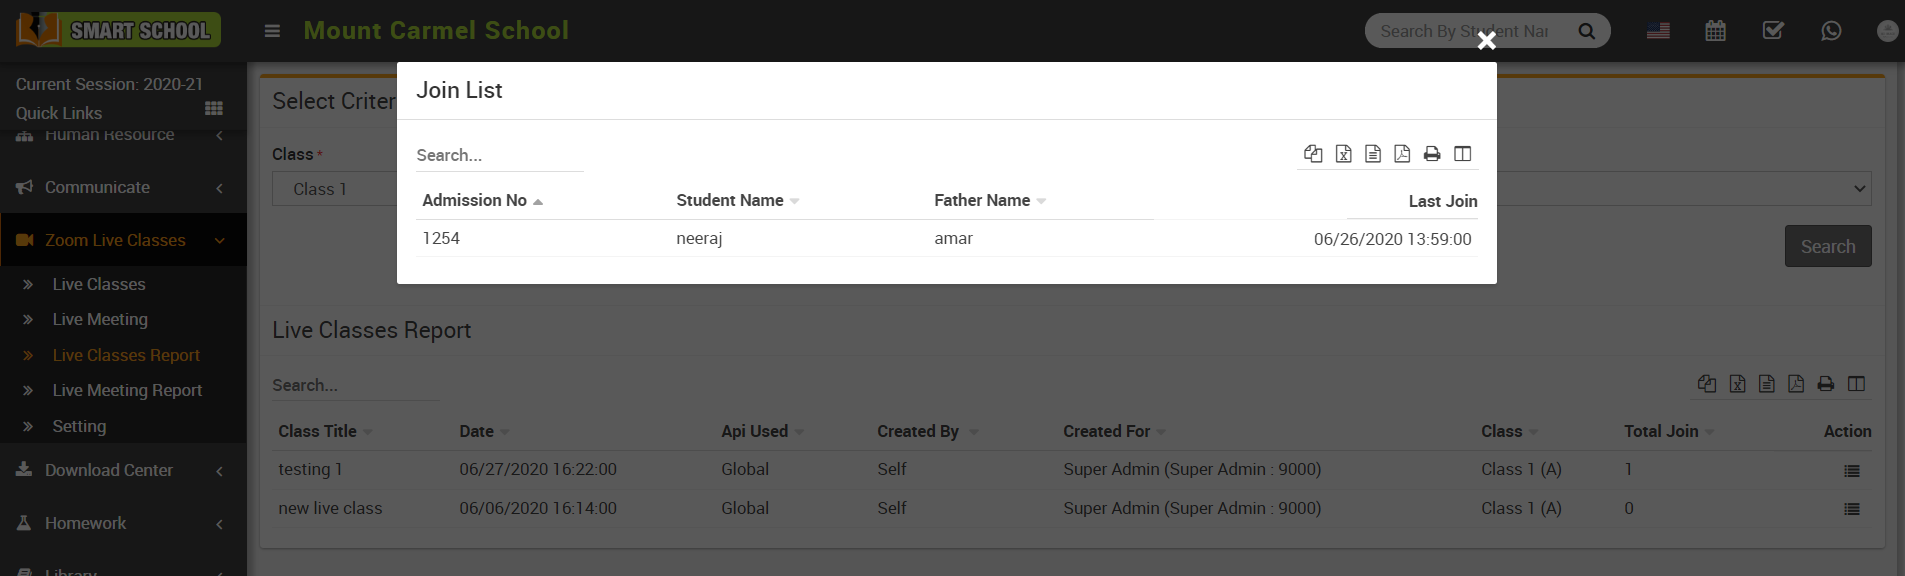
How to check zoom live classes report?
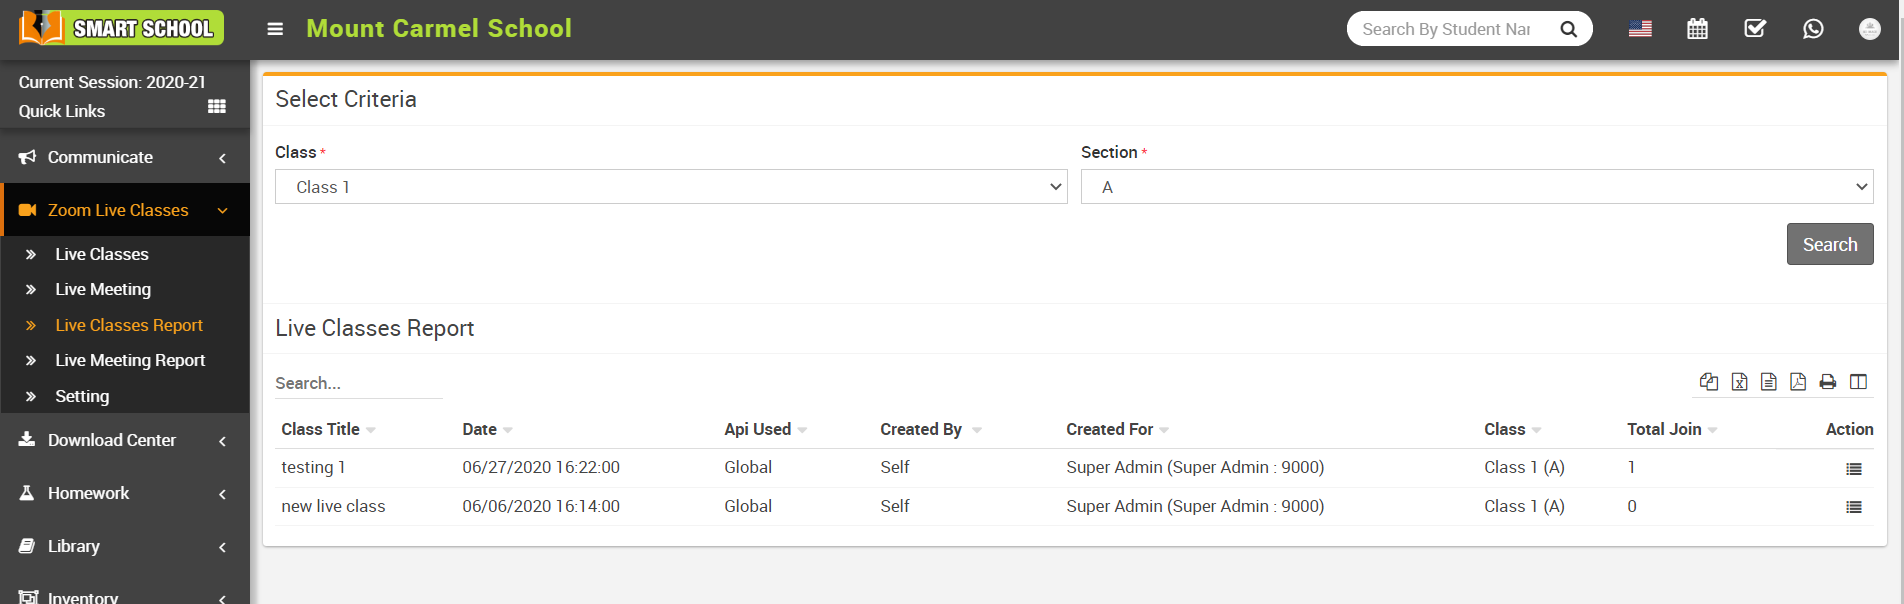
To check join list for a Live Classes click on View button from Action column.
How to create zoom live meeting?
To Zoom Live Meeting, Go to Zoom Live Classes > Live Meeting, live meeting page will be open on the right. Now click on Add button showing at Live Meeting page on top right corner.

Add live meeting modal will be open, Here enter Meeting Title, Meeting Date, Meeting Duration (Minutes), Host Video, Client Video, Description, Staff List details for live class then finally click on Save button. 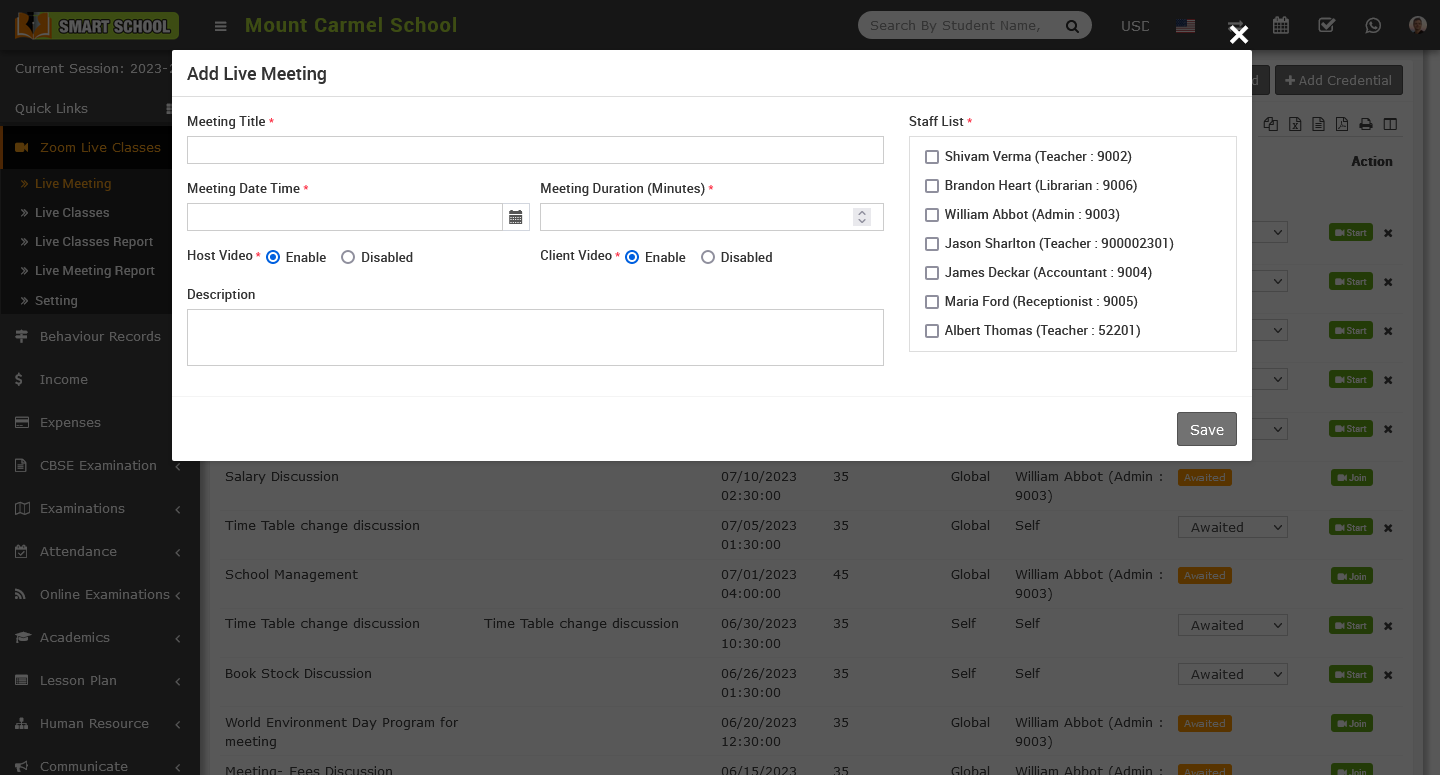
Once Live Meeting has been created then you can Start Meeting and other staff can Join meeting. Now click on Start Meeting button showing below of action column so that control will redirect to Zoom App window.

By default created Live Meeting status will be Awaited further you can set status of the Meeting as Finished or Cancelled. Start Meeting or Join button will only show when status of Live Meeting is as Awaited.
How to join zoom live meeting?
To join Live Meeting, login in to your account and go to Zoom Live Classes > Live Meeting, Here you will see available meetings to join. Now click on Join button. After clicking on Join button a modal opens with information like Host, Date, Duration and Status. If Meeting is not started you will see status "Meeting not started".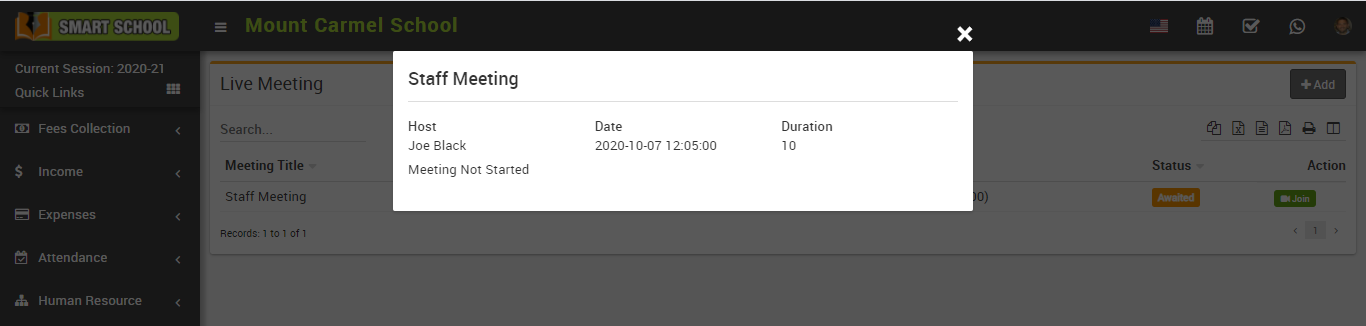
If Meeting is started by admin then you will see Join Now button in the bottom right corner and Status “Started” on the bottom left corner of the modal. On click of Join Now button you will join the Live meeting.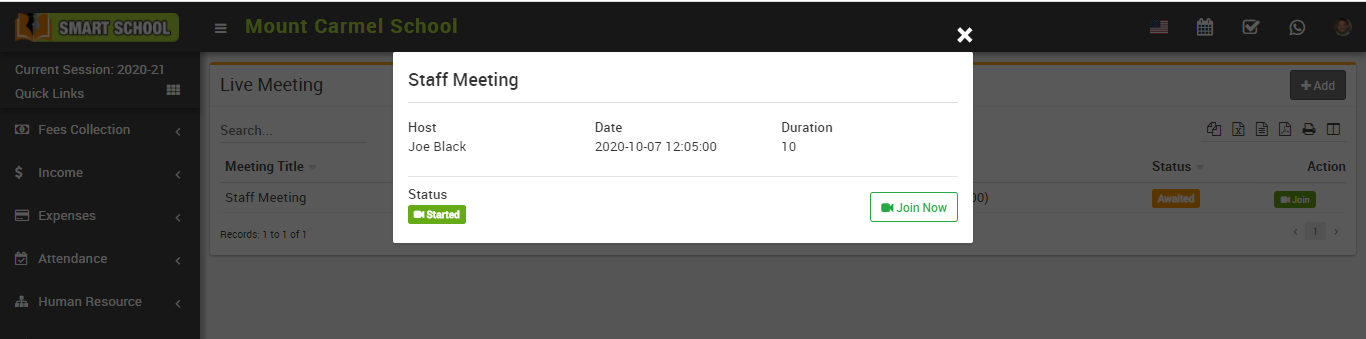
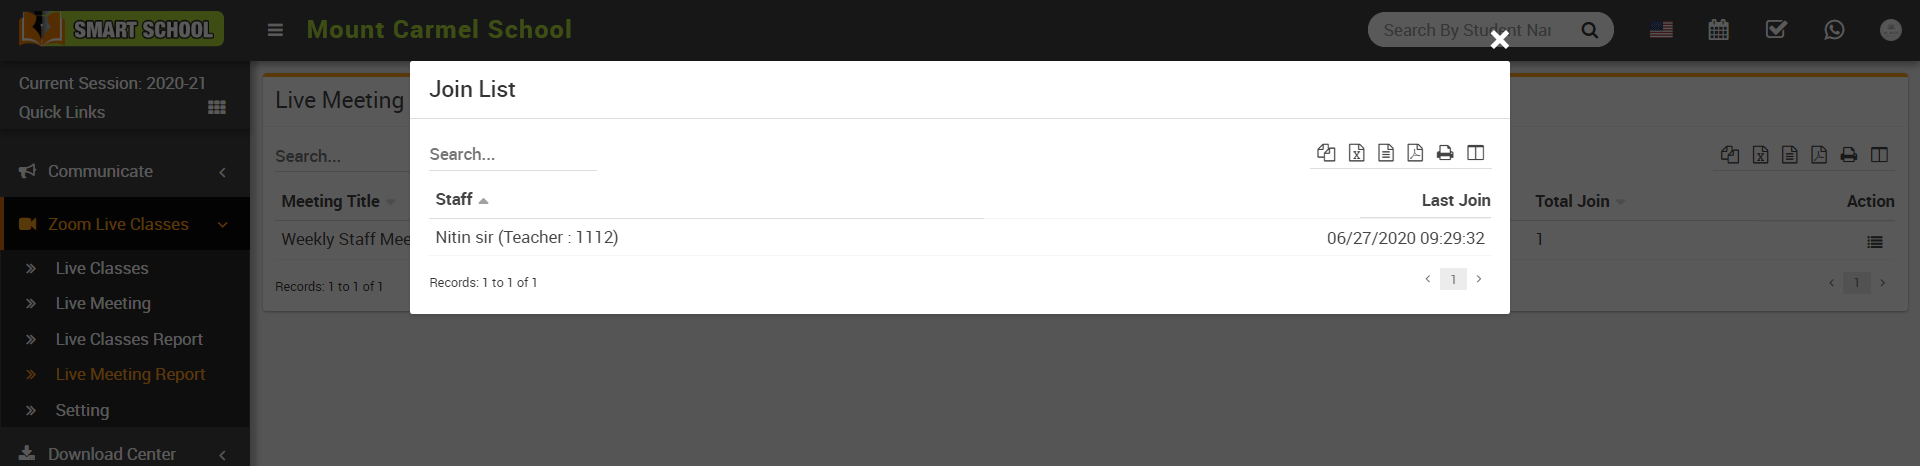
How to check zoom live meeting report?
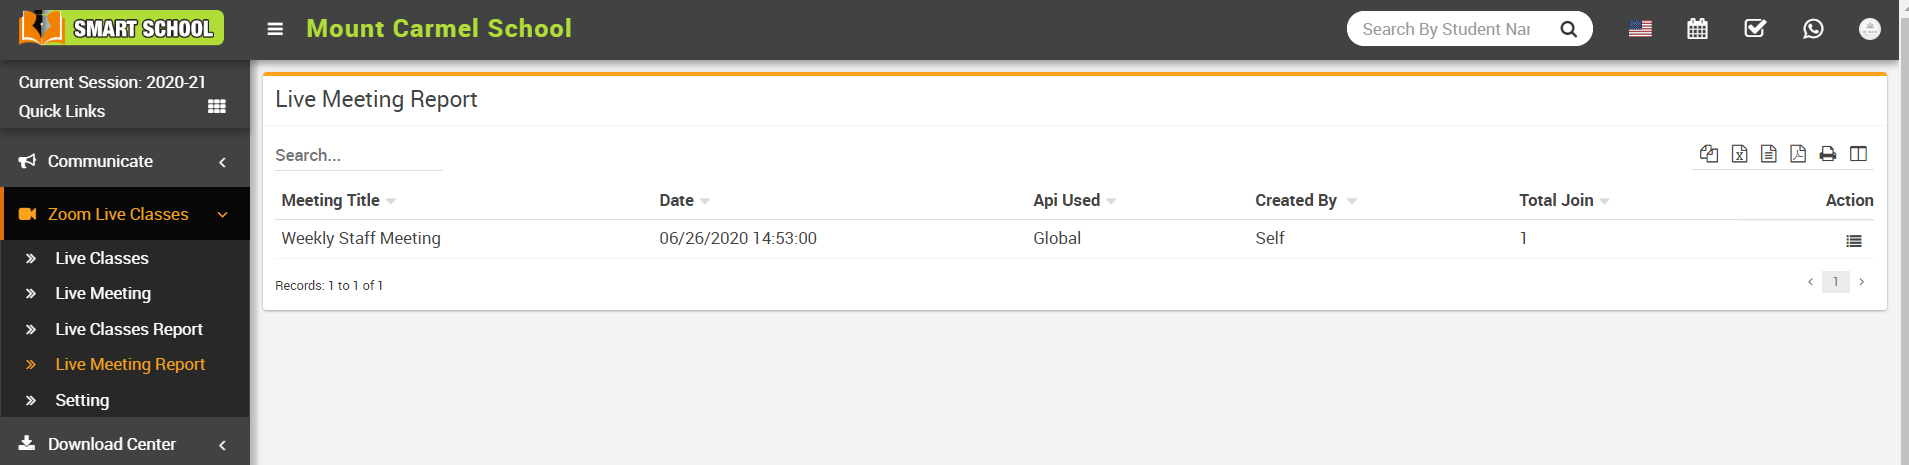
To check join list for a Live Meeting click on View button from Action Column
How to resolve "Invalid Access Token" issue?
How to conducted multiple zoom live classes simultaneously?
Note - In Smart School Zoom Live Class module only creates Classes and Meetings using zoom API and users can start or join these classes or meetings further all processing and management done by https://zoom.us. If you are using Zoom paid account (like 10 host license) then you should create each host user zoom API credential and add it to Smart School Zoom Live Class in Add Credential option present in teacher account. As Zoom doesn't provide simultaneously multiple Live Class start feature for single host even you are using zoom paid account so you should create multiple host account in zoom to run multiple simultaneous Live Classes started by each host.