About Human Resource
The main function of the human resource person is to make necessary staff arrangements, maintain staff attendance for the school.
Human Resource module workflow: First we will add Department, Designation, Leave Type then we will add staff member from Staff Directory, day by day Staff Attendance, and Payroll, Apply Leave, Approve Leave Request, Teacher Rating, Disabled Staff. If you want to add additional fields in staff form then you can use Custom Fields feature for this go to System Settings > Custom Fields and add your desired fields in Staff. If you also don't want any default fields in staff then you can disable it from System Settings > System Fields and disable staff system fields. You can also check staff attendance and payroll report and student can also give rating for teachers.

How to add Department?
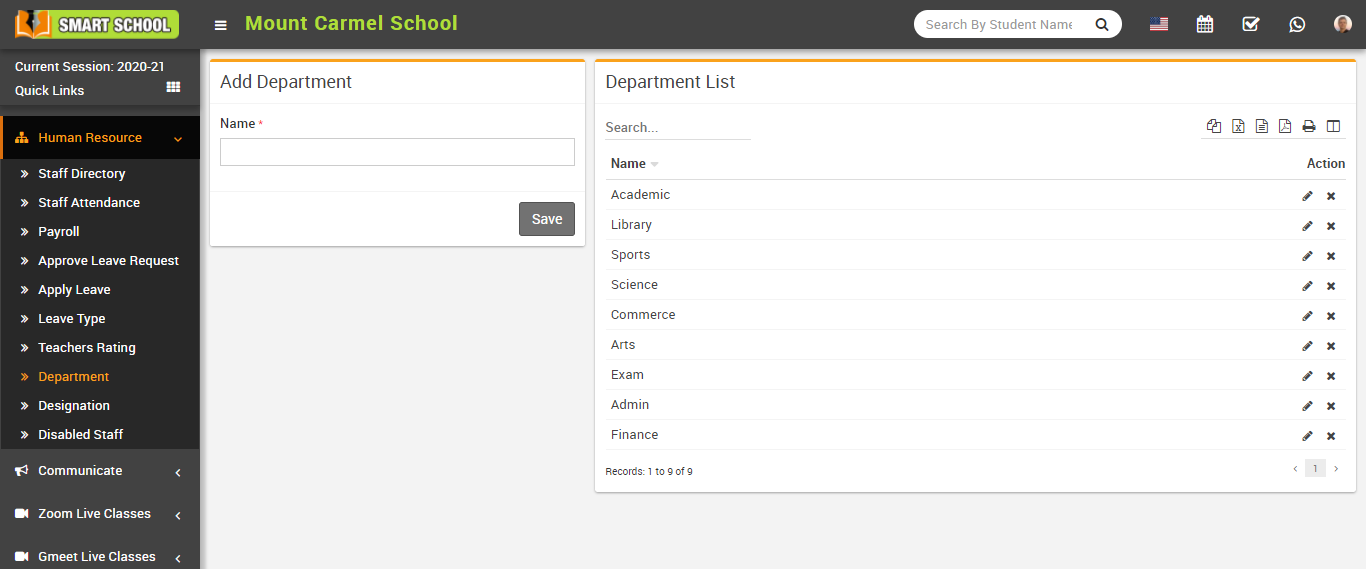
To edit department click on Edit icon and to delete department click on Delete icon present in the Department list.
How to add Designation?

To edit designation click on Edit icon and to delete designation click on Delete icon present in the Designation list.
How to add Leave Type?
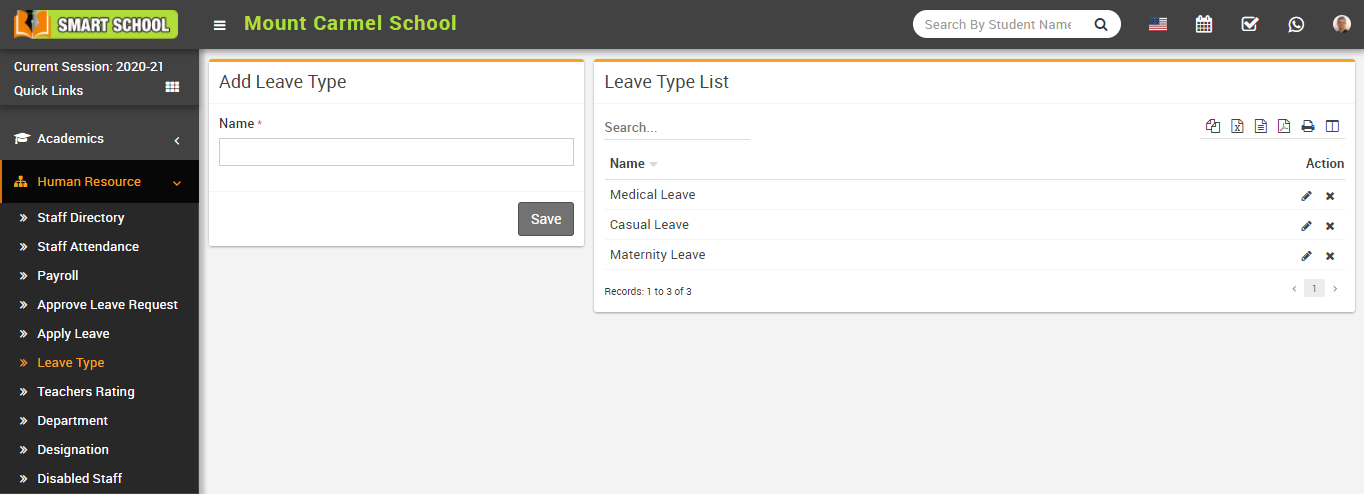
To edit leave type click on Edit icon and to delete leave type click on Delete icon present in the Leave Type List.
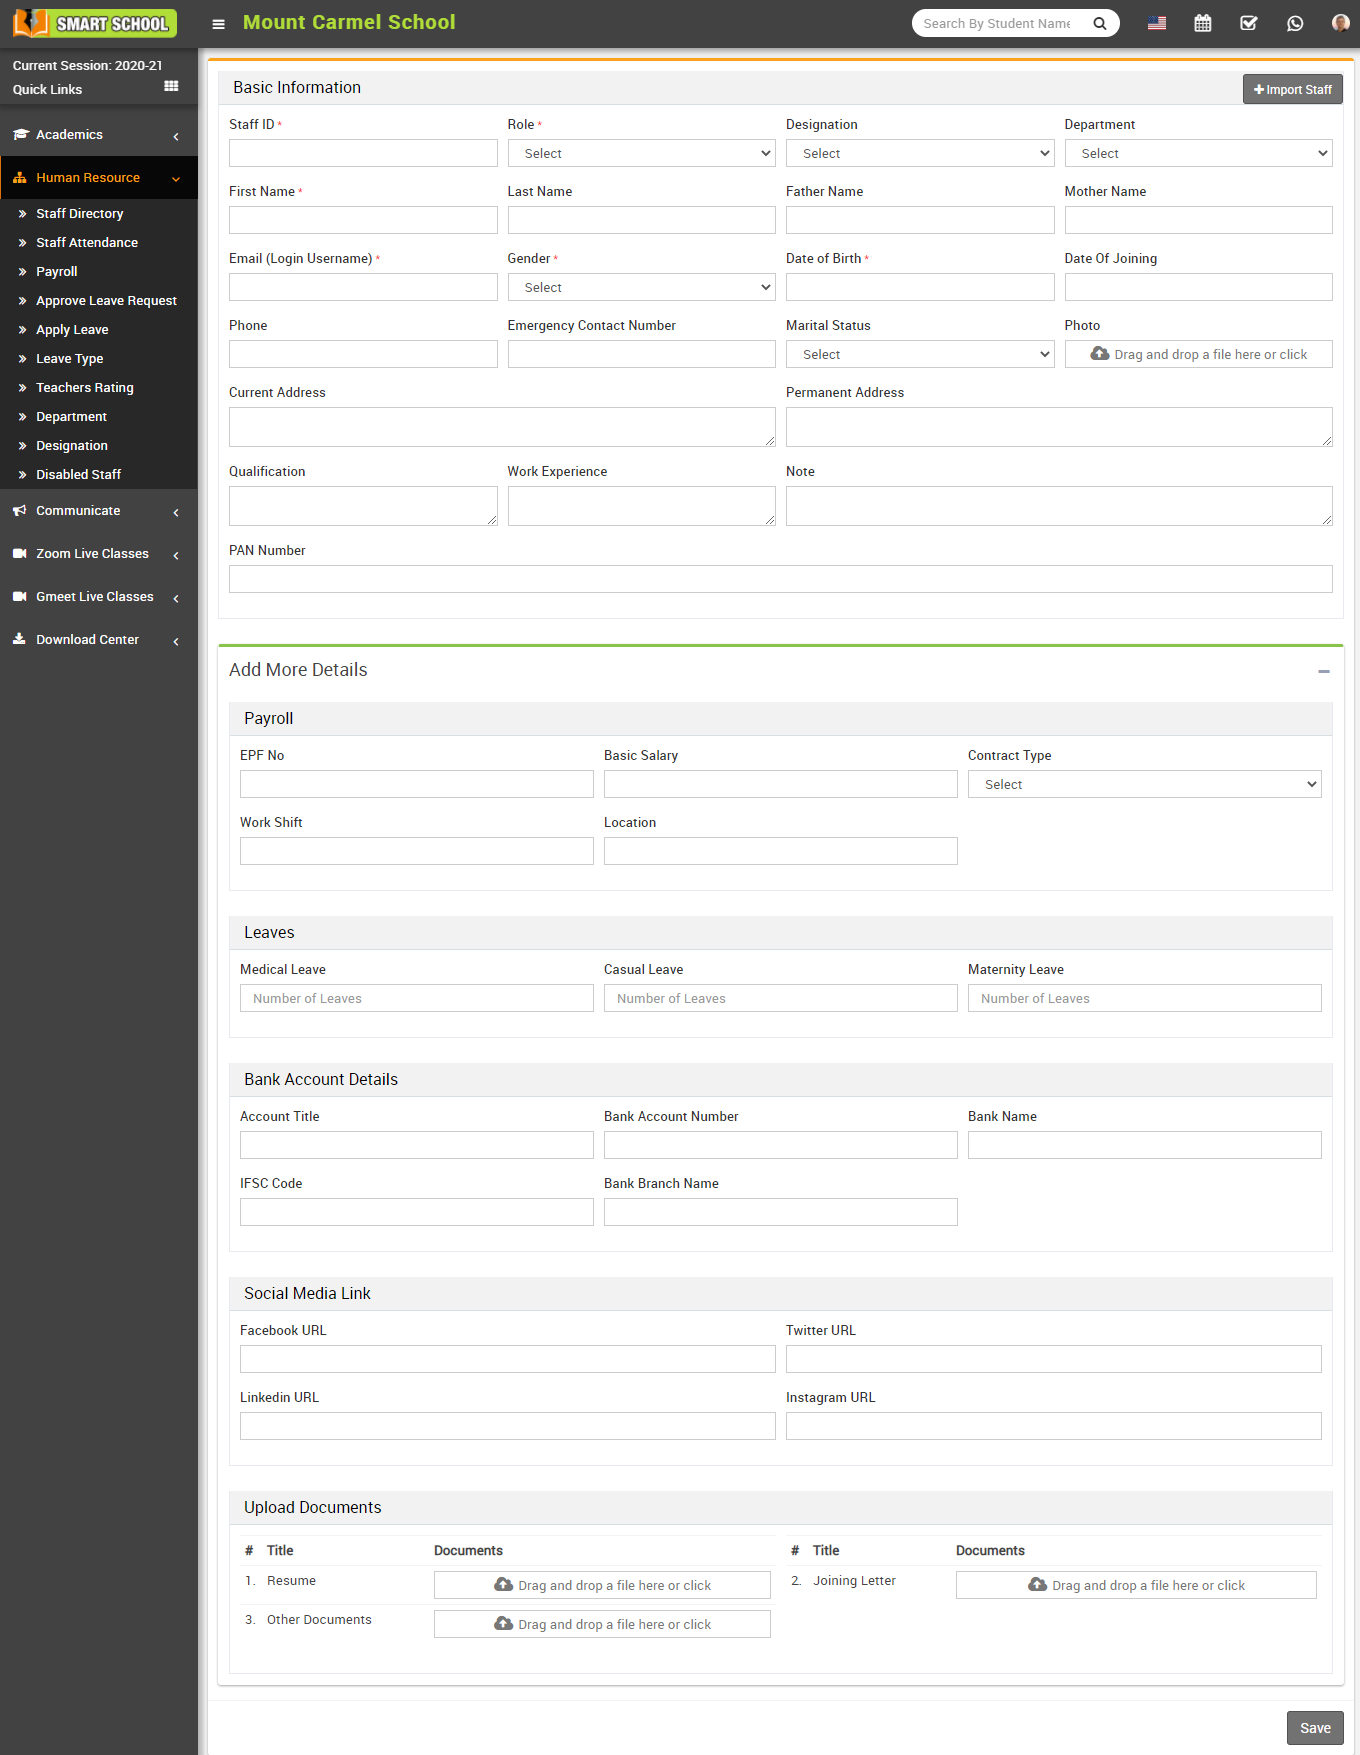
How to add Staff Directory?
Fill all entries here Staff ID, Role, Designation, Department, First Name, Last Name, Father Name, Mother Name, Email (Login Username), Gender, Date of Birth, Date of Joining, Phone, Emergency Contact Number, Marital Status, Photo, Current Address, Permanent Address, Qualification, Work Experience, Note, PAN Number.
If you want to add more details of the Staff, then click on + icon. Here you fill all the details Payroll – EPF No (Employee provident Fund Number), Basic Salary, Contract Type, Work Shift, Location, Leaves – Medical Leave, Casual Leave, Maternity Leave, Bank Account Details – Account Title, Bank Account Number, Bank Name, IFSC Code, Bank Branch Number, Social Media Link – Facebook URL, Twitter URL, Linkedin URL, Instagram URL, Upload Documents – Resume, Joining Letter and Other Documents and then click on Save button. You can view this added record of staff in the staff list page.
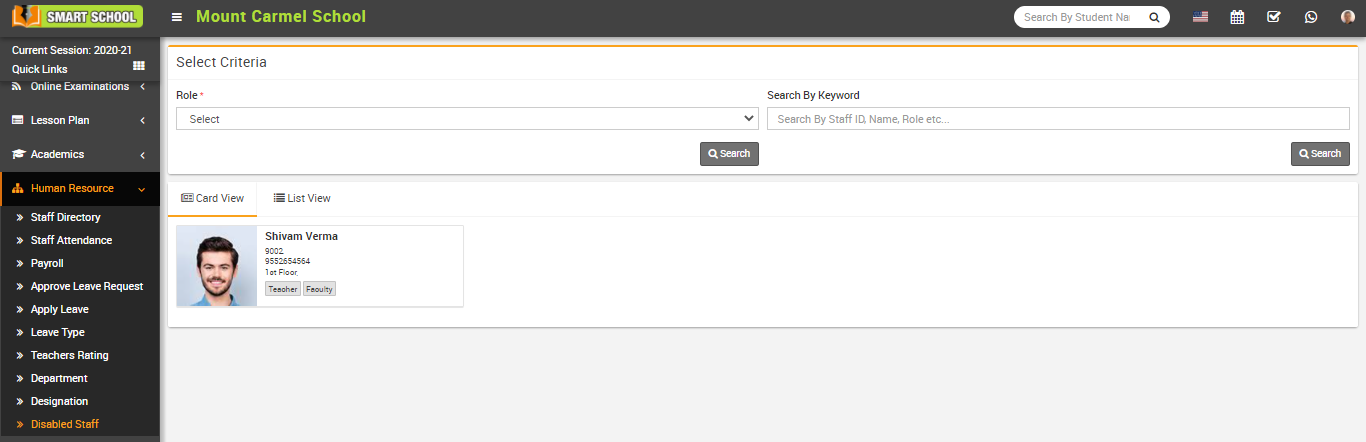
Here select Role and then click on Search button, the list of staff will be shown in the below of the page. You can see staff list in card view and list view by clicking Card View and List View tab.
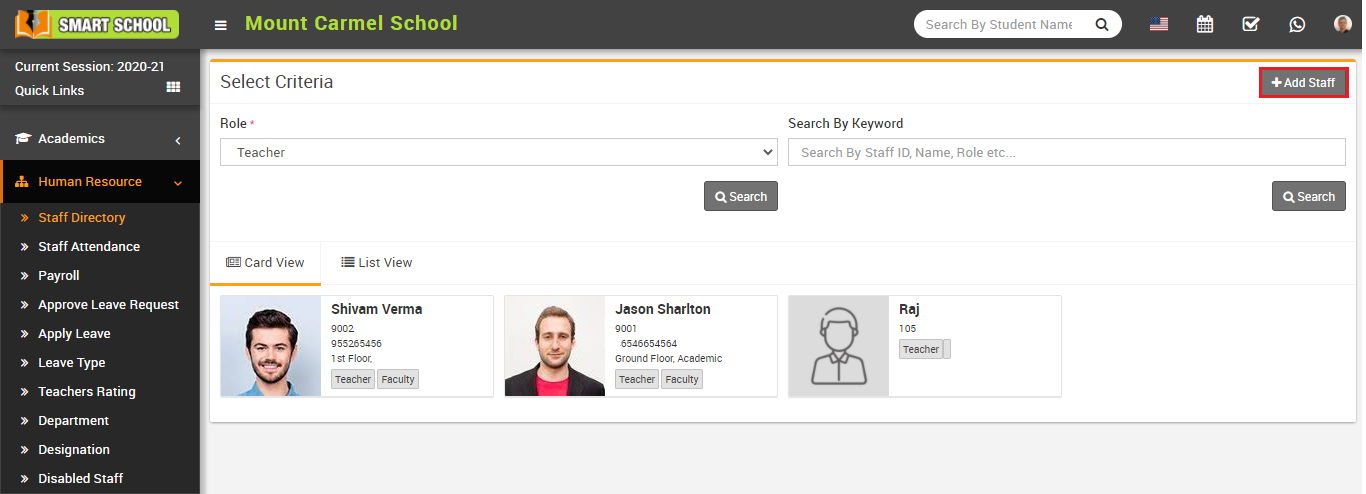
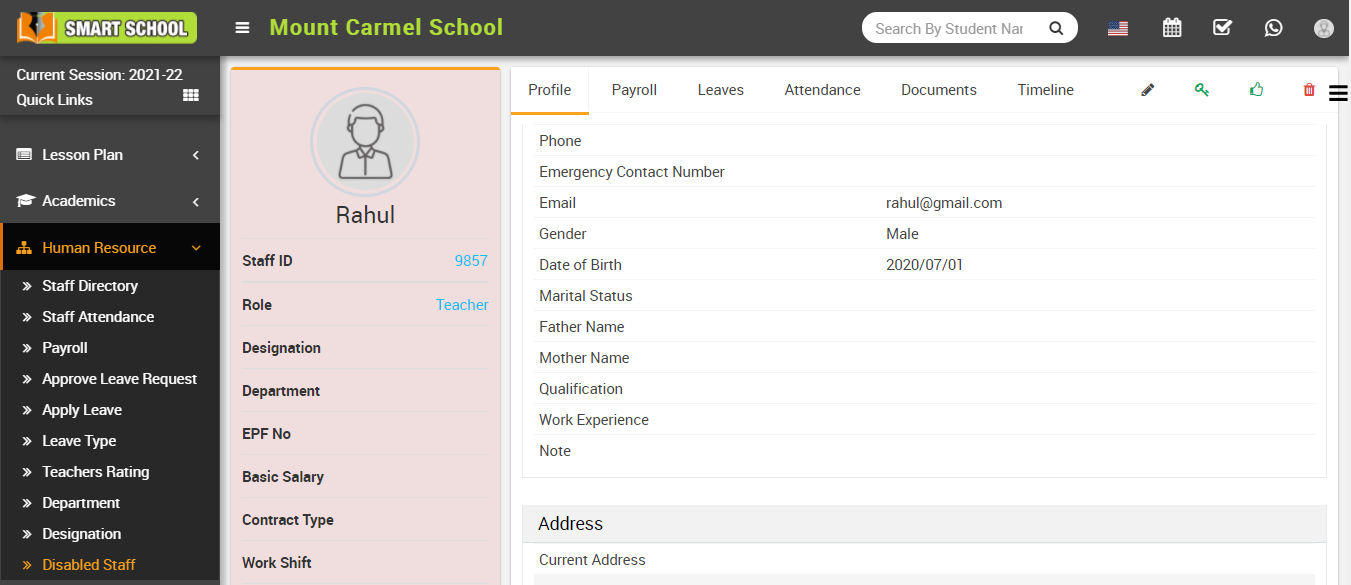
To view staff details click on Show icon present in staff card. Here you can view basic details of staff Like Profile, Payroll, Leaves, Attendance, Documents and Timeline.

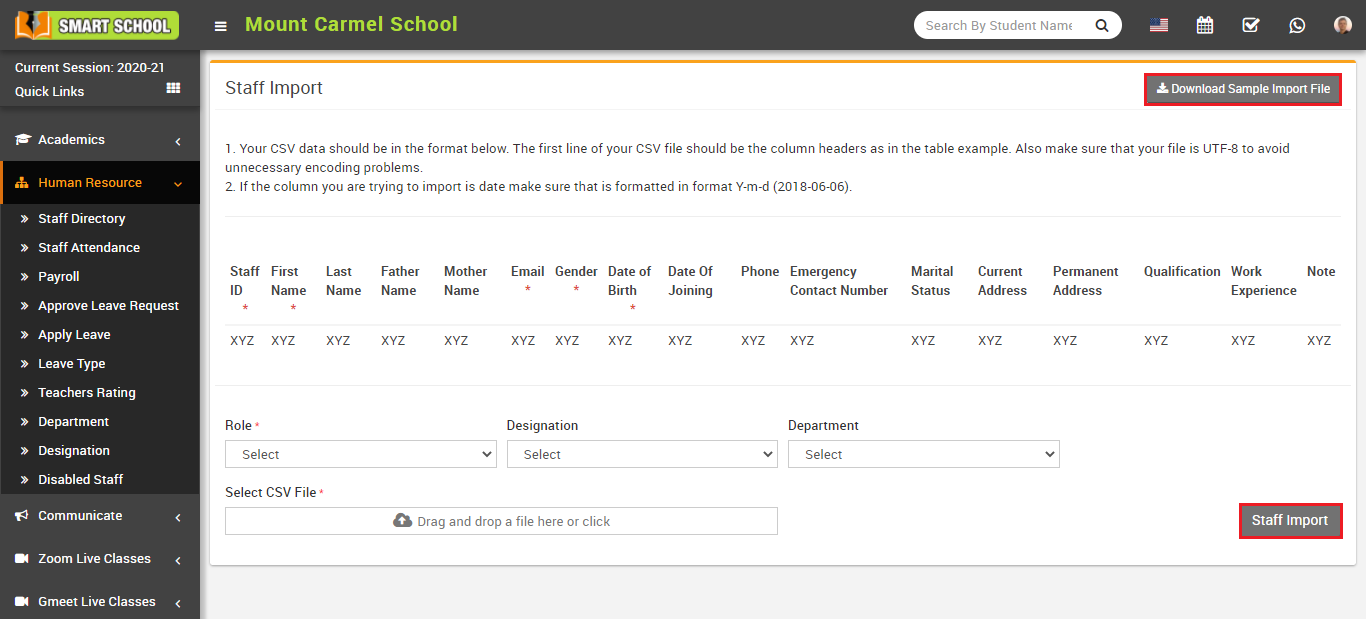
How to Import Staff?
You have to follow all the necessary instructions given. Here you can also add multiple staff at the same time for this, you have to create a CSV file format. You can also download the sample file from top right corner by clicking on Download Sample Import File button.
You shouldn’t delete the first row of CSV file. It is necessary to fill the required field in this file. After completing the file, here select Role, Designation and Department and then you have to select this CSV file on Select CSV File option and then click on Staff Import button.
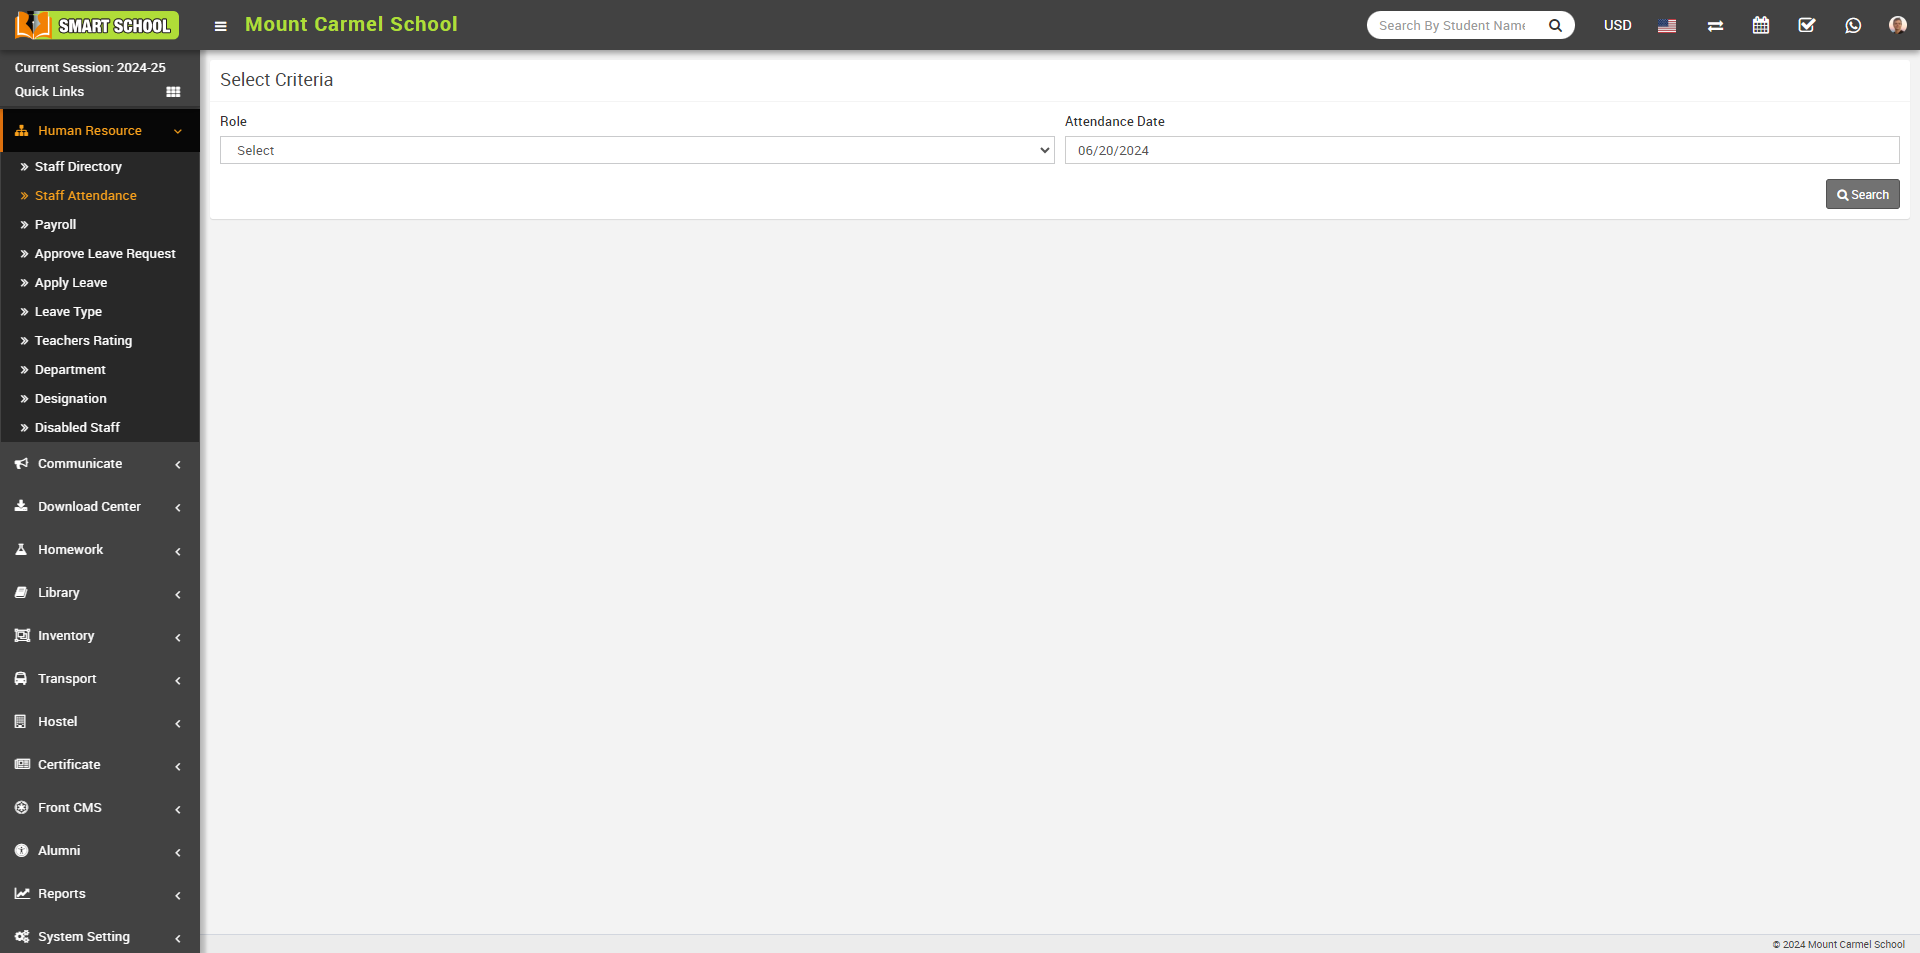
How to mark Staff Attendance?
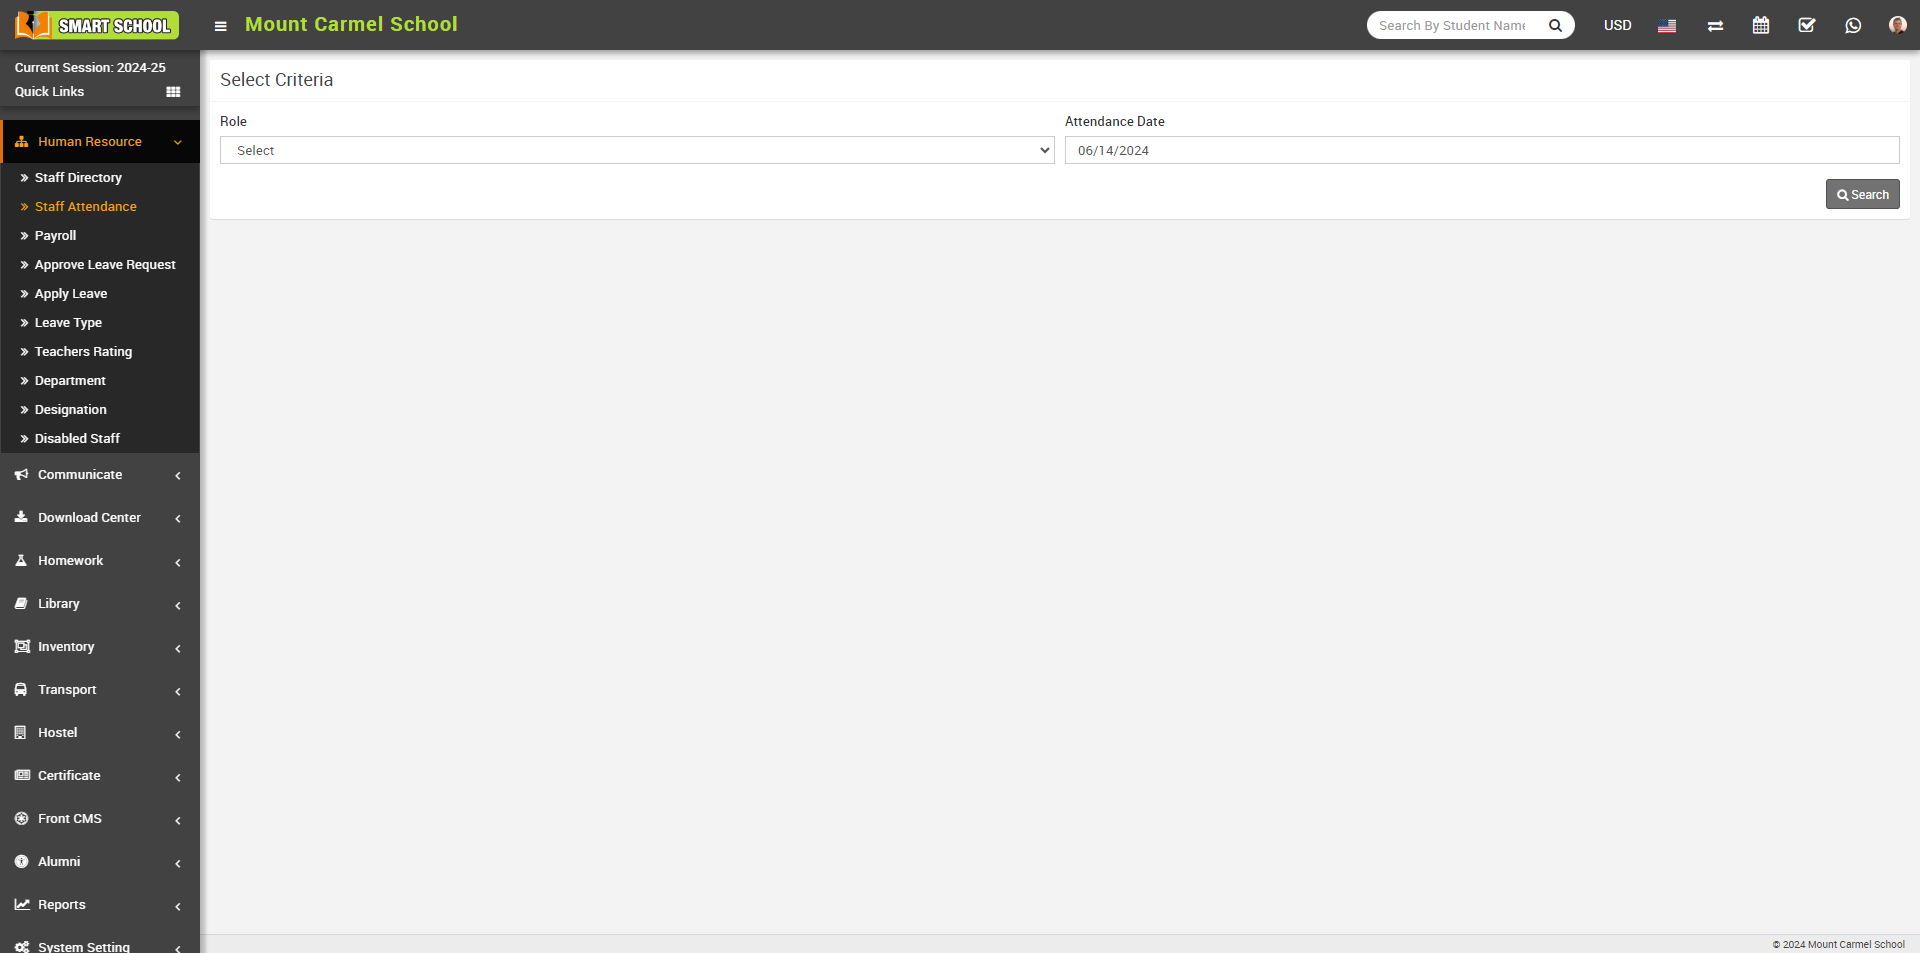
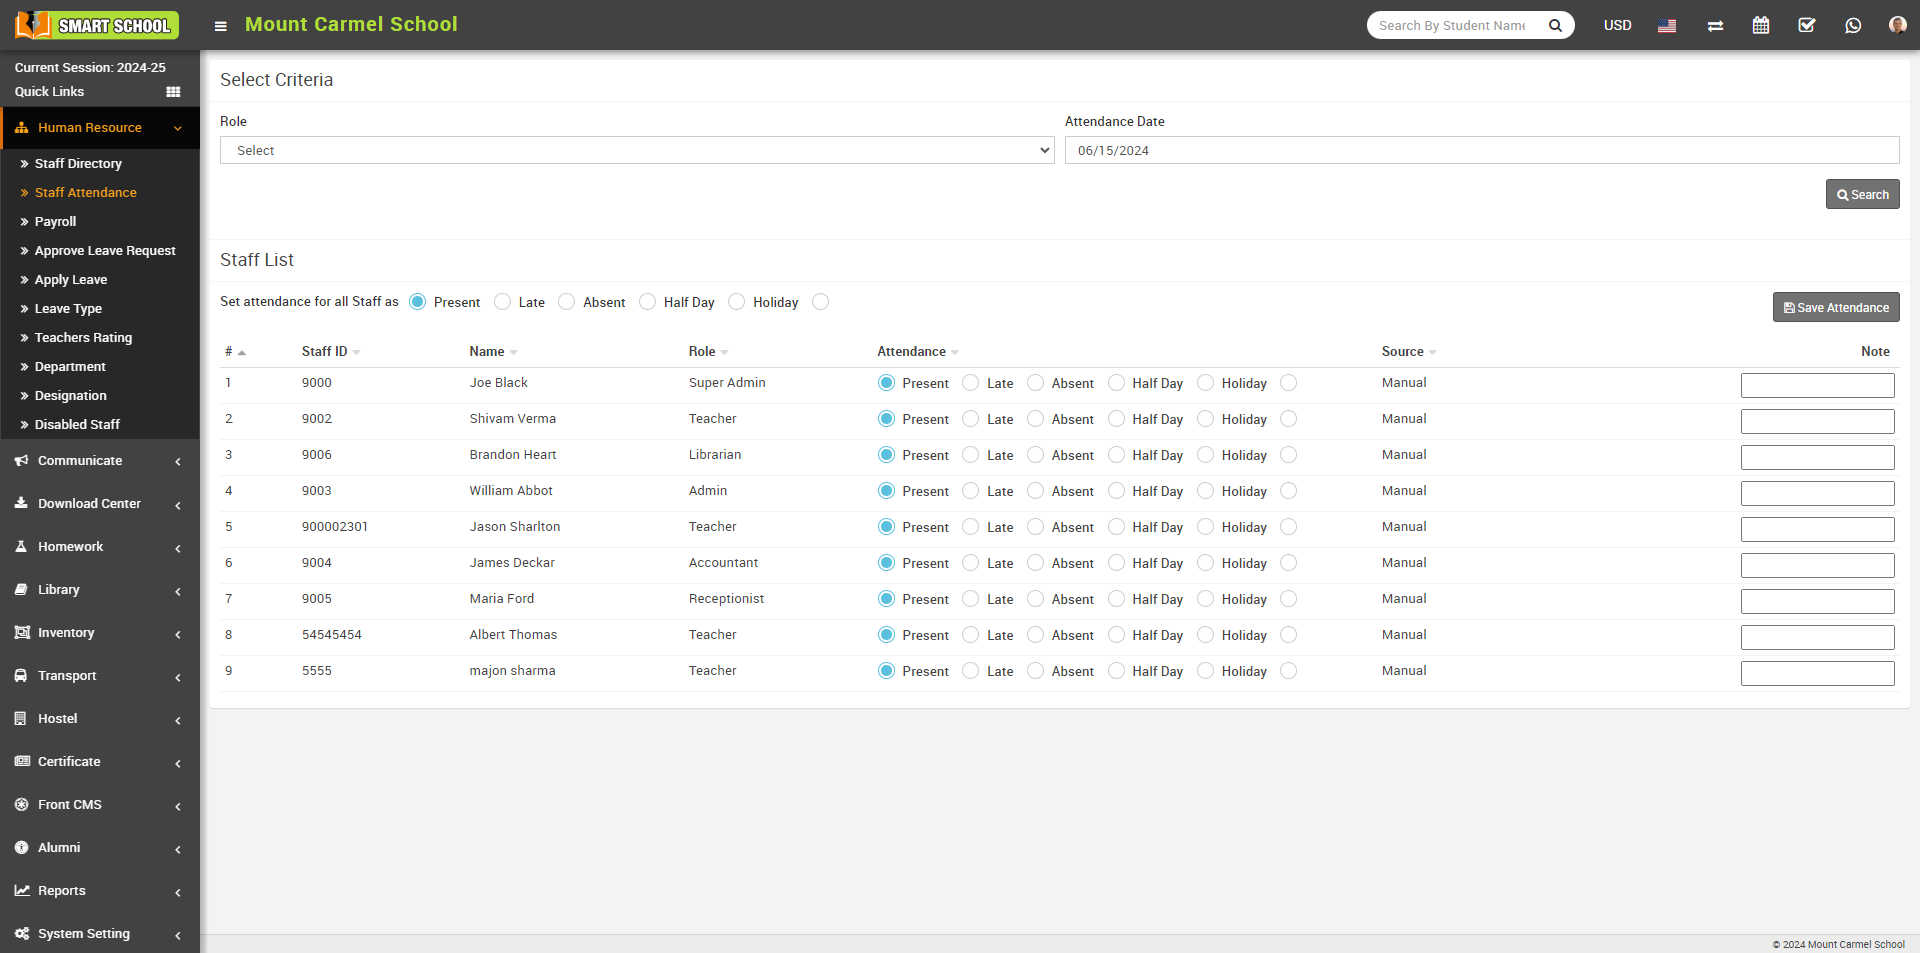
Here select Role and Attendance Date and then click on Search button. The list of staff will be shown in below of the page.
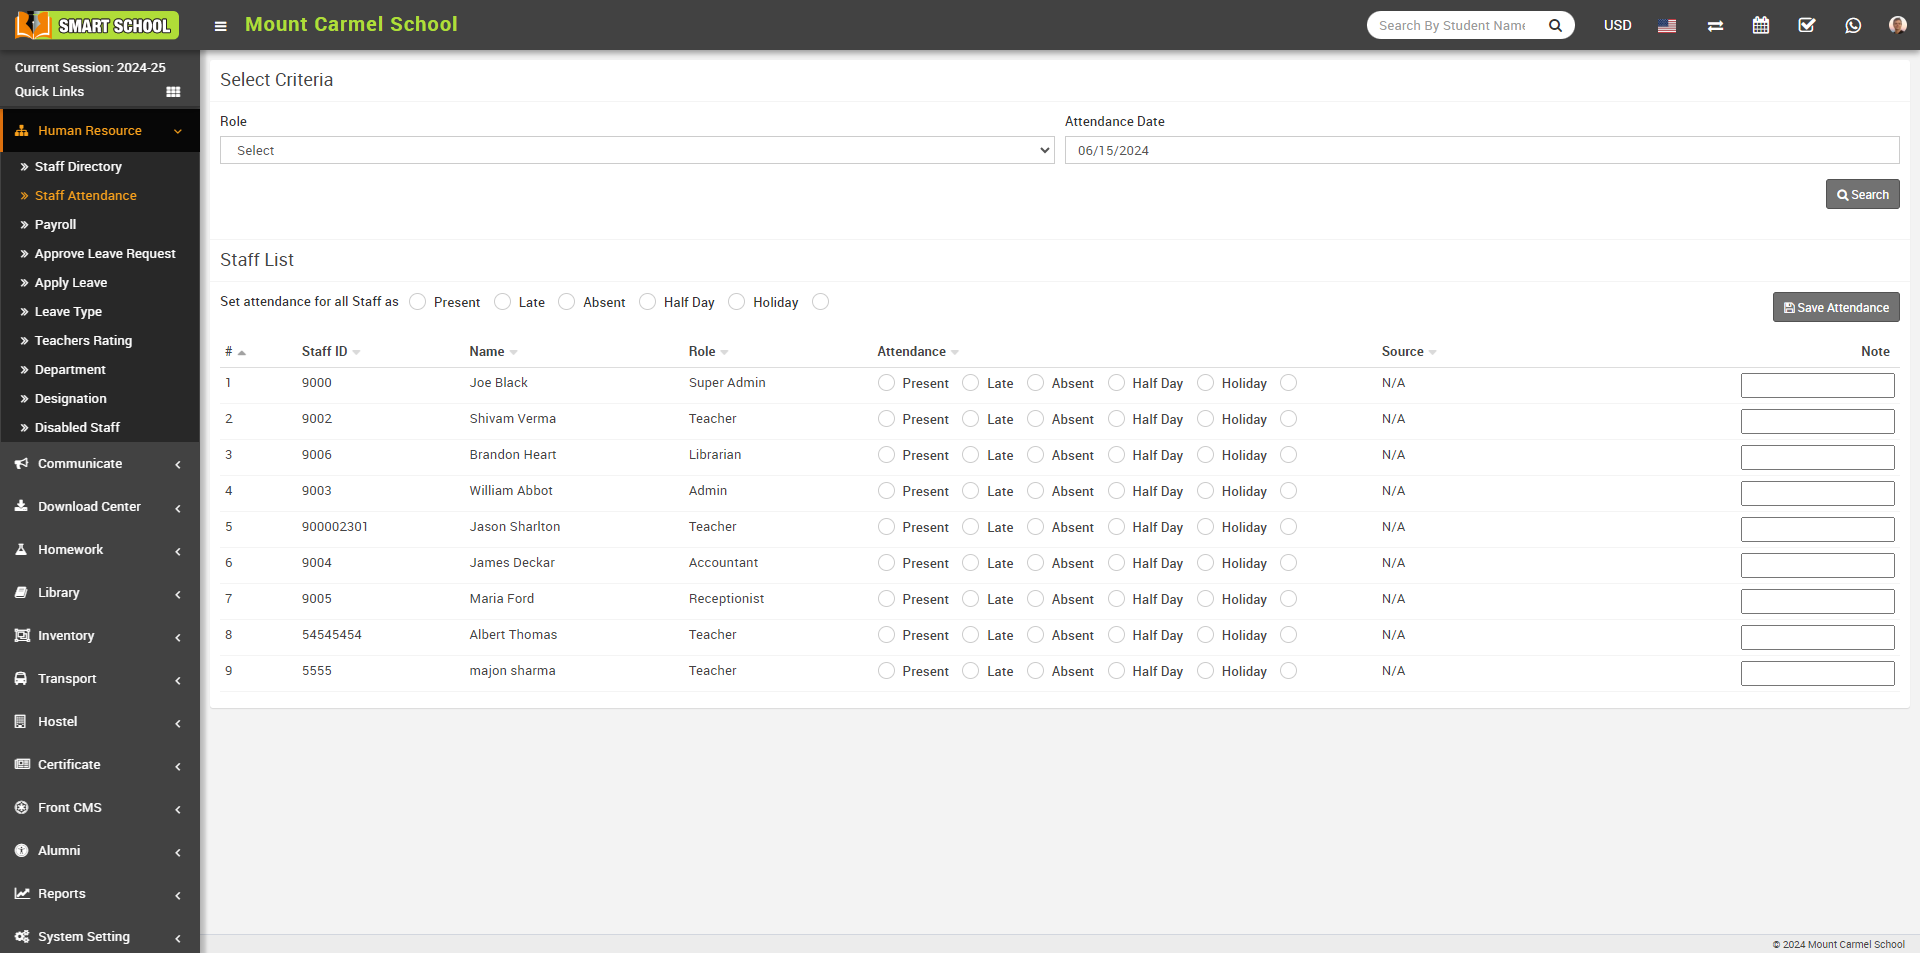
Now you can mark the Staff Attendance in three ways
1. Manual
2. Biometric
3. QR Code / Barcode
First, we proceed with Manual Type Staff Attendance. Simply select the attendance of the staff of the current date, here you can see Set attendance for all staff as option is available, using this option you can mark the all staff attendance at single click, if you want to mark the attendance as Present for the all staff, simply click on Present checkbox then click on Save Attendance button showing at the right side, all staff attendance will be mark as present at the same time and in Source column will show the type of Attendance as here we marked Manual Attendance. this process would be same for Late, Absent, Half Day, Holiday
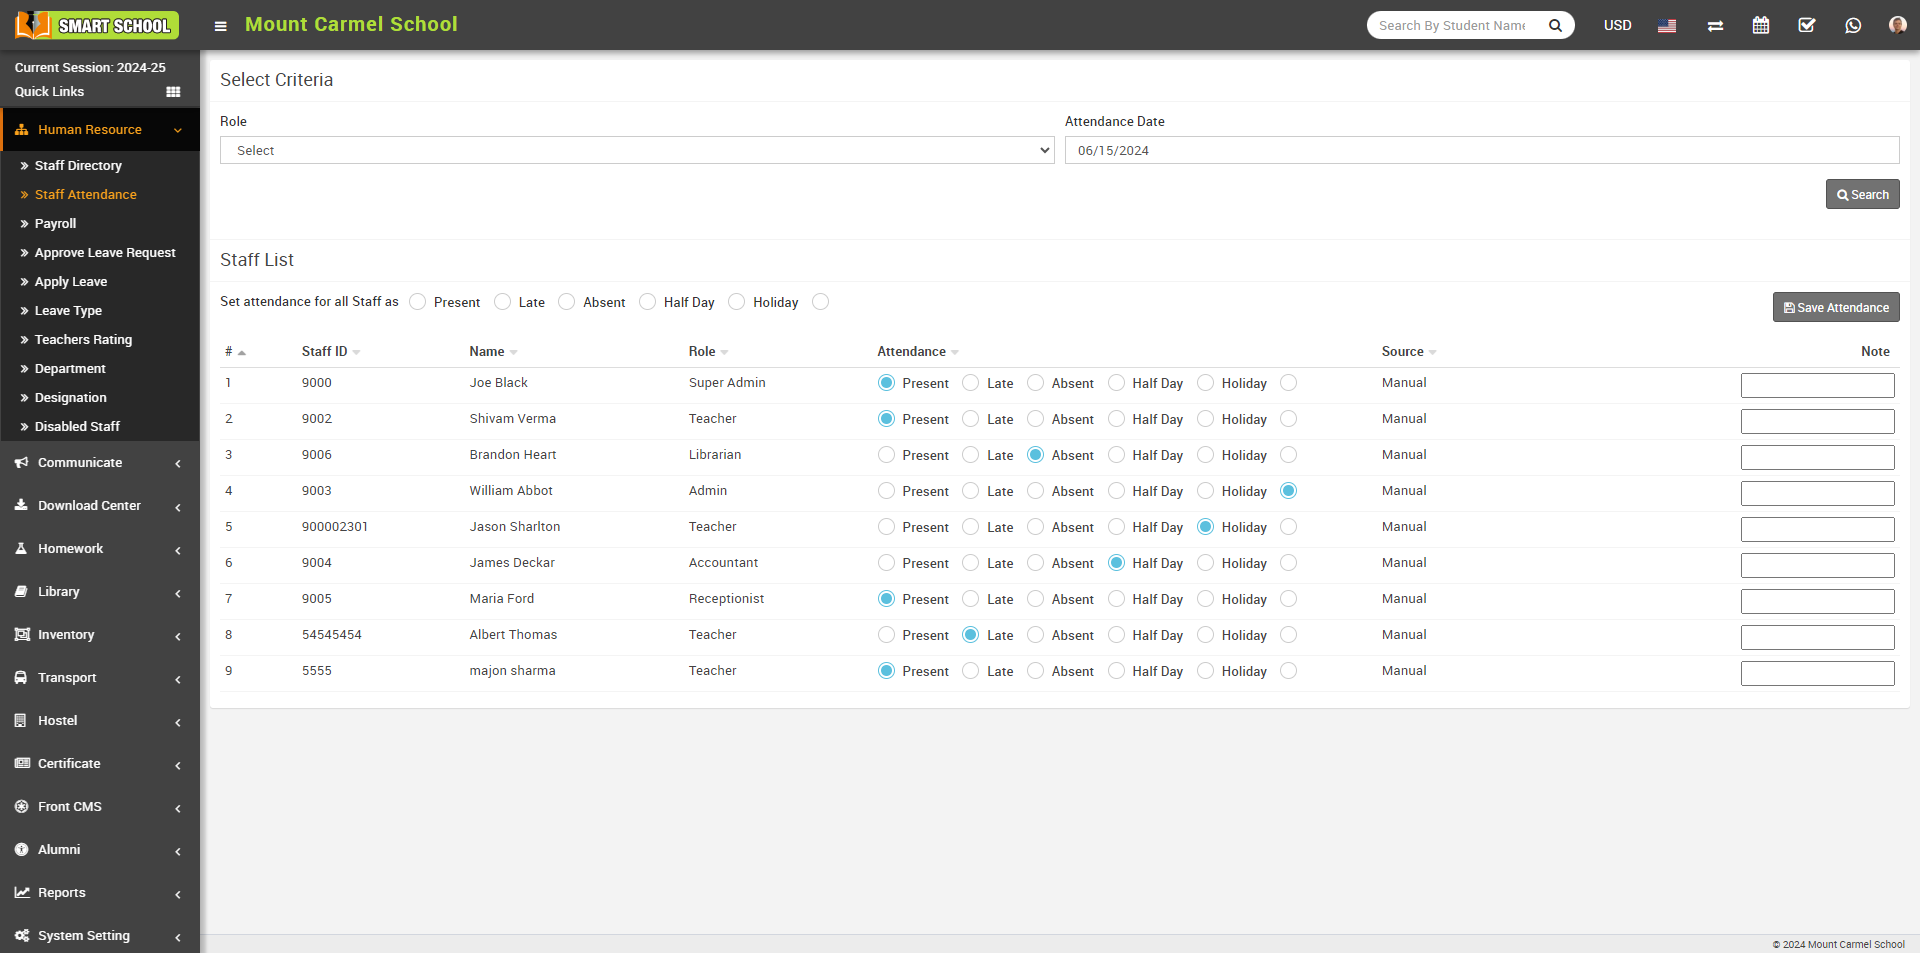
And if you want to mark the separate and different attendance like Late, Halfday, Absent etc, go to the every staff attendance column and check the checkbox regarding the same then click on Save Attendance button showing at right side, attendance will be mark successfully and Status will be show
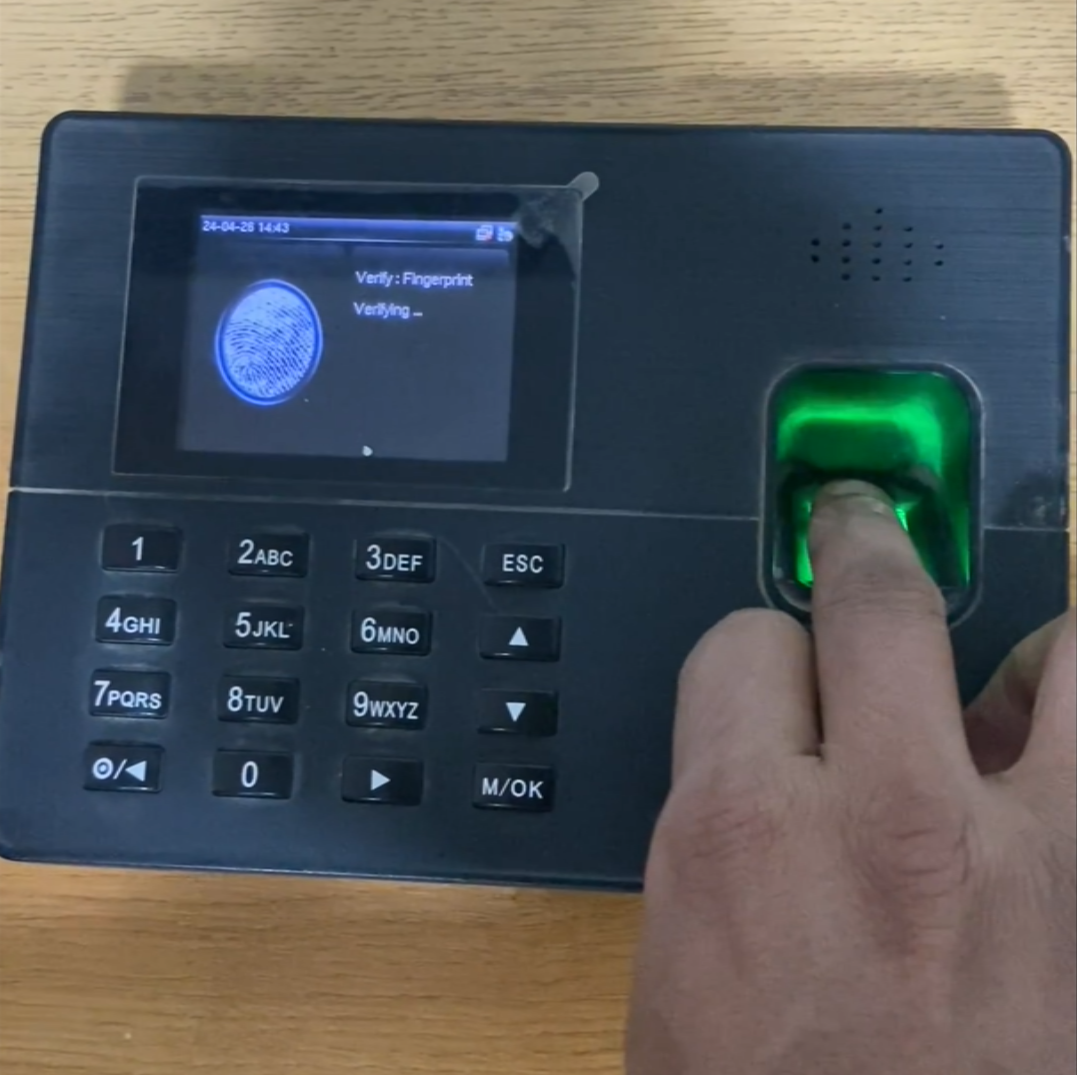
Now we mark Biometric Attendance using biometric device, first you have to configure biometric machine in your system and for this we have created separate video for Installation and Configuration of Smart School Biometric Attendance App in your system so more information just go to the given youtube link https://www.youtube.com/watch?v=zuAvANRAtaE
After successfully configure the biometric attendance in your system, now mark the attendance using biometeric device, simply mark the fingure in biometric device, device will recongnize the fingure of staff, which previously registered in biometric device and store and send the attendance to the system.
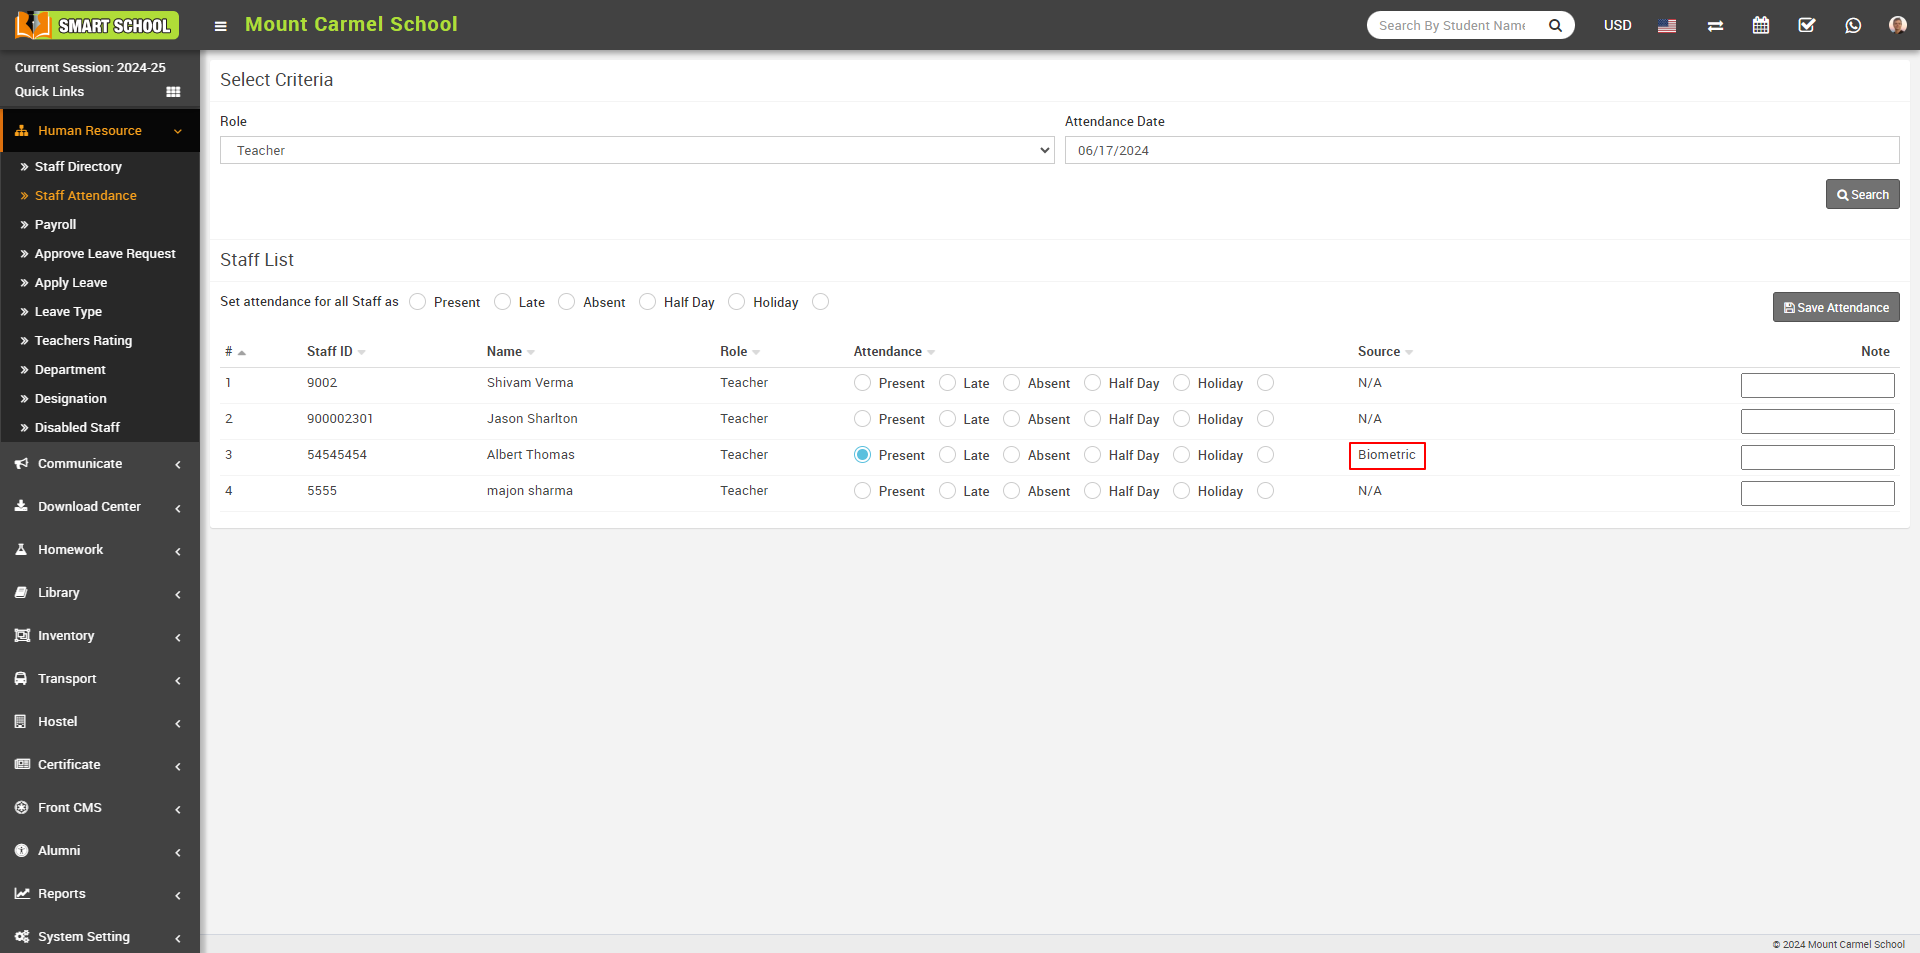
Staff attendance is successfully marked. If you want to verify it, simply go to the Human Resources > Staff Attendance page. There, you will see 'Present' in front of the staff names, and in the 'Source' column, you can see the type of attendance through which it has been marked, such as 'Biometric'
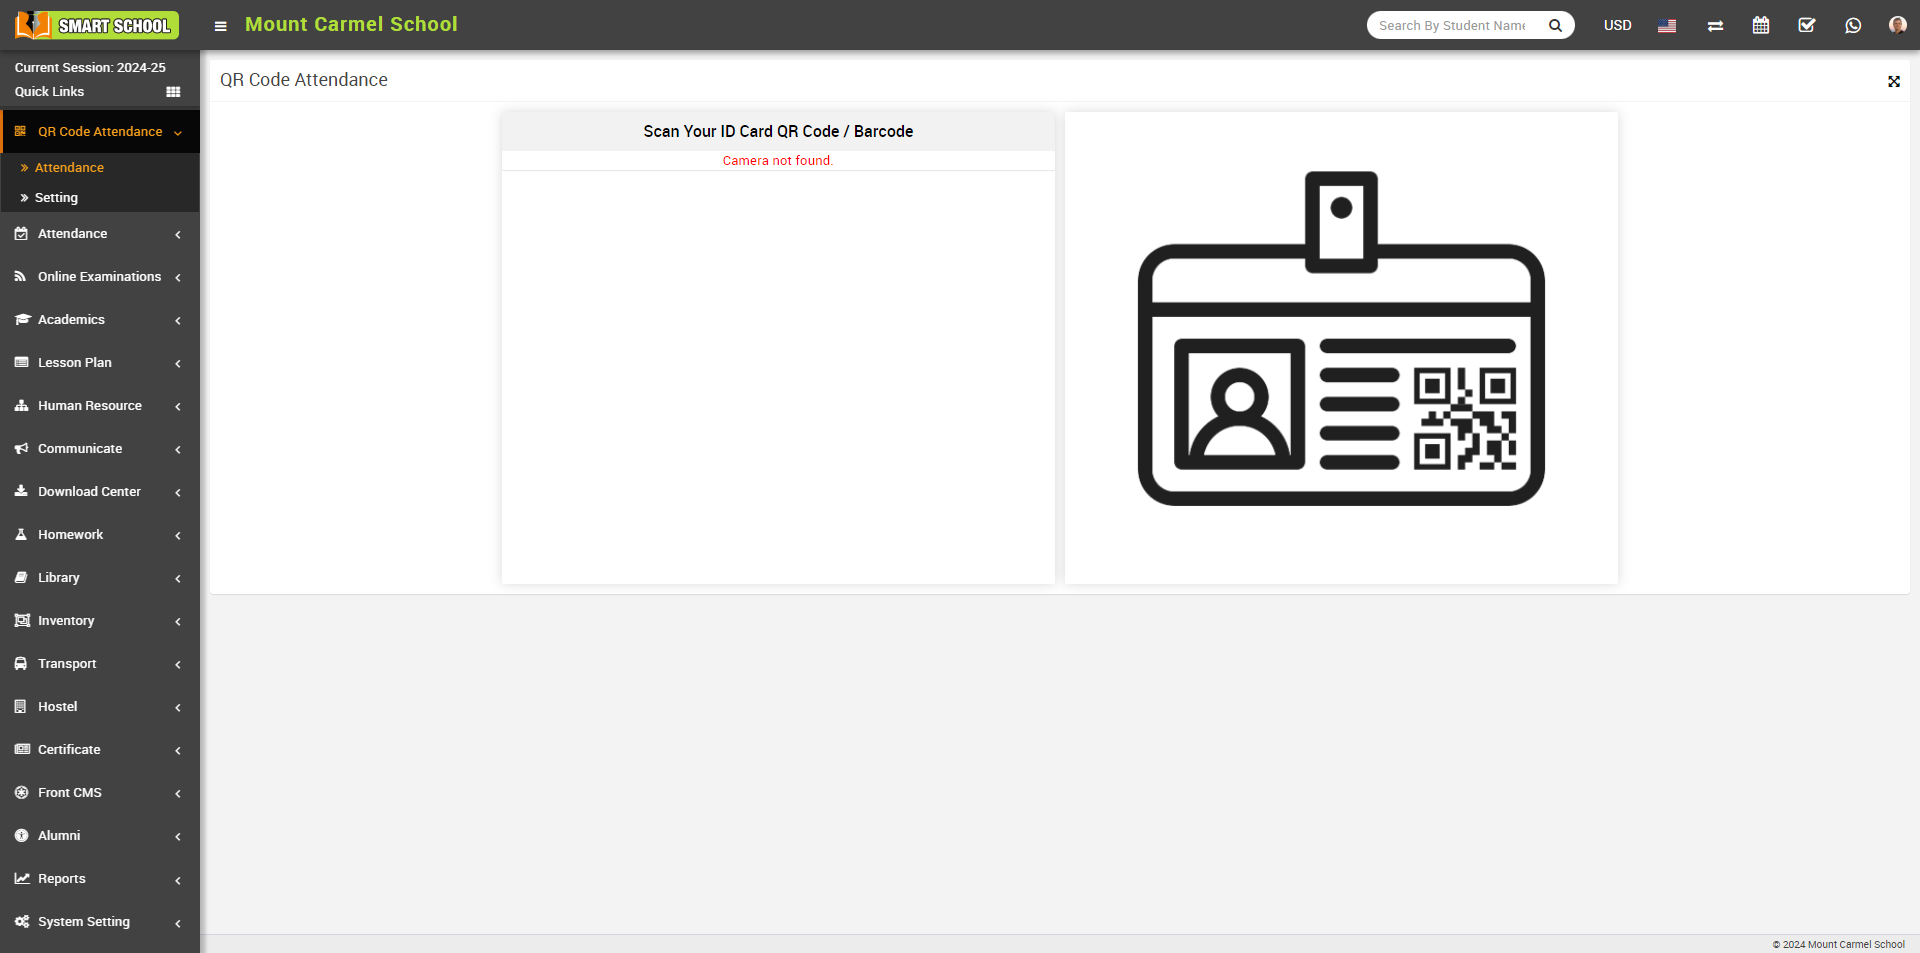
To mark the attendance using QR Code/Barcode, simply go to the QR Code Attendance > Attendance, QR Code Attendance page will be open.
Before mark the attendance we suggest you please go to the Settings page in QR Code Attendance module.
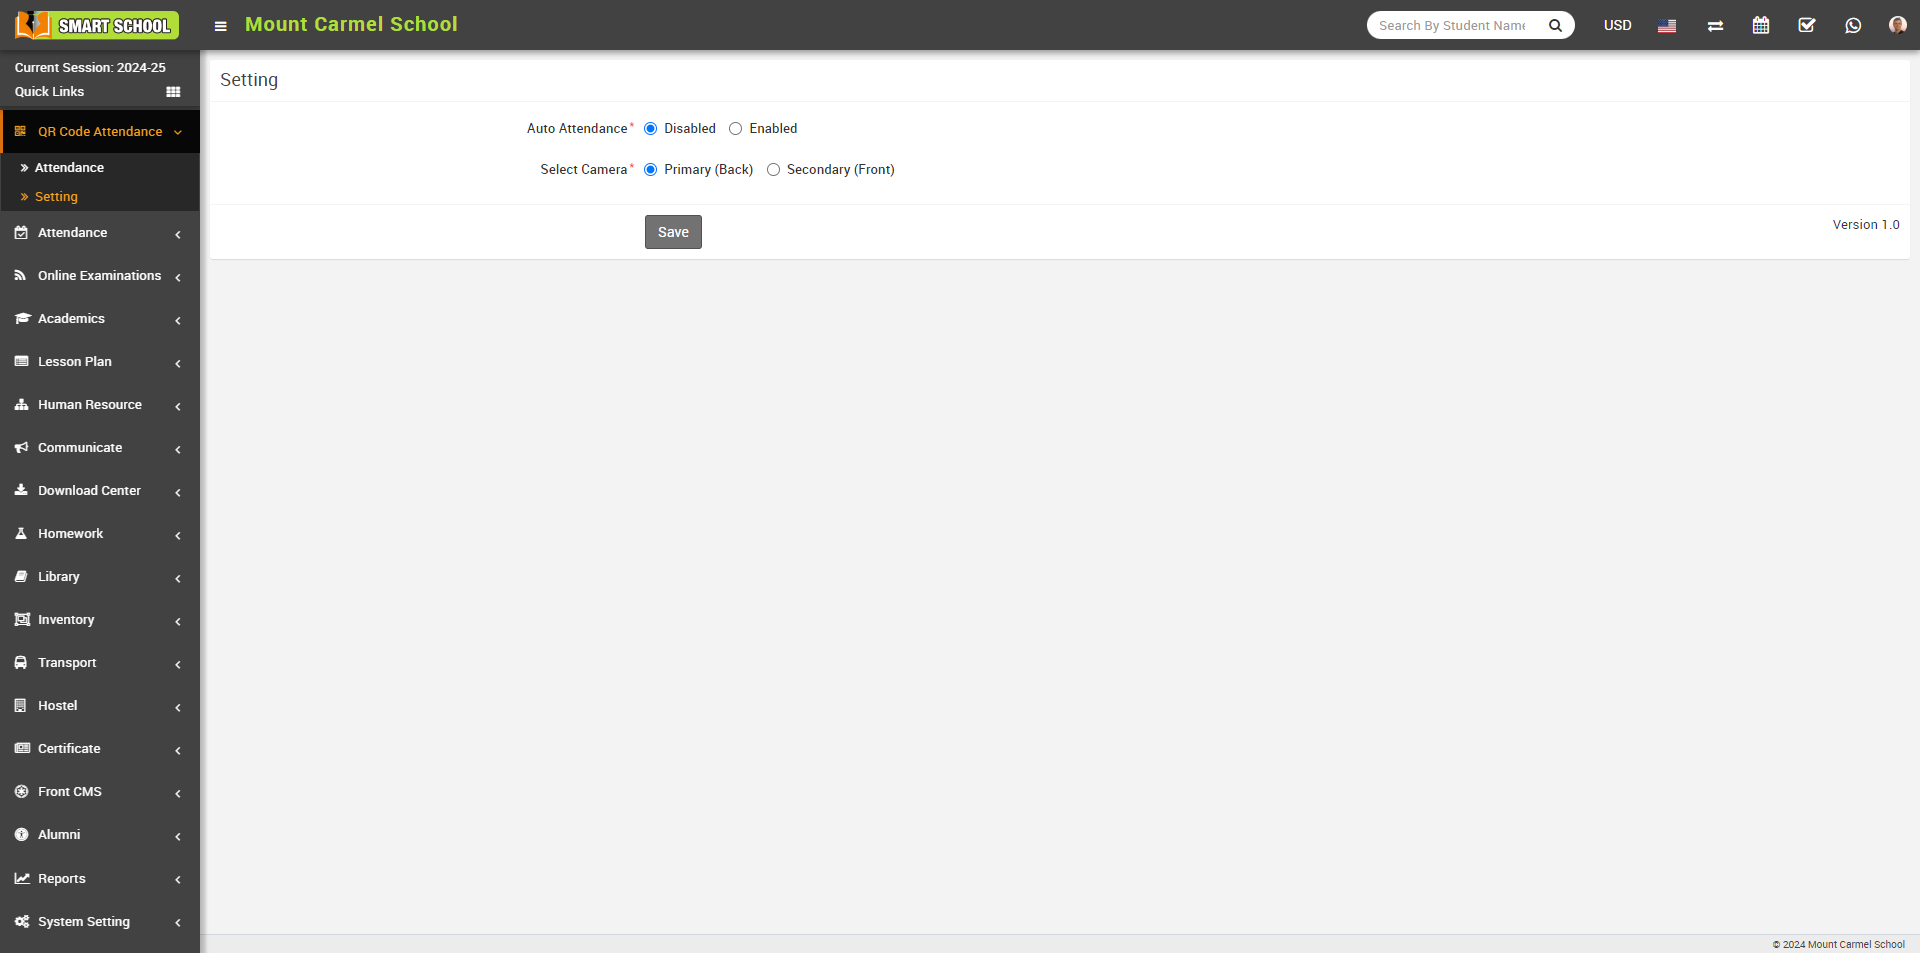
In this page you can see the setting Auto Attendance and Select Camera, When you keep the auto attendance Enabled so when you scan your QR Code/Barcode it will mark the attendance automatically and if you want to keep the disabled, you have to mark the attendance manually. For more information please visit the youtube link https://www.youtube.com/watch?v=xRB1Fpv0Z3o or go to the QR Code Attendance article https://smart-school.in/category/qr-code-attendance here you will get all the information
When you come to this page scaner will be open,
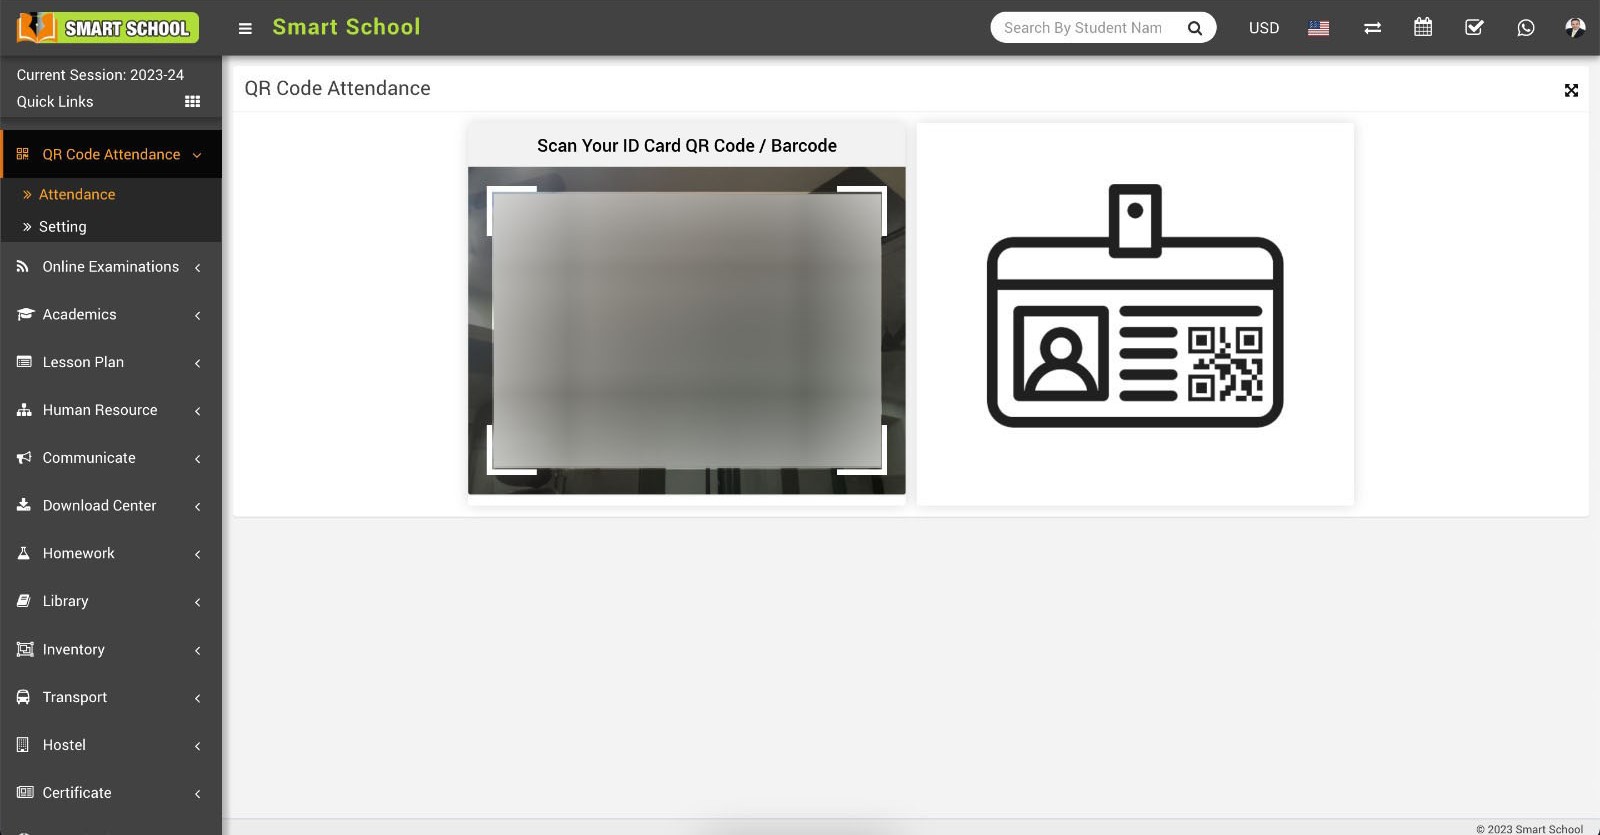
Now, simply you have to scan your id card in which QR Code/Barcode are display, your attendance will be mark successfully.
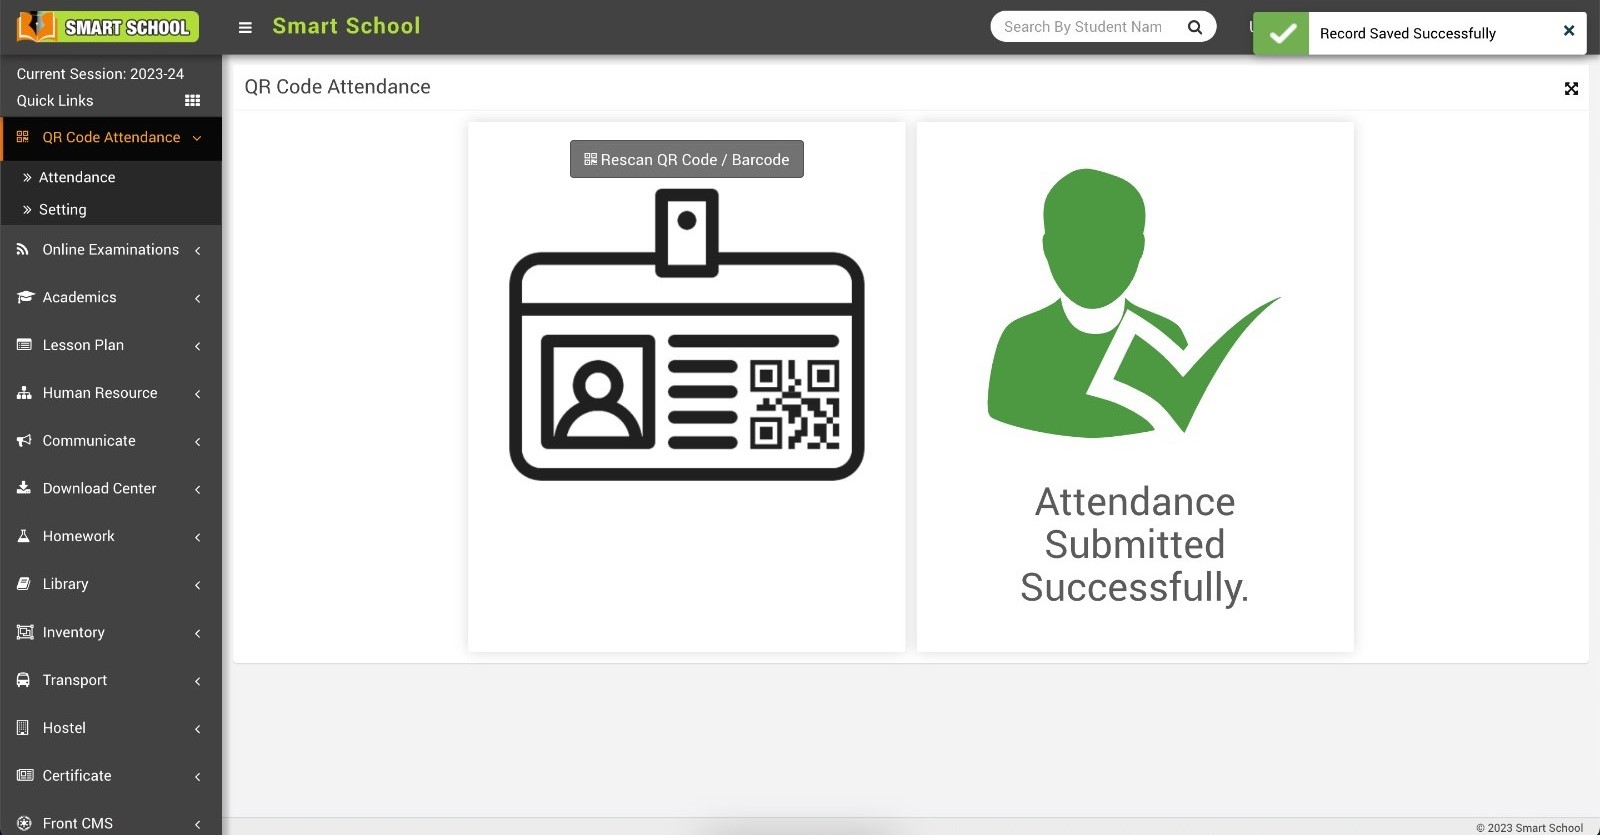
Now go to the Human Resource > Staff Attendance page, here search that staff whose attendance you want to see.
Now search that staff whose attendance you want to see. here you can clearly see in source column attendance type showing QR Code/Barcode Attendance

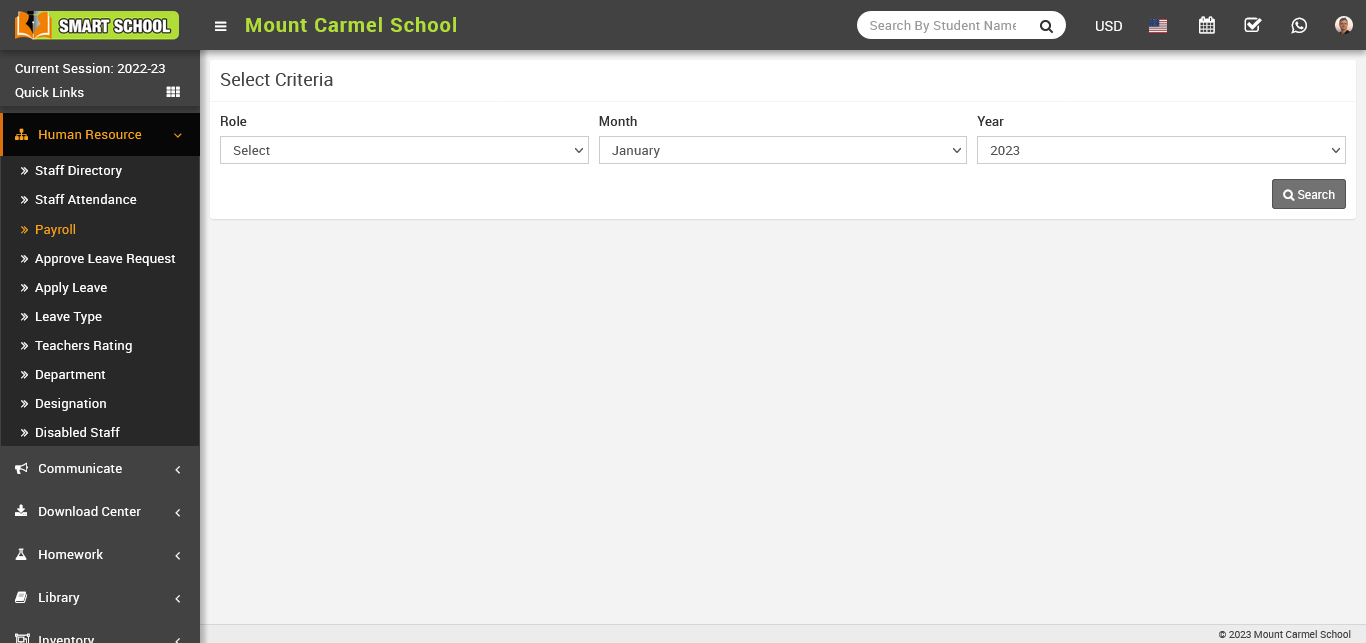
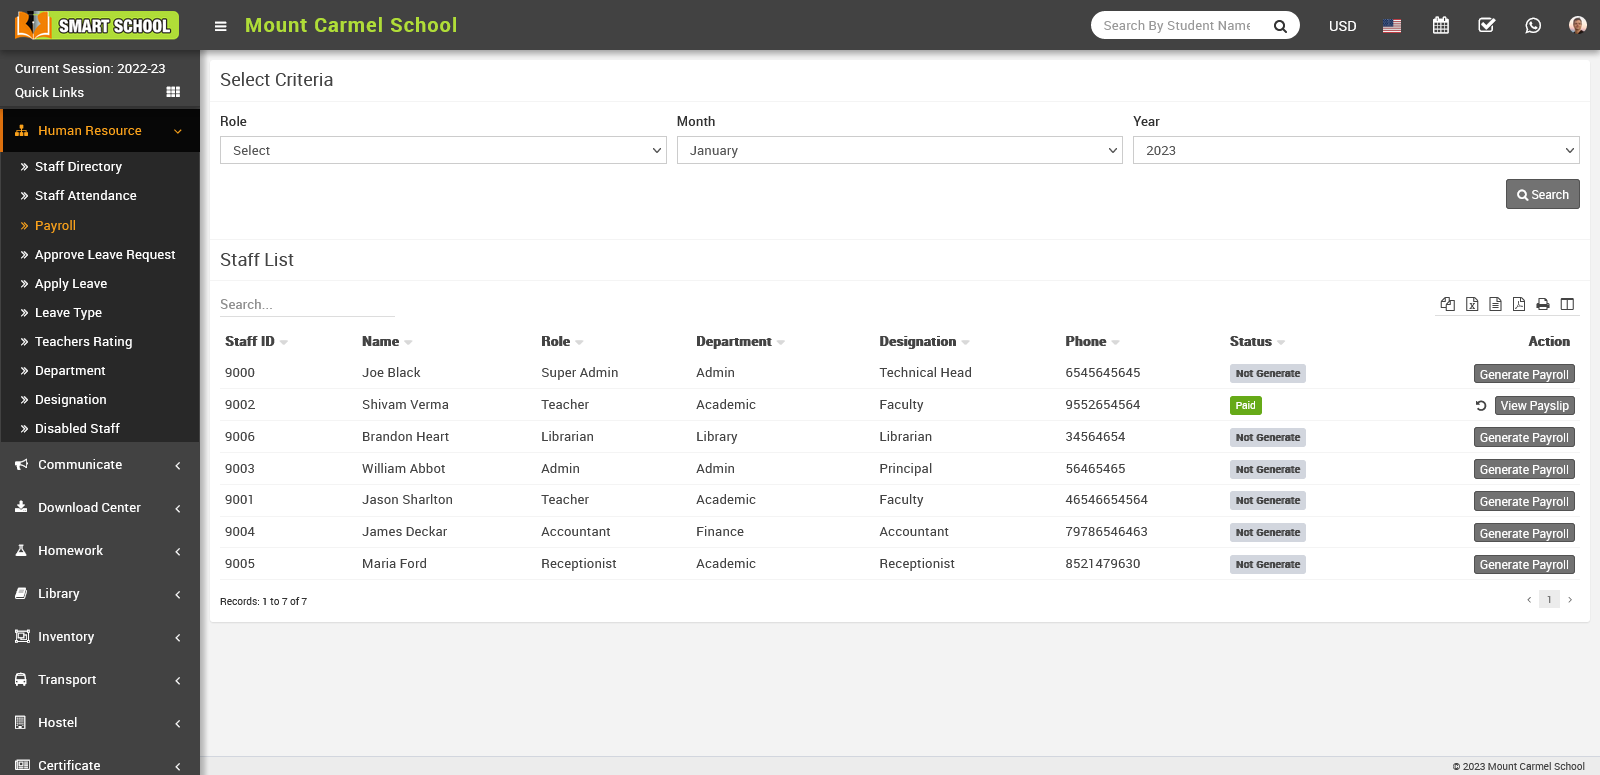
How to generate Payroll for Staff members?
Here you can see staff member list and their payroll status and generate button in action column.
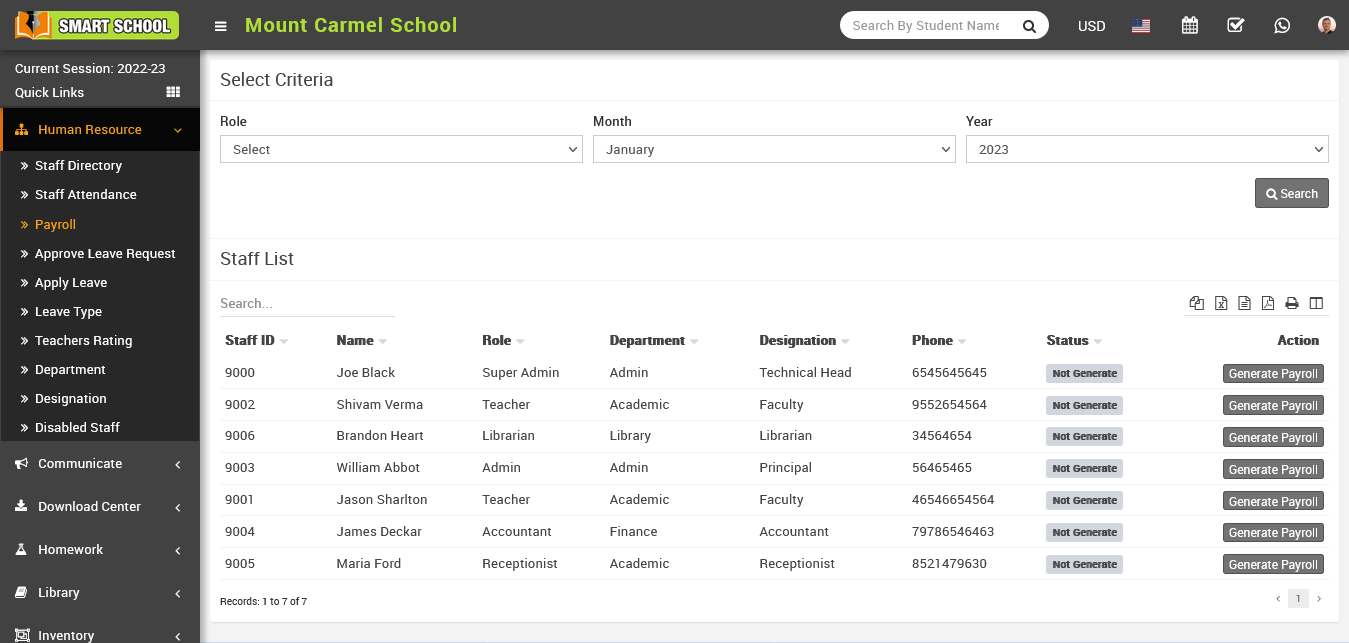
Now, in the Action column of the staff list, click on the Generate Payroll button, this will open the Staff Details page with the payroll form. You can see a staff member's profile and their attendance.
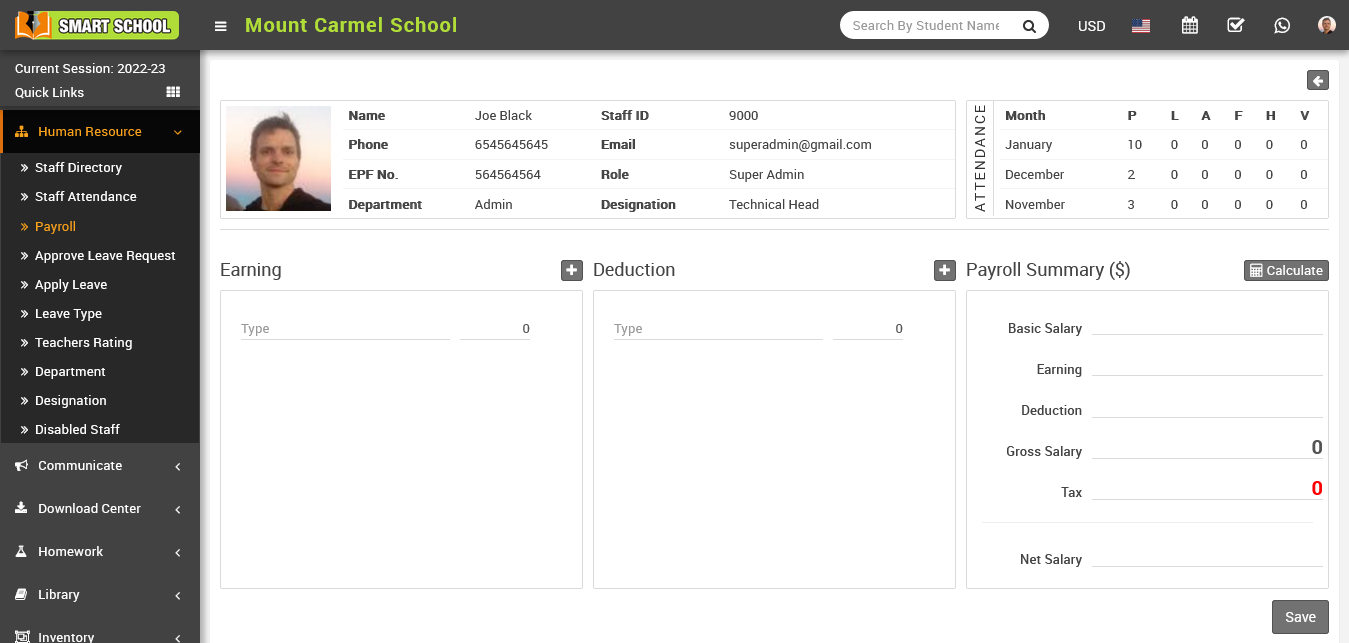
To enter the earning type and amount in the earning column, click on the Add icon. To remove an earning type and amount, click on the Remove icon. Similarly, enter the deduction type and amount in the deduction column and use the Add and Remove icons to make any changes. To view a staff member's basic salary, click on the Calculate button in the Payroll Summary column. Once you have reviewed the salary details, click on the Save button to save the changes.
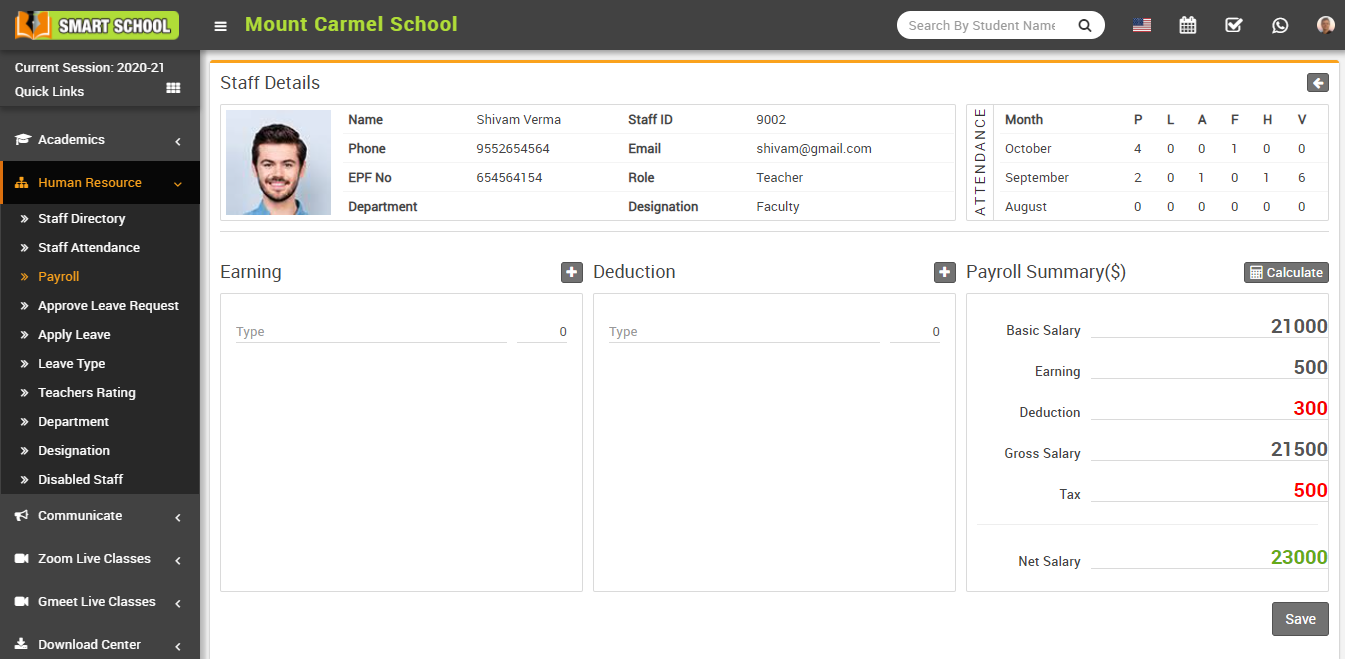
After reviewing the payroll summary, click on the Save button to generate the payroll. Once the payroll has been generated, you can see the status as 'generated' in the status column of the staff list.
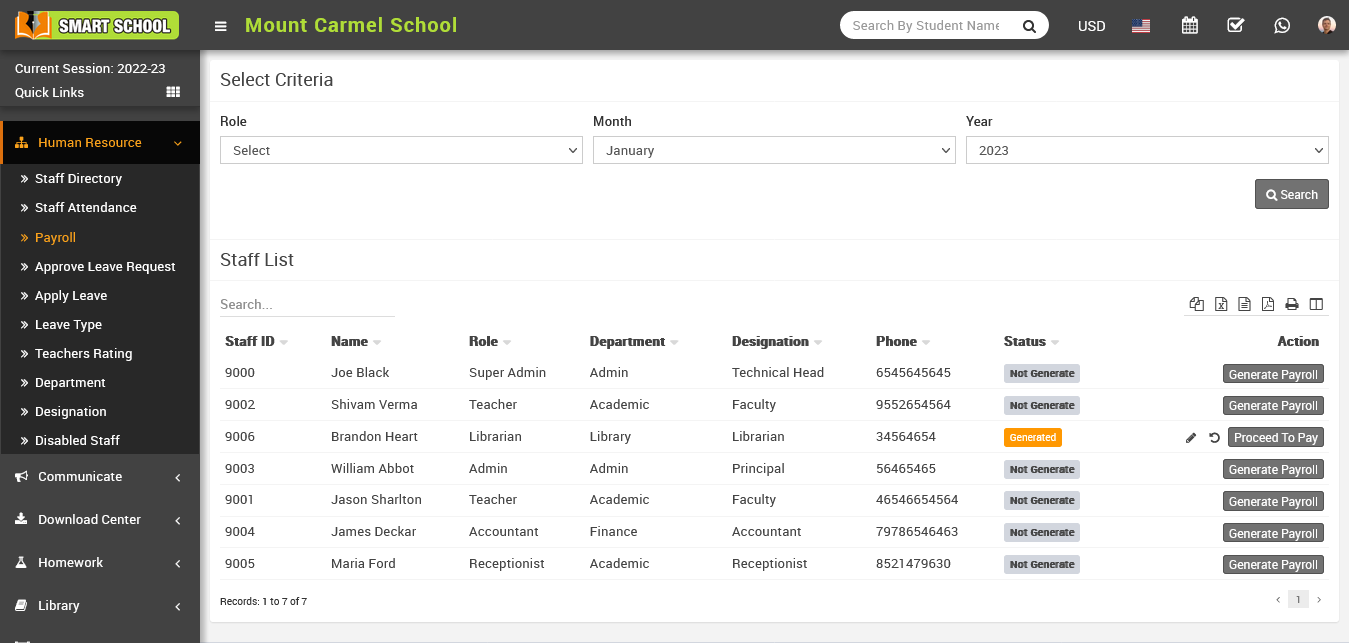
To Edit a generated salary, go to Human Resource > Payroll and select the role, month, and year criteria, then click on the search button. This will open the staff list, where you can see the payroll status in the status column. You can only edit the payrolls with a status of 'generated', which will have the edit option displayed next to them in the action column.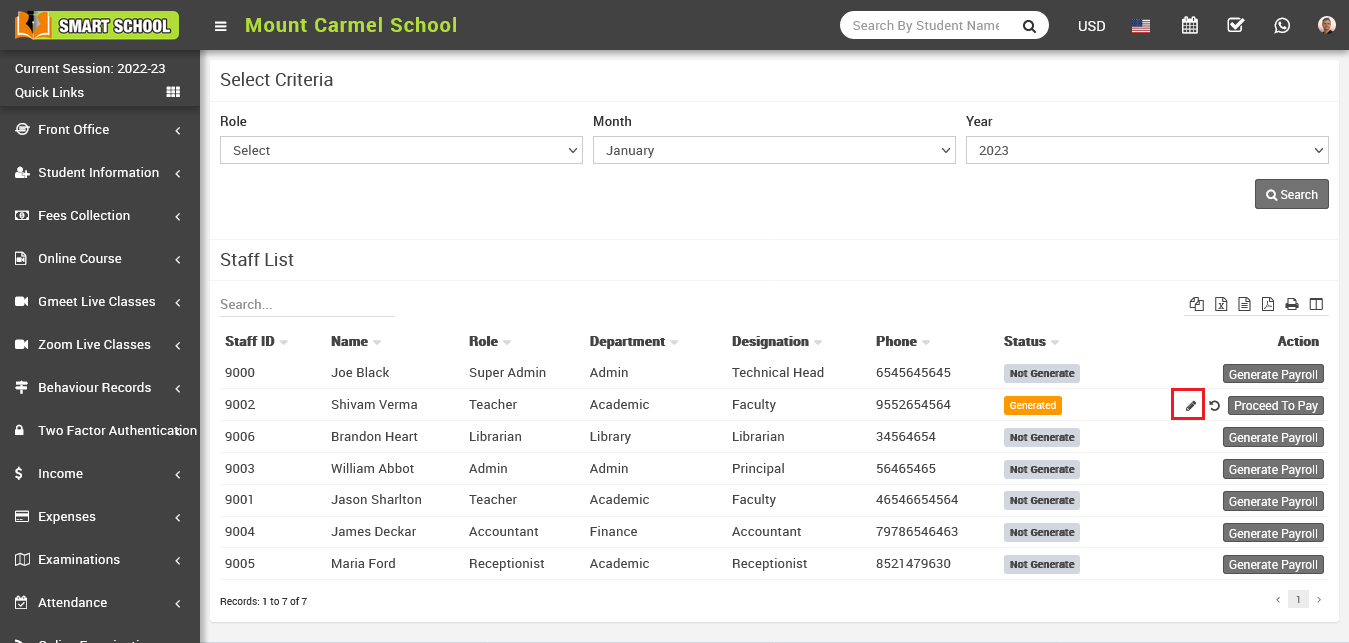
Now, click the Edit icon to open the edit payroll form, where you can update that staff's payroll, click the Save button, and the payroll will be successfully updated.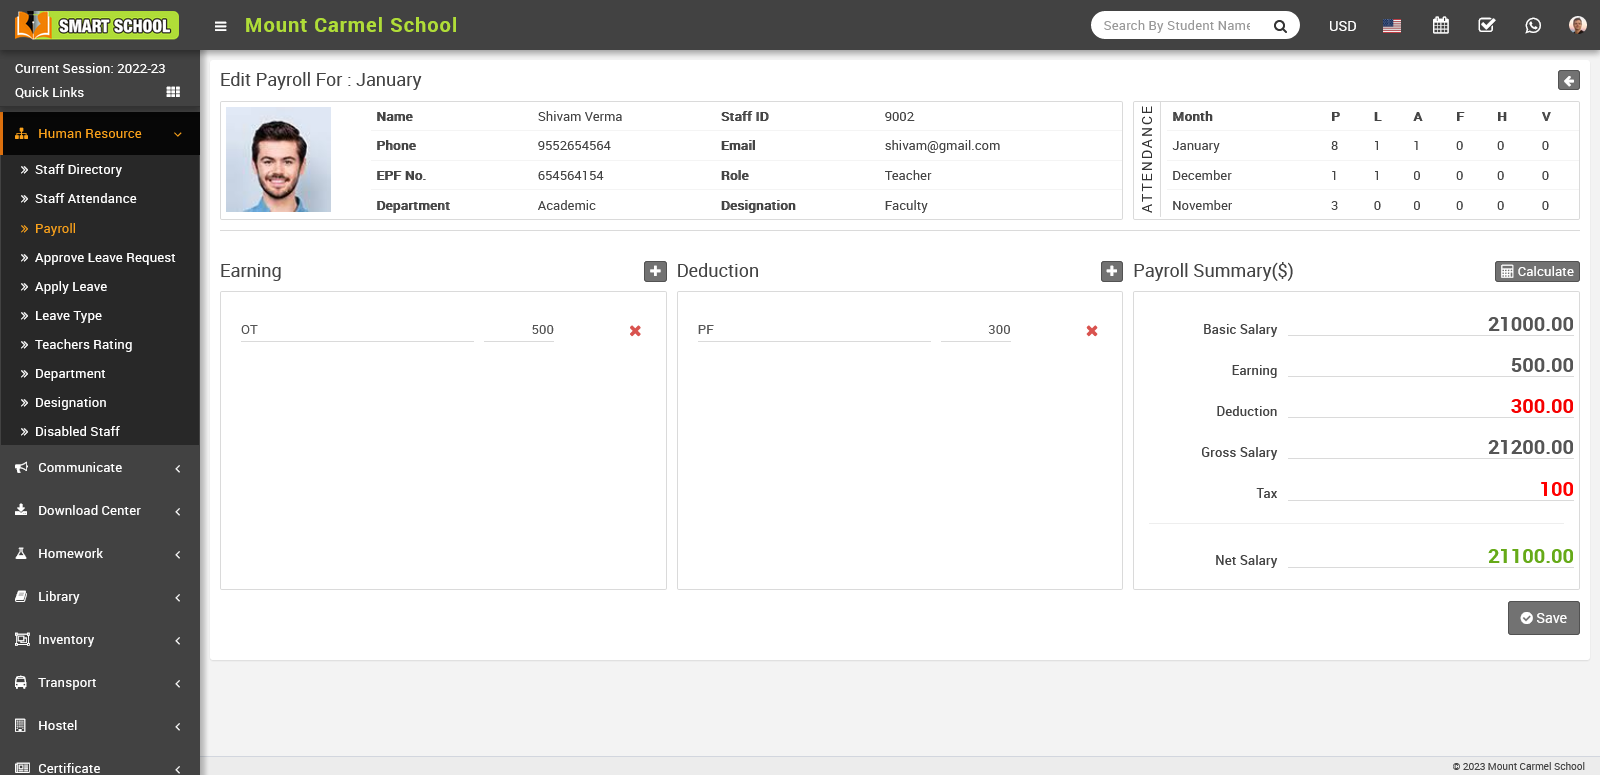
Now click on Proceed To Pay button present at Action column in staff list, at click of this button Proceed To Pay modal will be open. Here you can see Staff Name, Payment Amount, Month Year and select Payment Mode, Payment Date, Note.
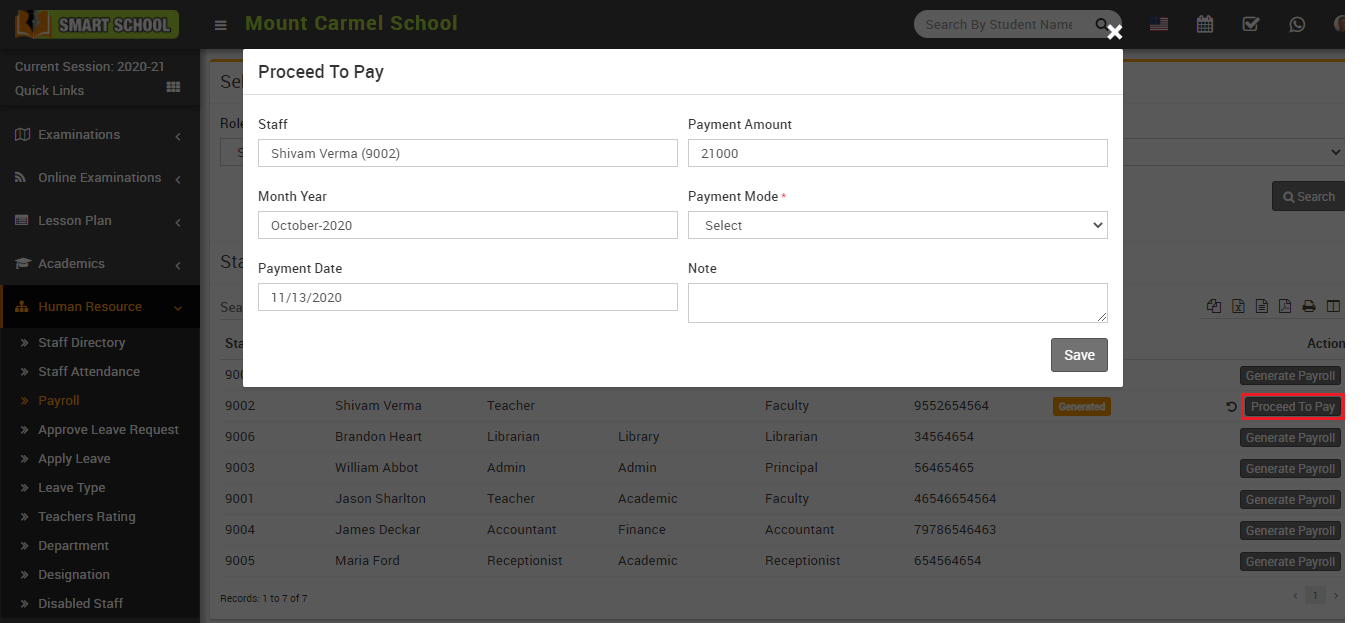
And then click the Save button to confirm that payment was made using the payment mode you chose, and you can see the status Paid in the column.
Now click on View Payslip button present at Action column in staff list, at click of this button Details modal will be open. Here you can see staff payslip details.
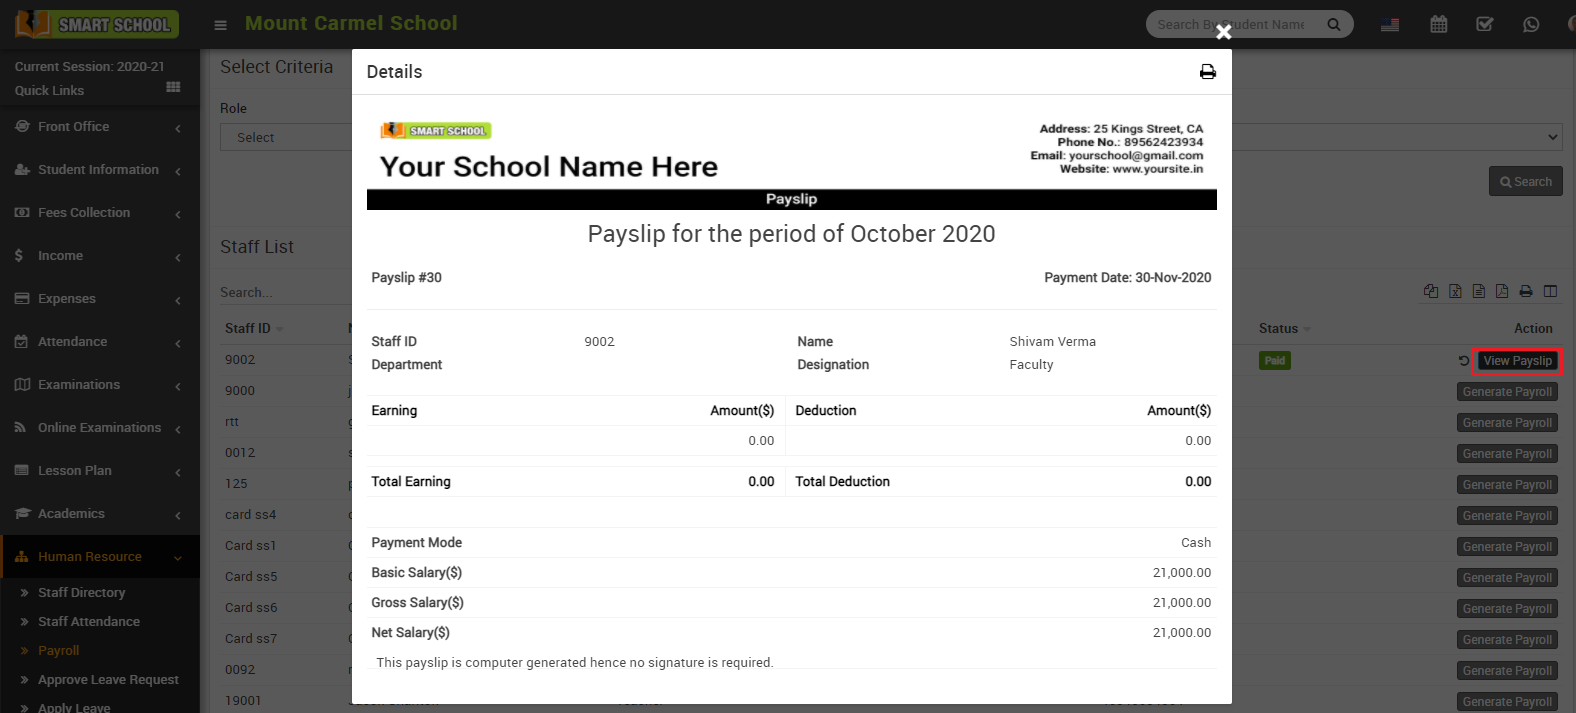
To print payslip click on Print icon present at top right corner in the Details page, at click of this icon print modal will be open.
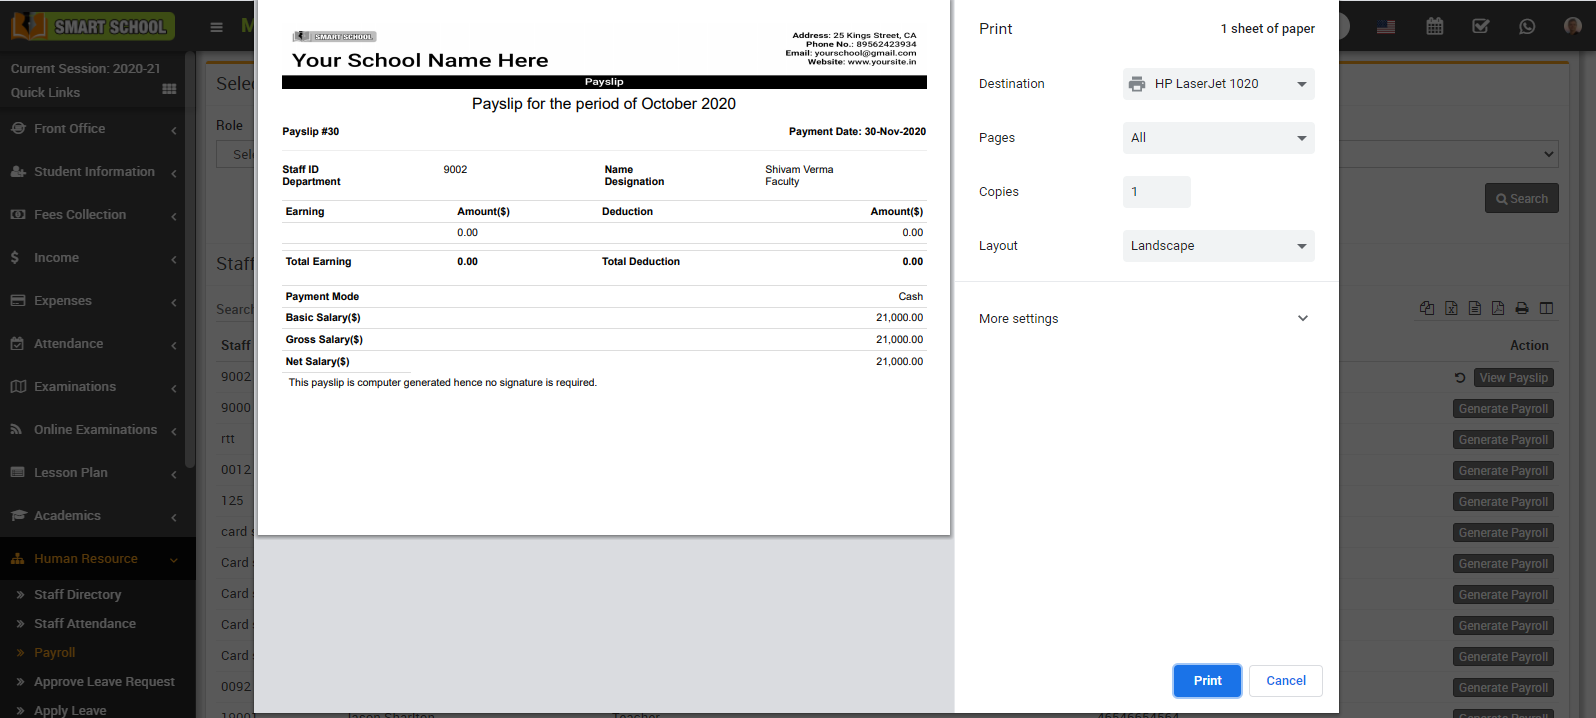
Note: Do not print payslip directly, here select the Destination (save as pdf) and save pdf file and then print payslip using this pdf file.
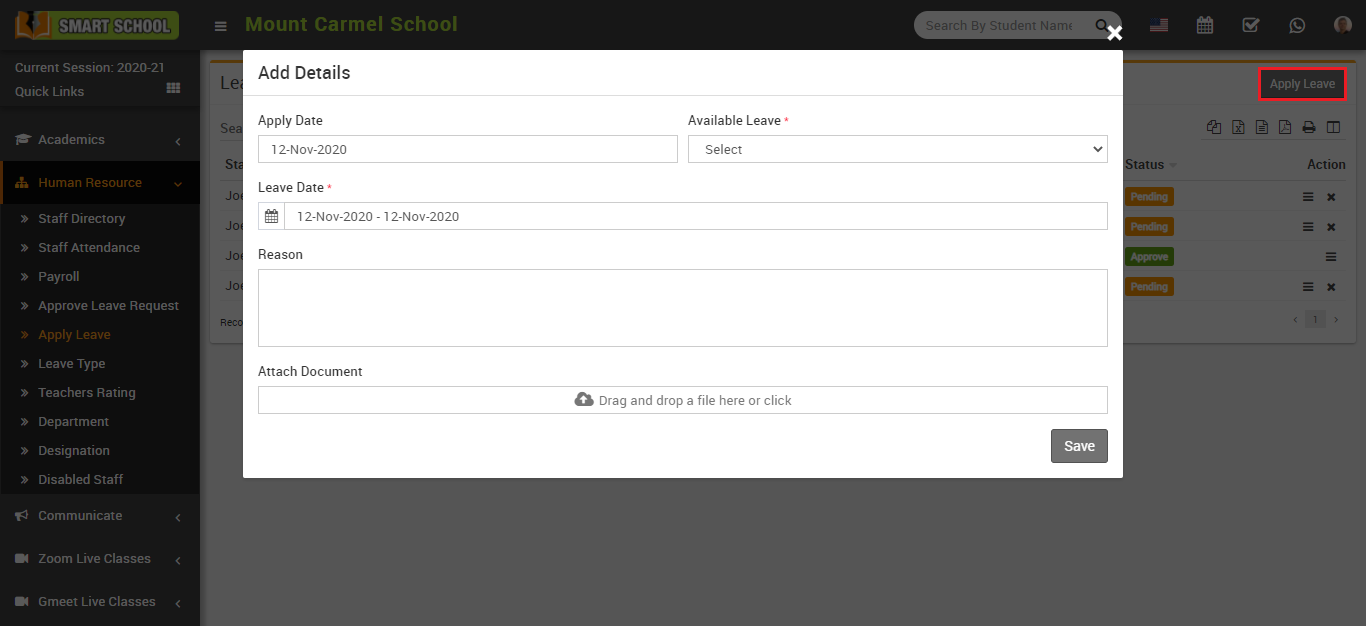
How to Apply Leave?
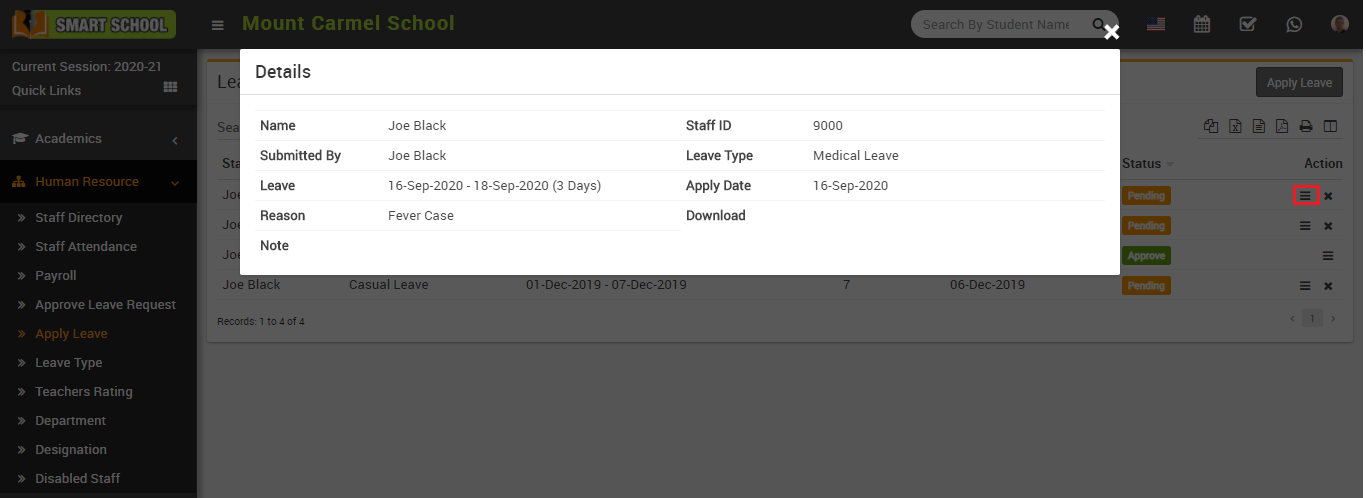
To view apply leave click on View icon present at Action column in the leaves page, at click of this icon Details modal will be open. Here you can see the details of staff member.
To delete apply leave click on Delete icon present at Action column in the leaves page.
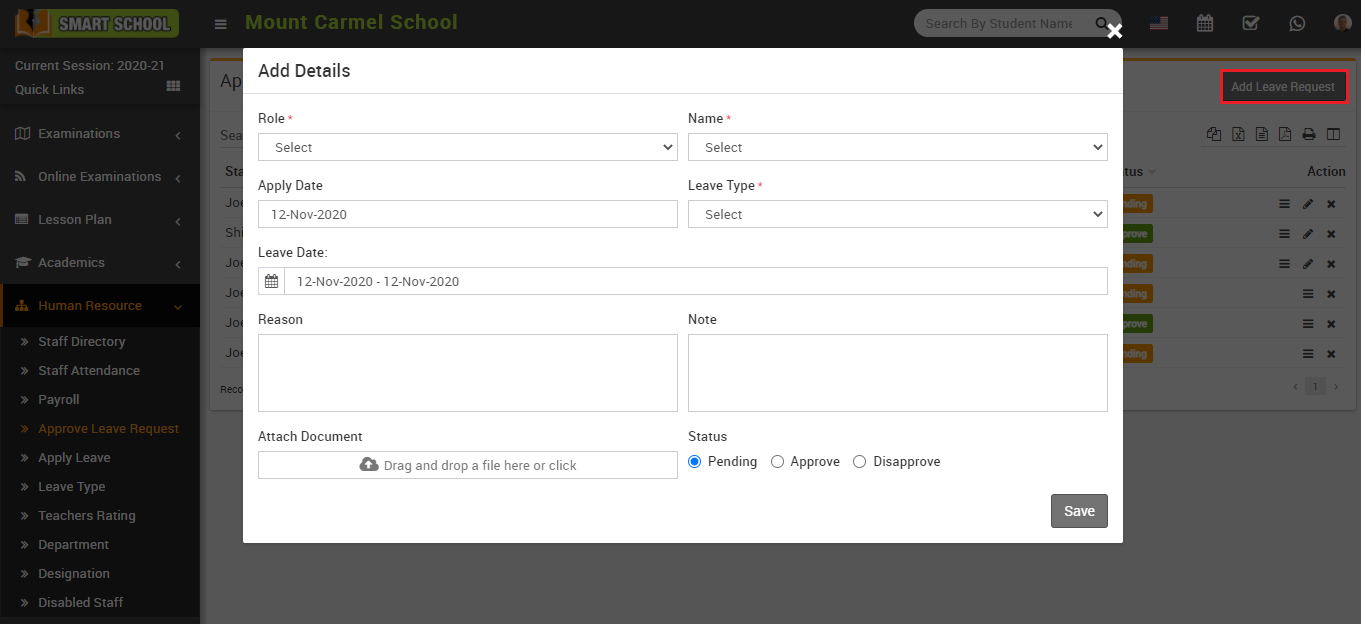
How to Approve Leave Request?
Here select Role, Name, Apply Date, Leave Type, Leave Date, Reason, Note, Attach Document and Status and then click on Save button.
To view approve leave request click on View icon present at Action column in the approve list page, at click of this icon Details modal will be open. Here you can see details of staff member.
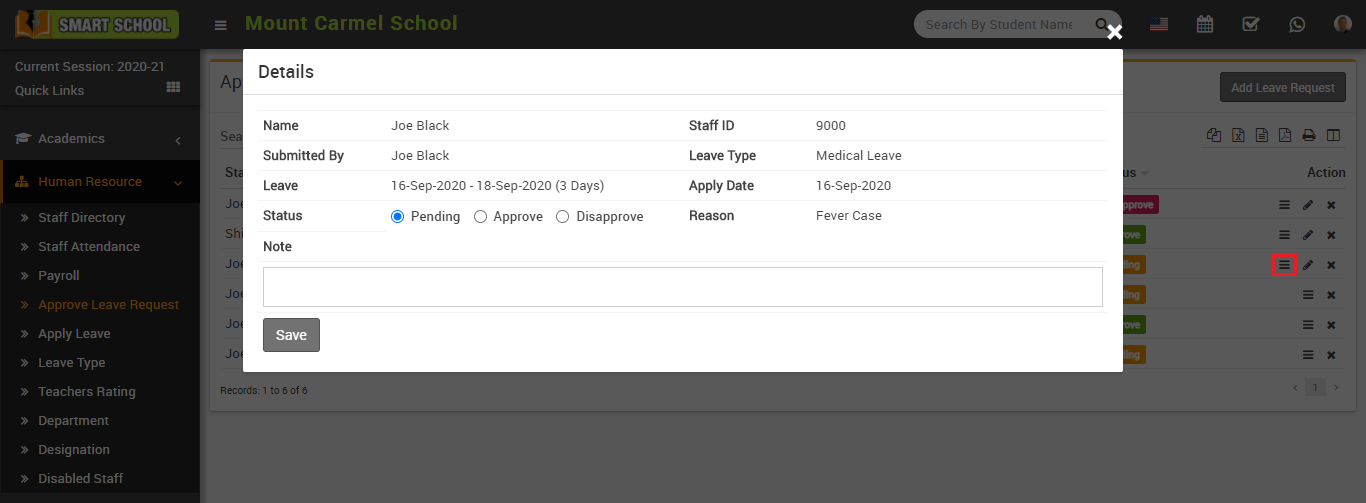
To edit approve leave request click on Edit icon and to delete approve leave request click on Delete icon present in the approve leave request page.
How to view Teachers rating?
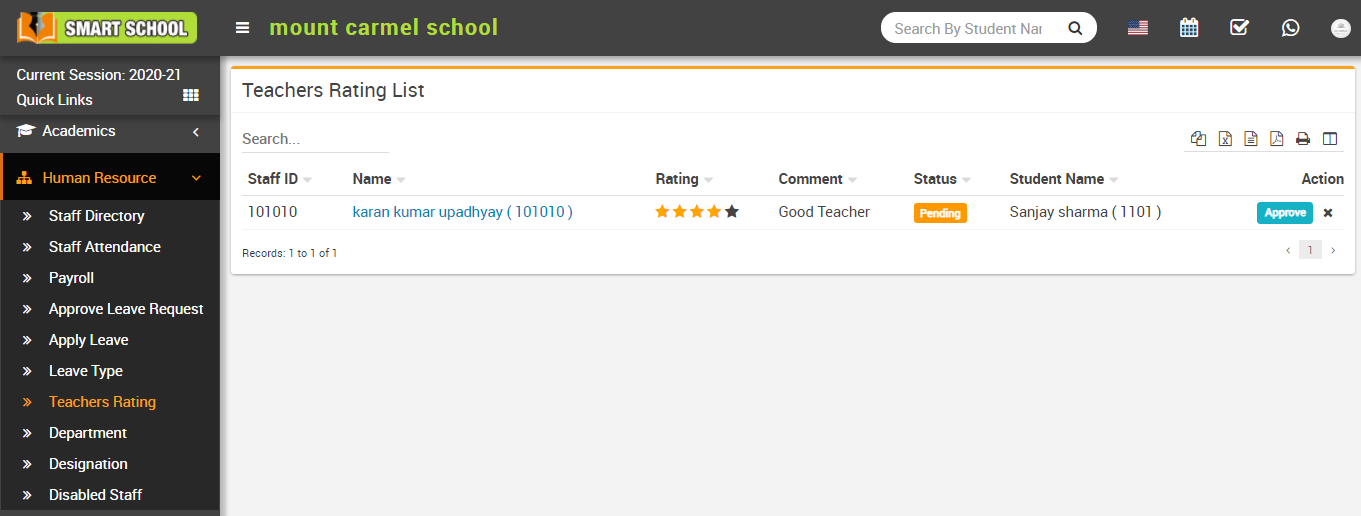
To delete staff rating click on Delete icon present in teachers rating list page.
How to view Disabled Staff?
To view staff details click on Show icon present in staff card. Here you can view basic detail of staff like Profile, Payroll, Leaves, Attendance, Documents, Timeline.
To edit staff click on Edit icon and to enable staff click on Enable icon and to delete staff click on Delete icon present in staff profile page.
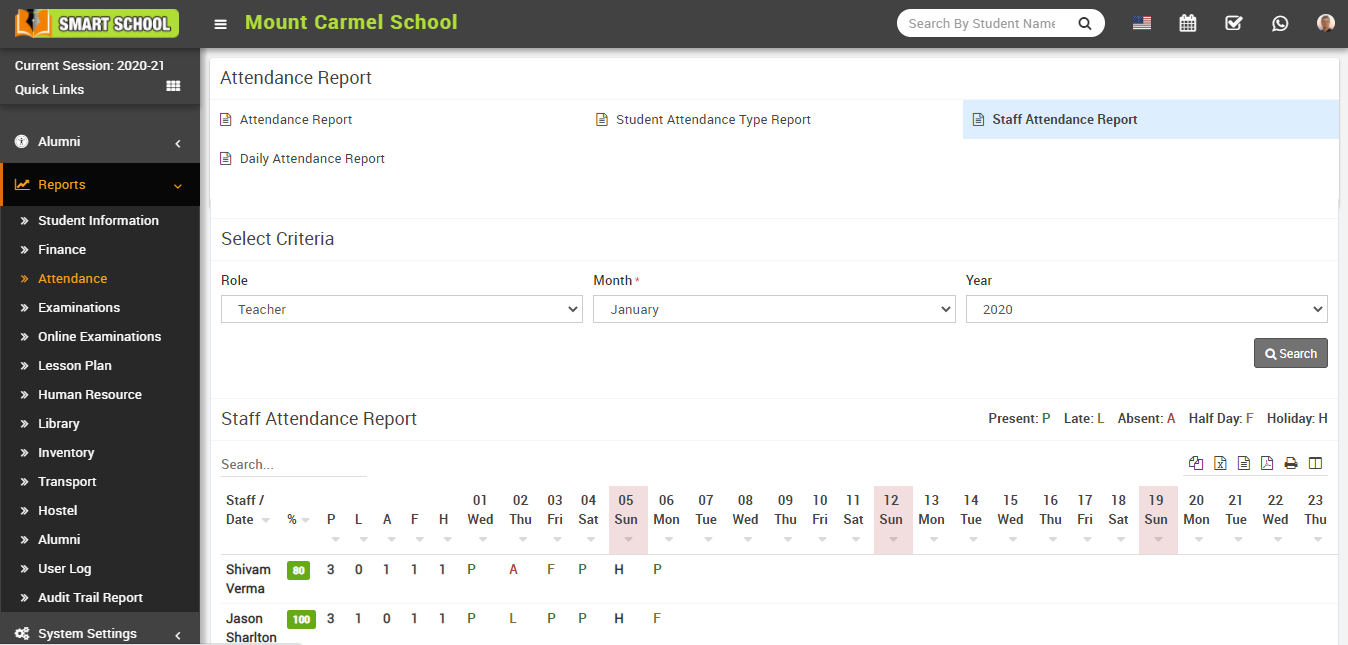
How to check Staff Attendance Report?
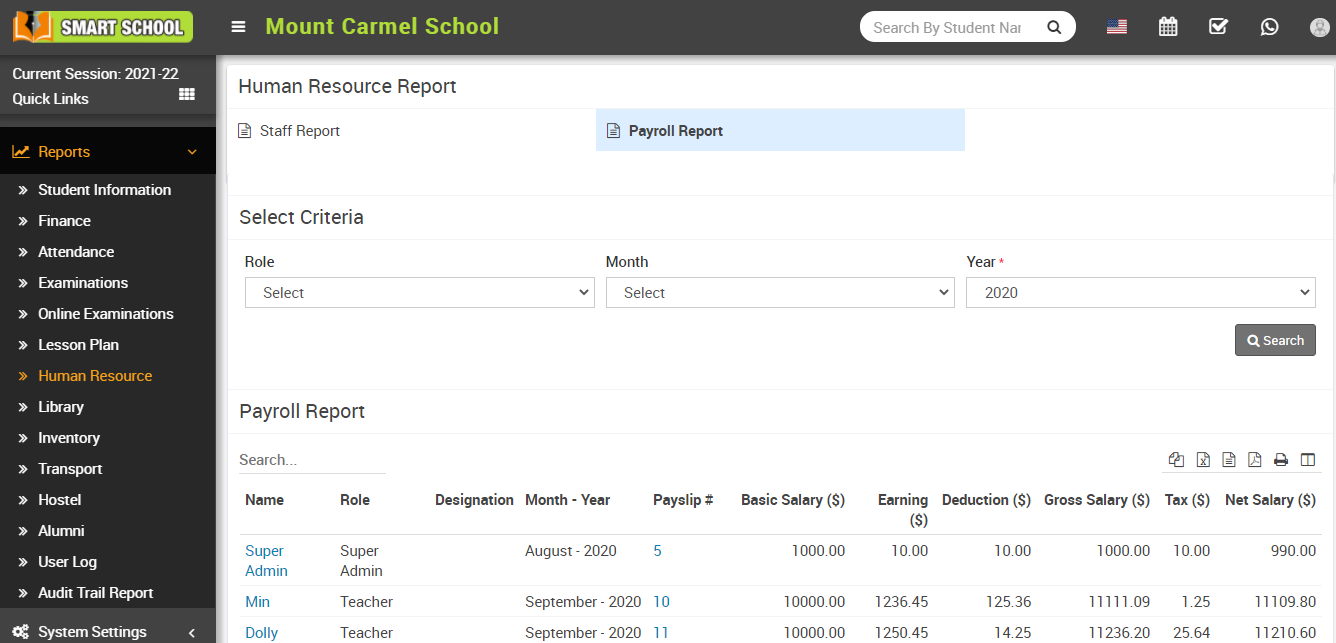
How to check Payroll Report?
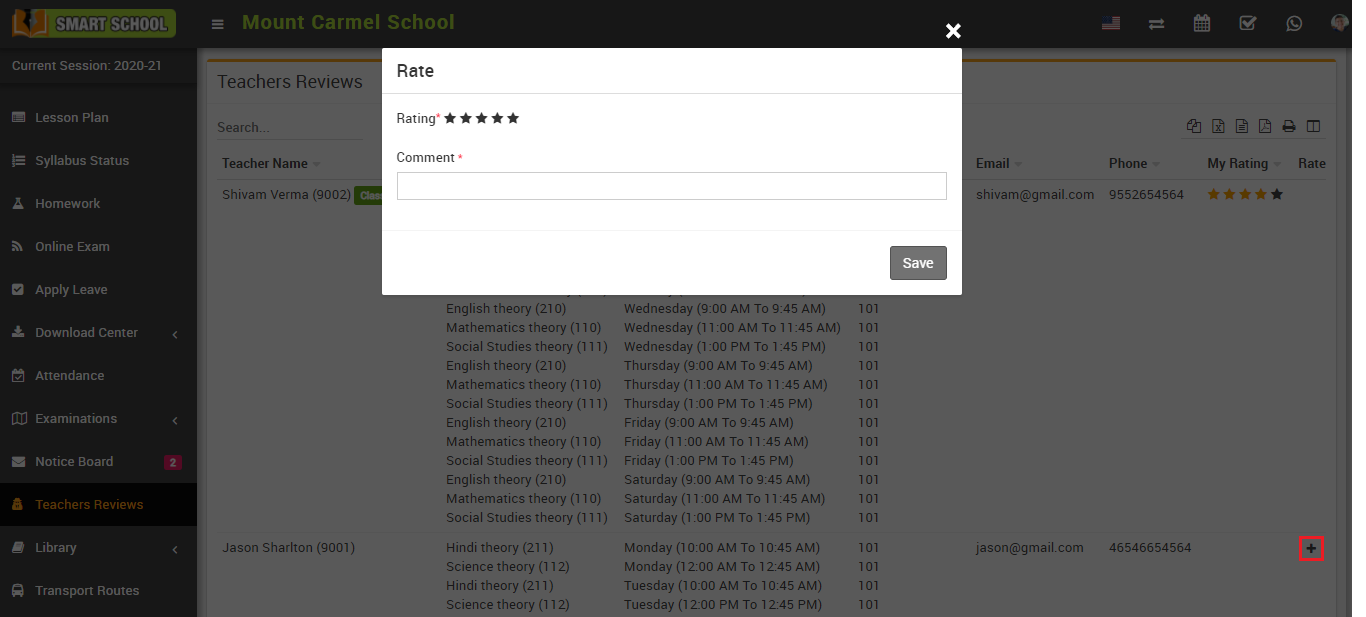
How student can check teacher review?
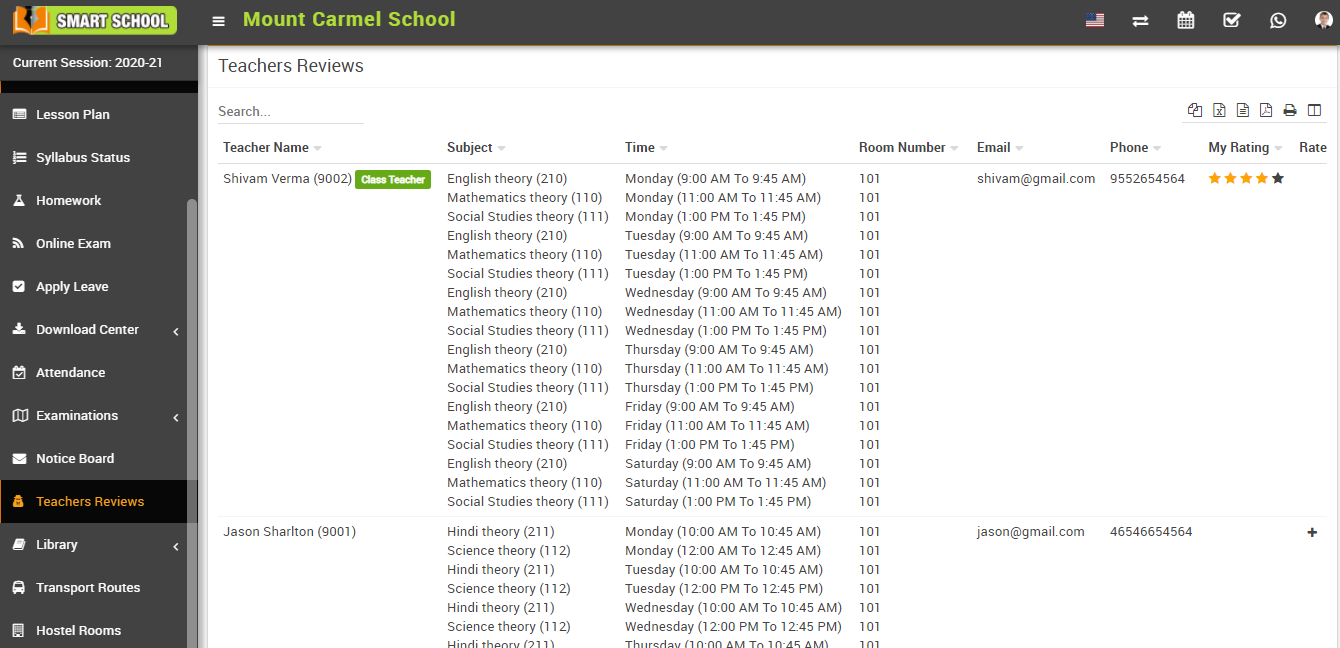
To add teacher rate click on Add icon present in Rate column in teachers review page, at click of this icon Rate modal will be open. Here student can give Rating and Comment and then click on Save button.