About Certificate
Certificate Module Workflow- First we will design student certificate or id card then we will generate/print them. If you will properly configure background, height, width etc. settings then you can design professional quality certificate or id cards very easily.
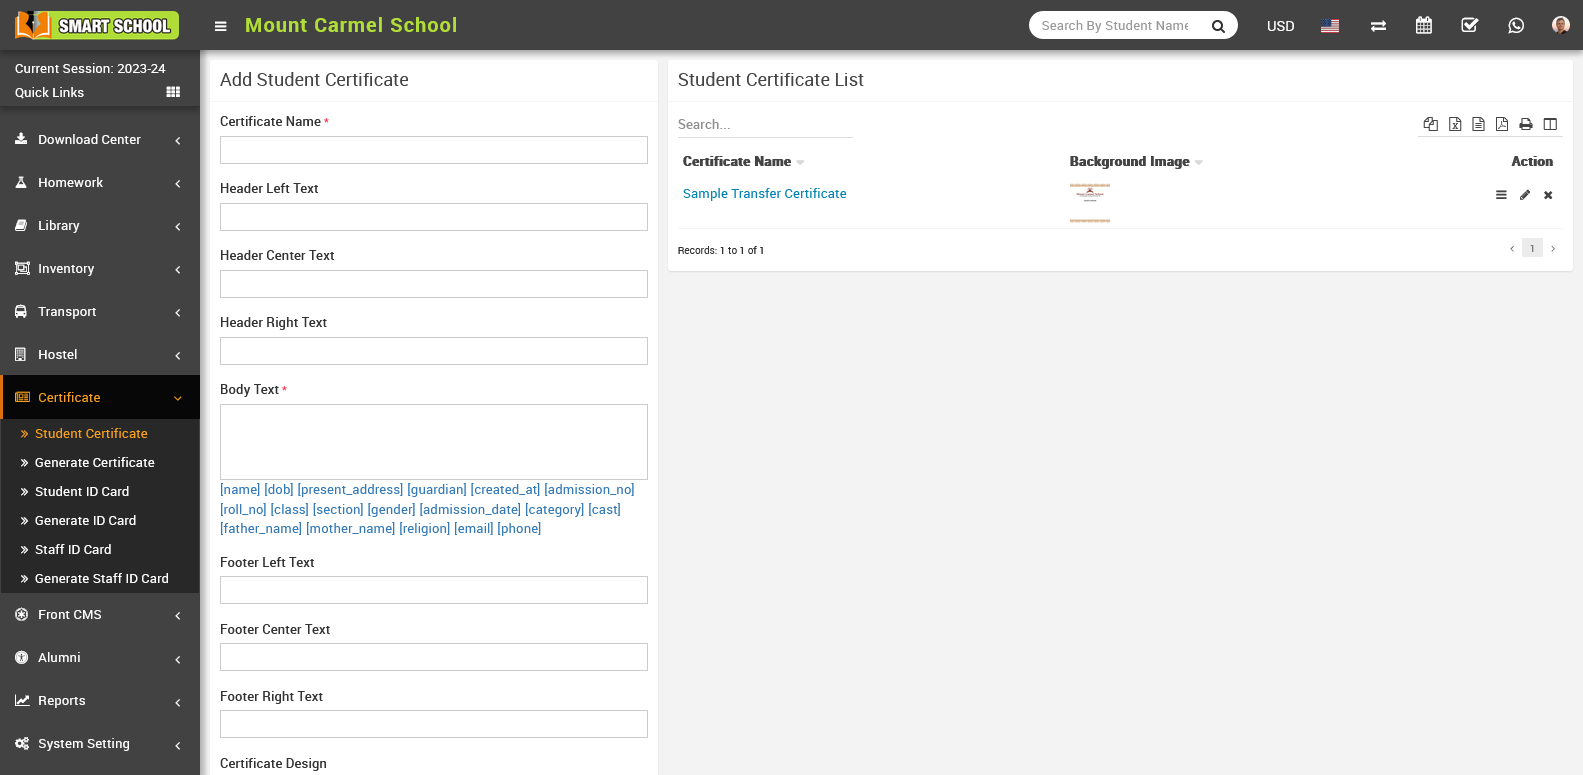
How to add student Certificate?

To edit student certificate, click on Edit icon and to delete student certificate, click on Delete icon present in Action column in student certificate list.
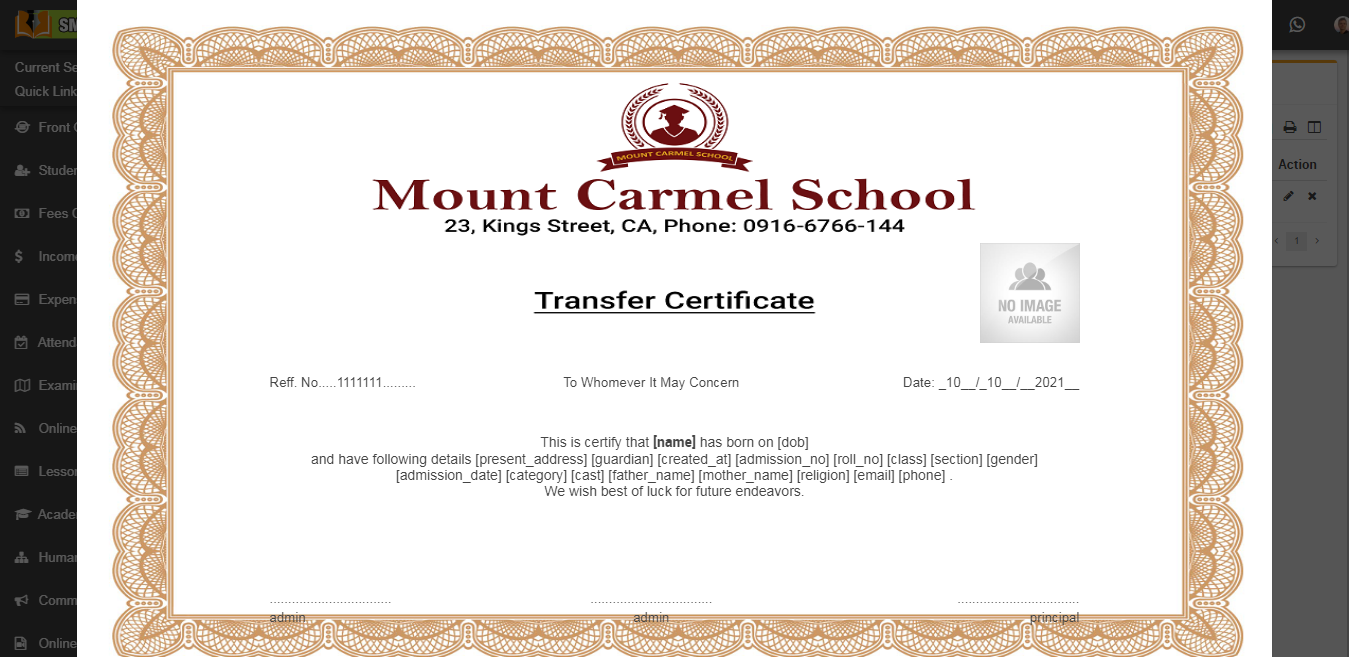
To preview student certificate, click on View icon present in Action column, at click of this icon Certificate will be open.
Note: In certificate design we will suggest you to try to edit certificate design parameters by edit as many time possible until you will get your perfect design. You have to adjust many time design parameters to get your perfect design. While adjusting design parameters take browser final print preview or print as pdf option from browser as final reference of print design by using Generate Certificate link. Otherwise in final print you will get little bit deviation in design.
How to generate Certificate?
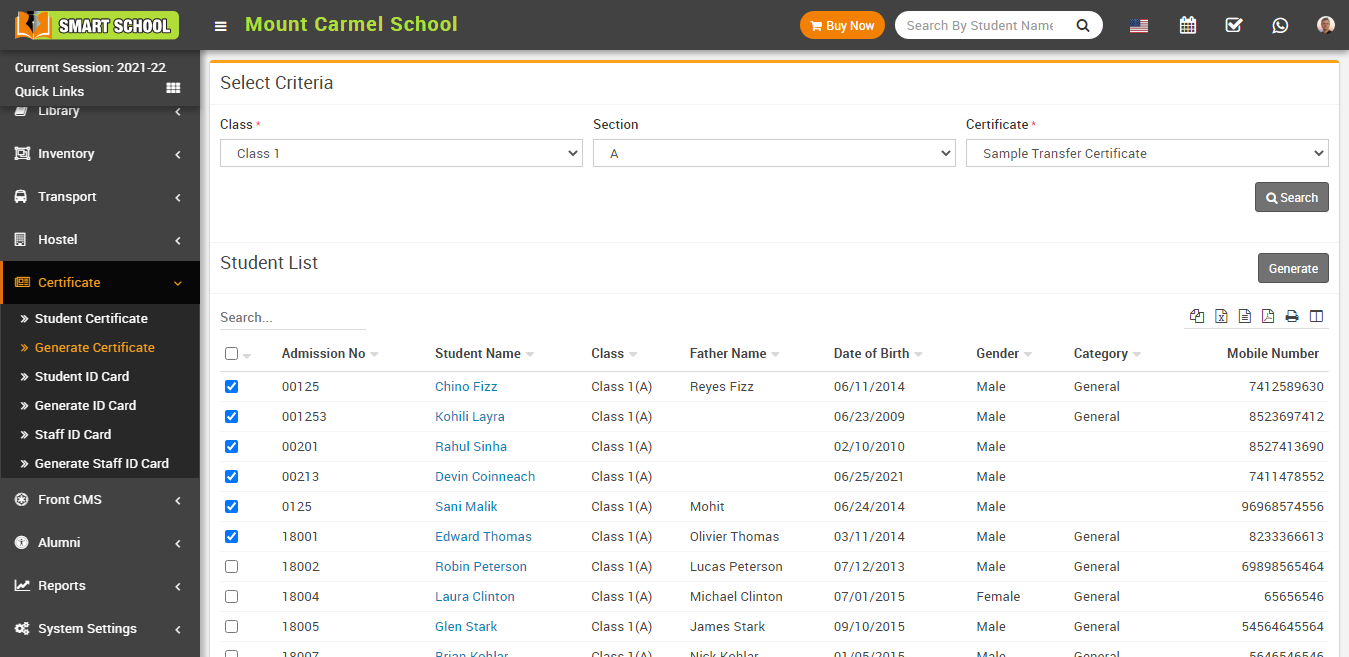
Now select student for generate certificate and click on Generate button present at right side in the student list, at click of this button certificate will be open.
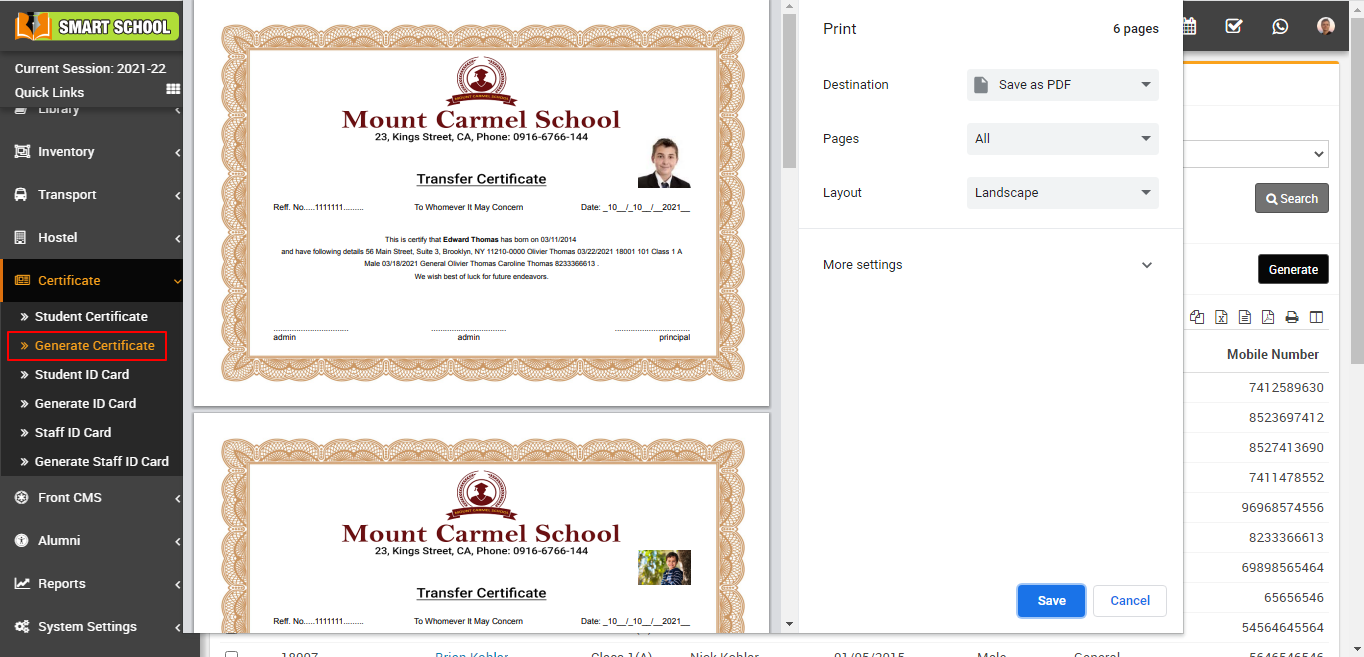
Note - Do not print the certificate directly, here select the Destination (save as pdf) and save pdf file and then print certificate using this pdf file.
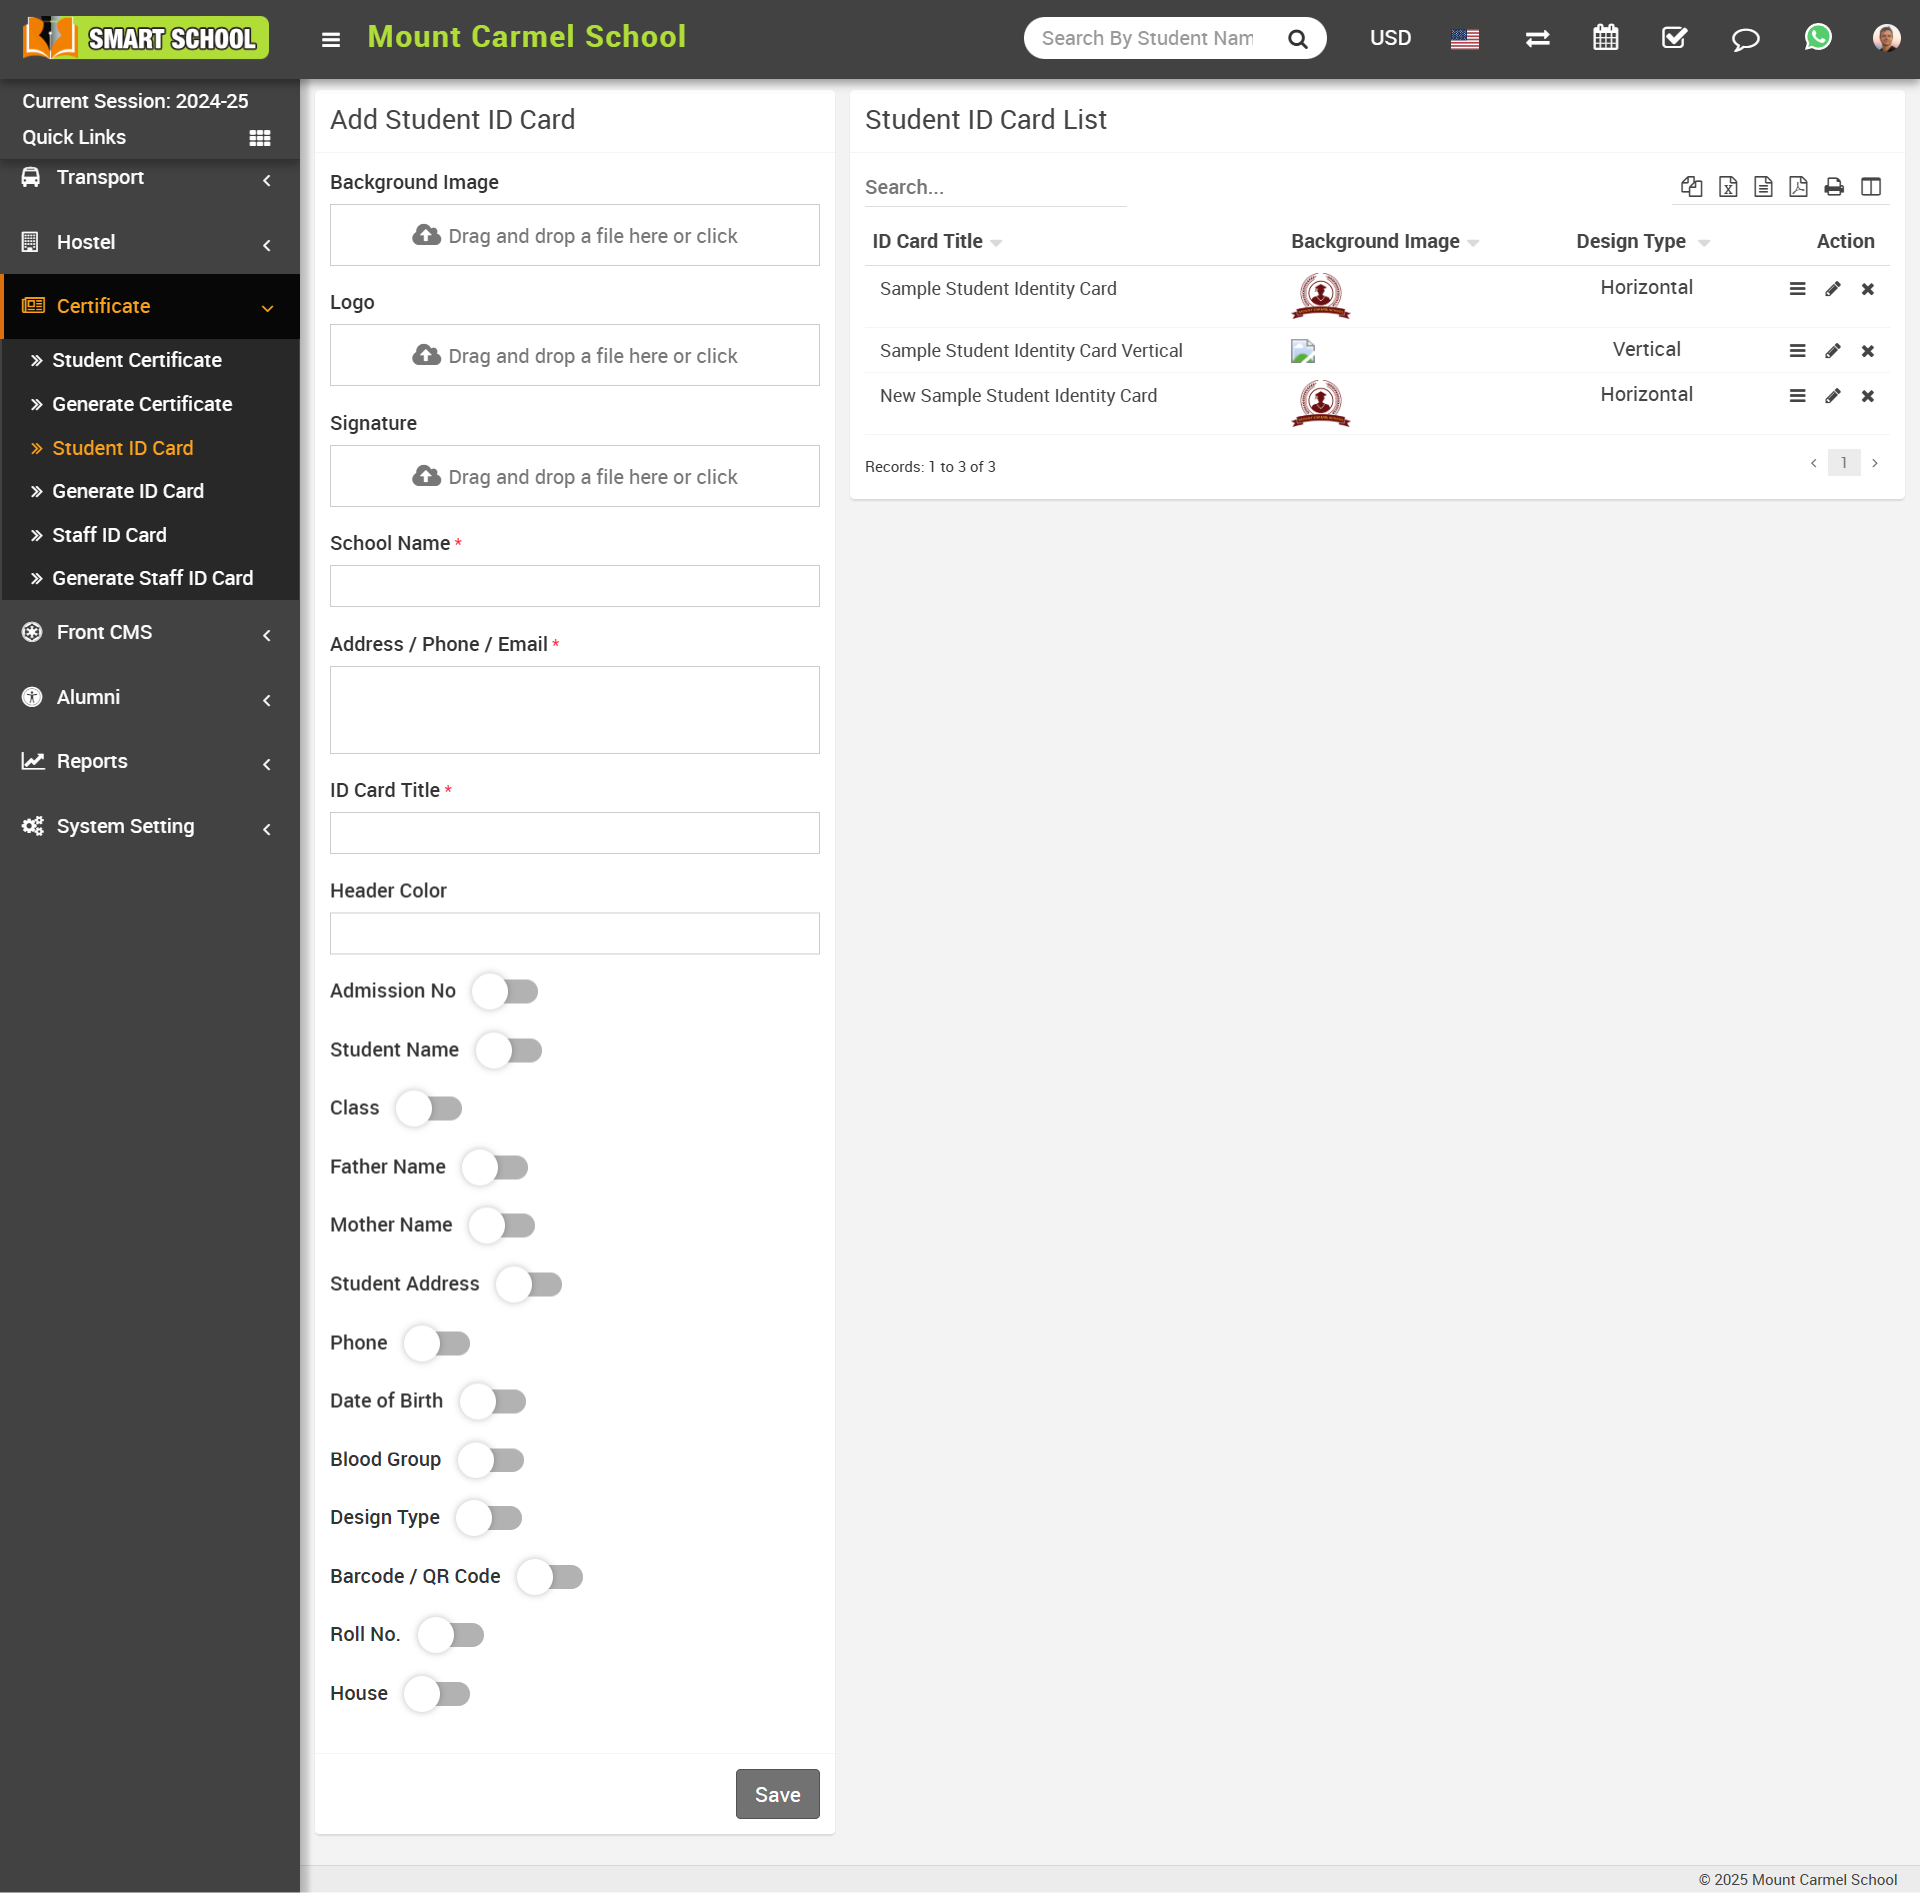
How to add student ID card?
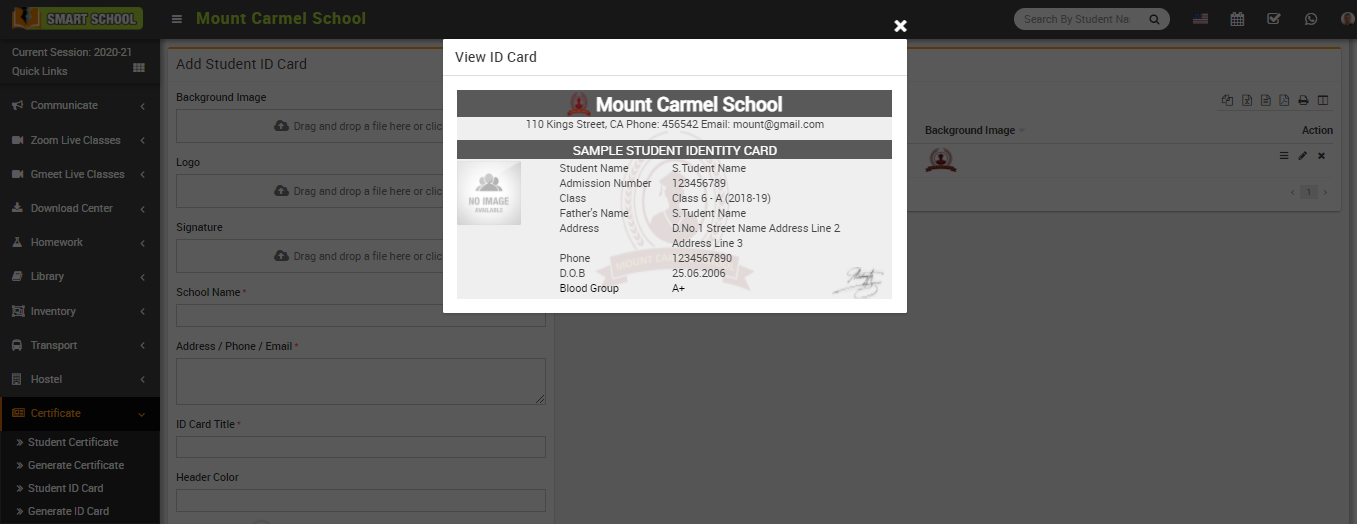
To view ID card click on View icon present at action column in the student ID card List page, at click of this icon ID card will be open.
To edit ID card click on Edit icon and to delete ID card click on Delete icon present in the student ID card list.
Note: In ID card design we will suggest you to try to edit ID card design parameters by edit as many time possible until you will get your perfect design. You have to adjust many time design parameters to get your perfect design. While adjusting design parameters take browser final print preview or print as pdf option from browser as final reference of print design from Generate ID Card link. Otherwise in final print you will get little bit deviation in design. All ID card designs can be see right side of this page.
How to generate ID card?
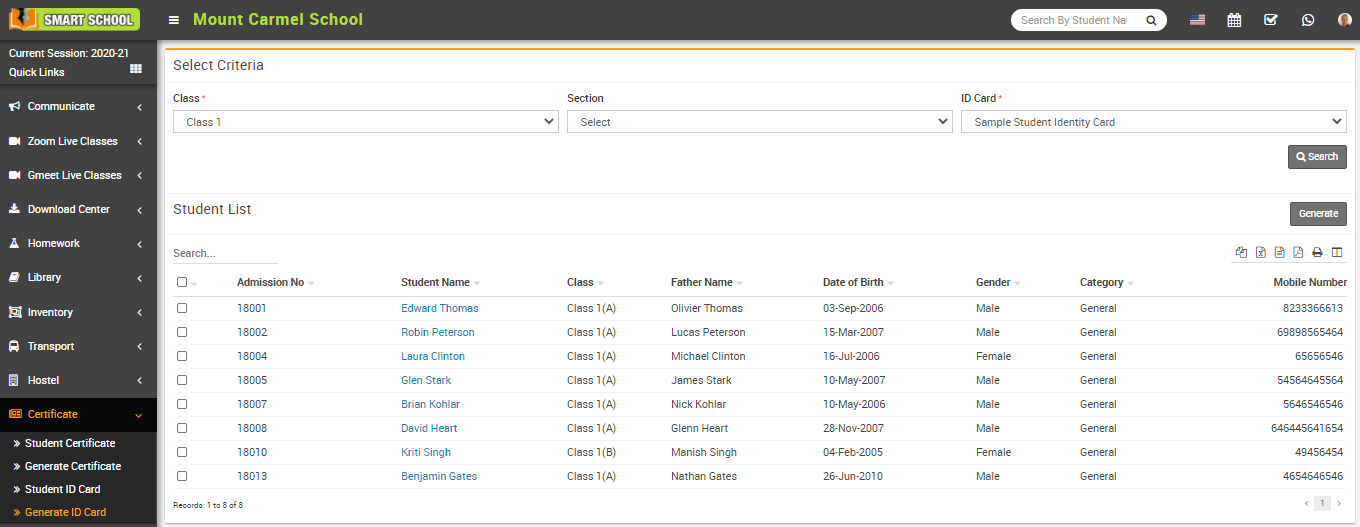
Now select student for generate ID card and click on Generate button present at right side in the student list, at click of this button students ID card will be open.
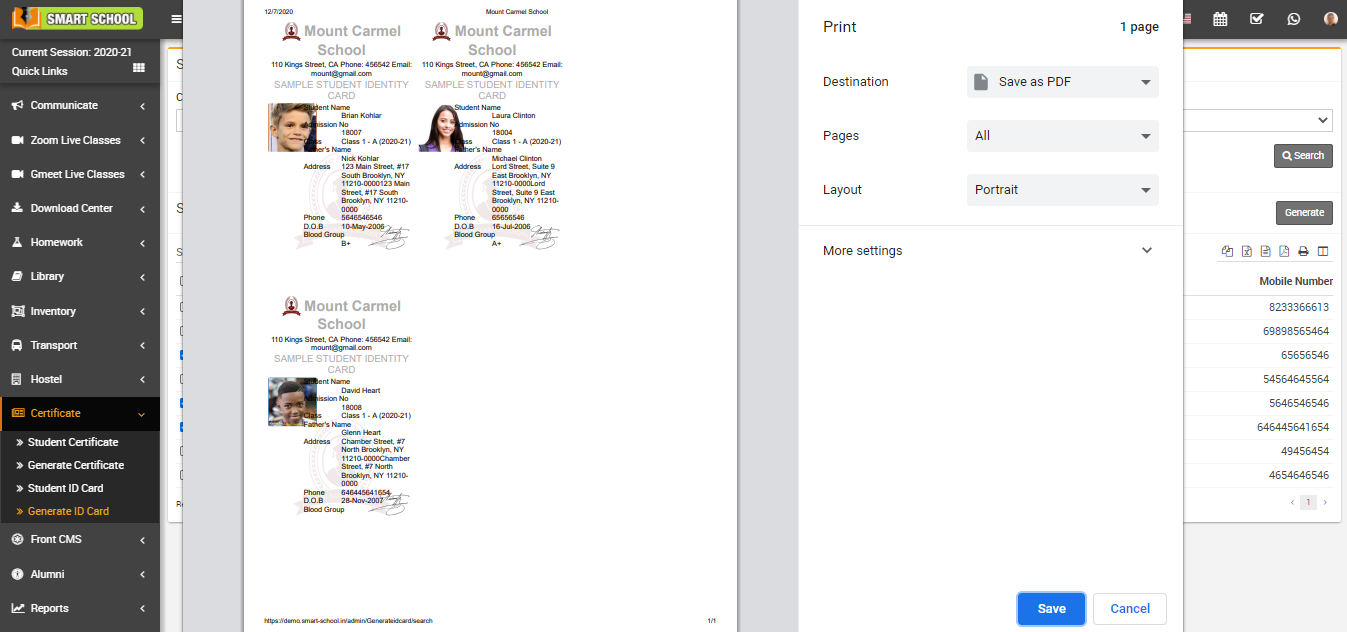
Note: Do not print the ID card directly, here select the Destination (save as pdf) and save pdf file and then print ID card using this pdf file.
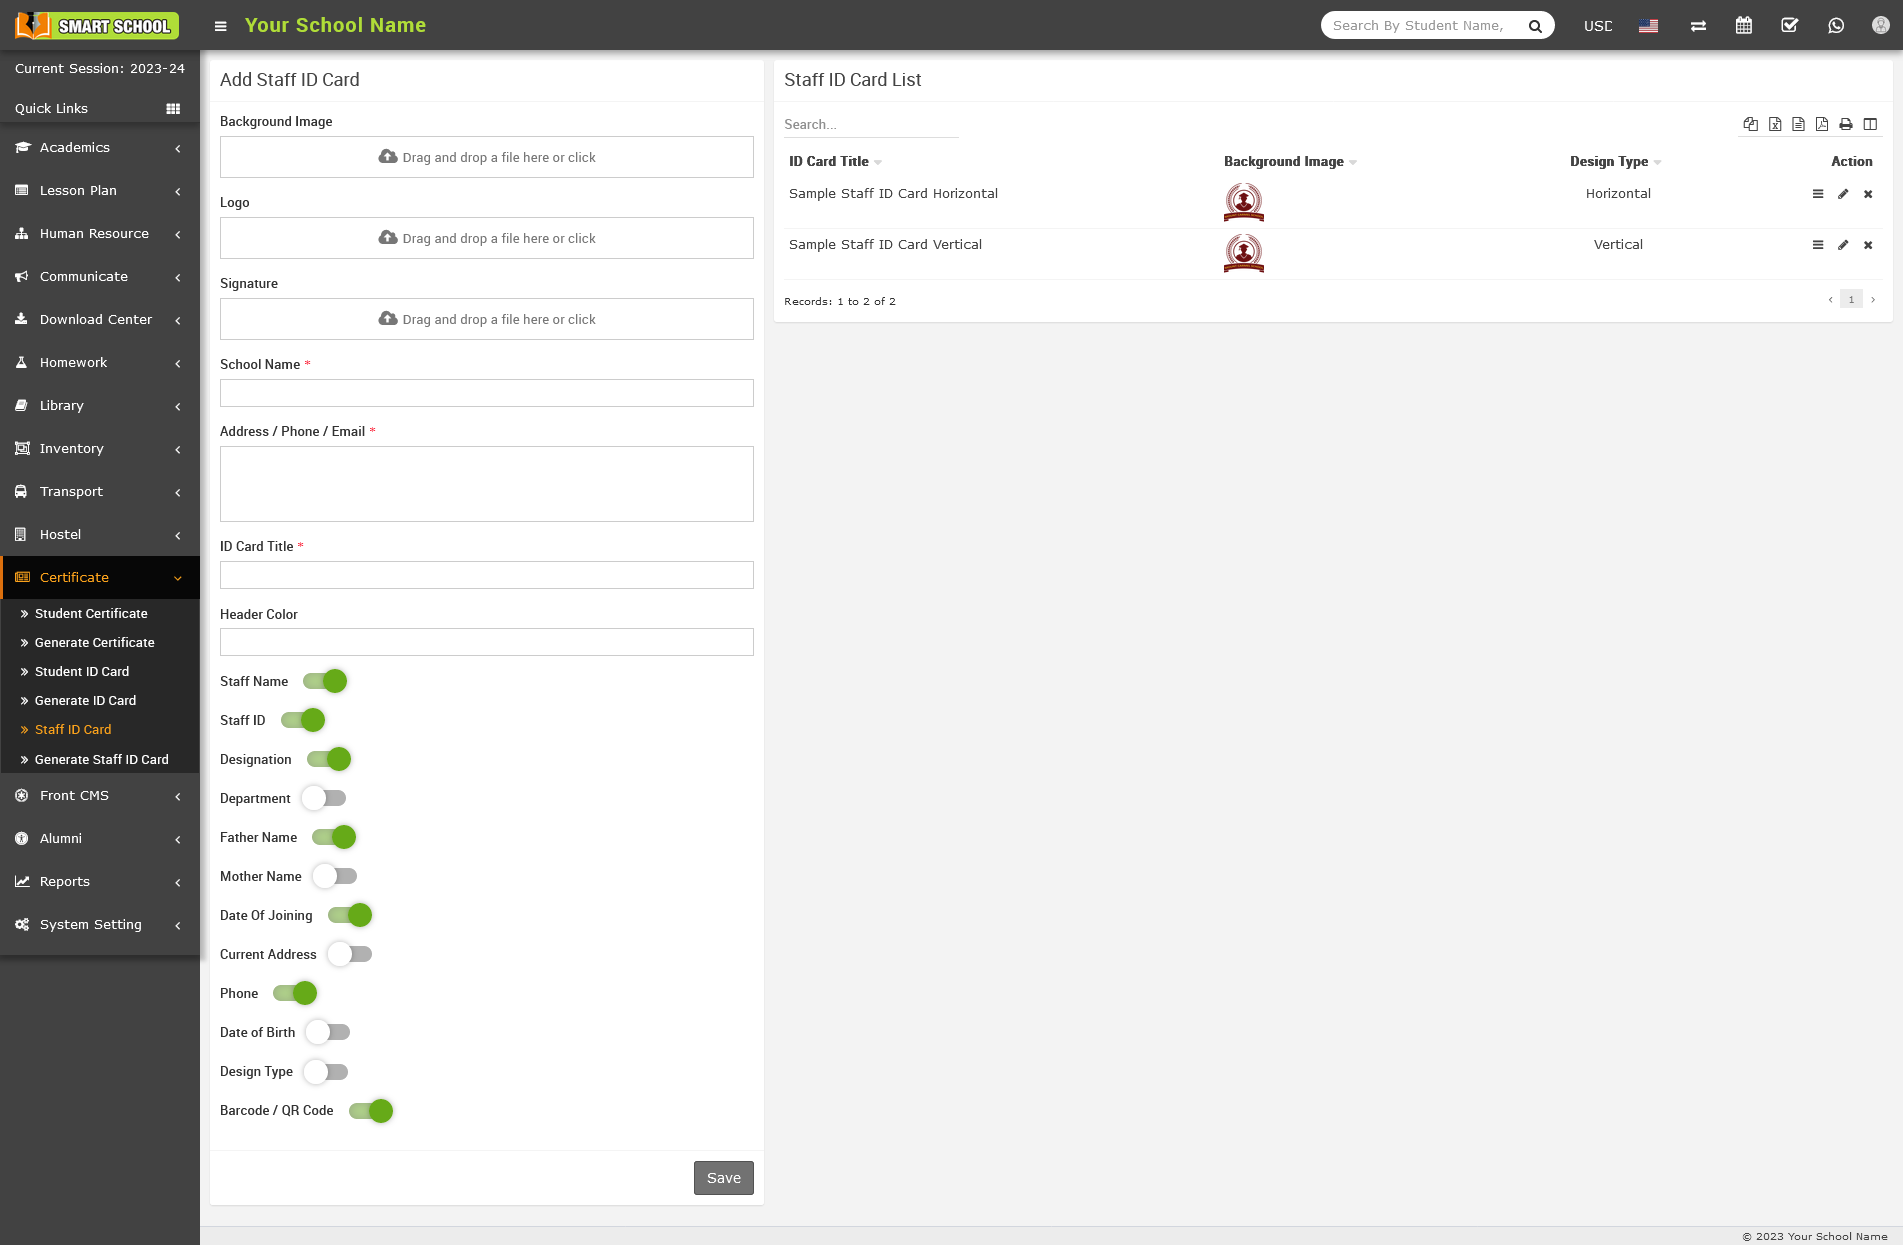
How to create staff/admin id card and show Barcode and QR Code on id?
Note :- For show the Barcode and QR Code on the staff/admin id, you must enable the button of Barcode / QR Code mention on the last in below screenshot.
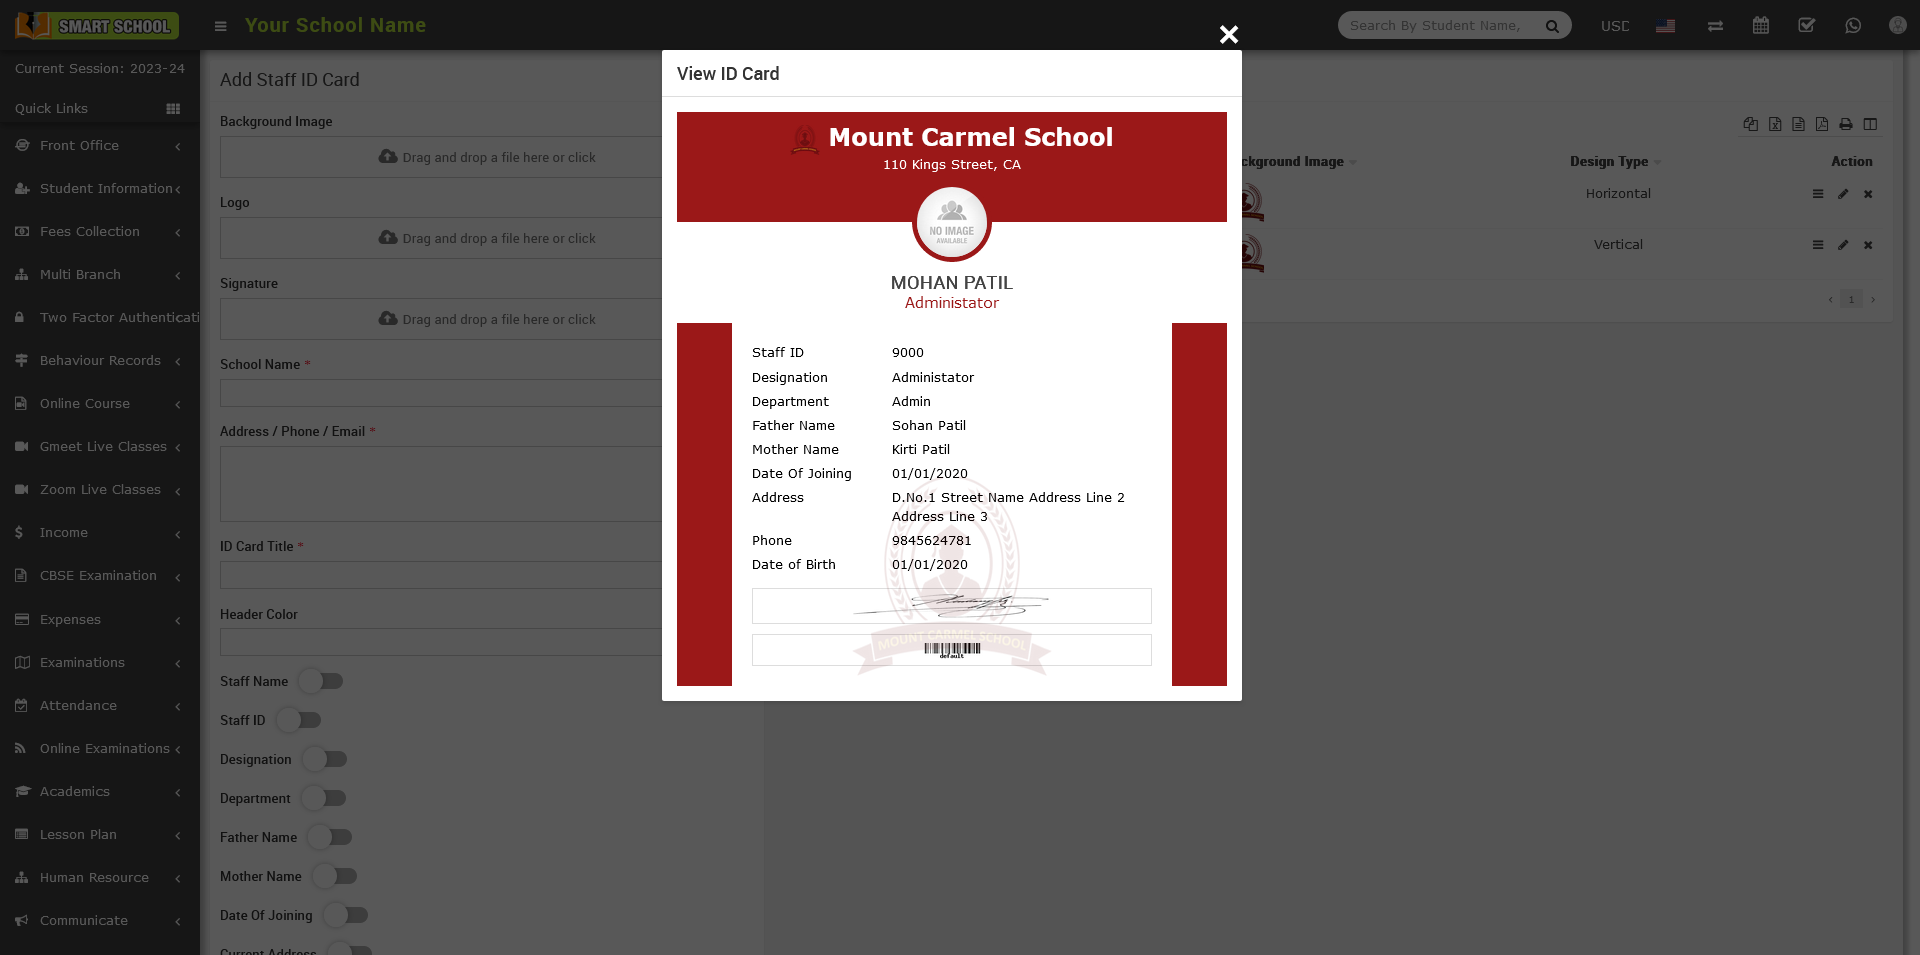
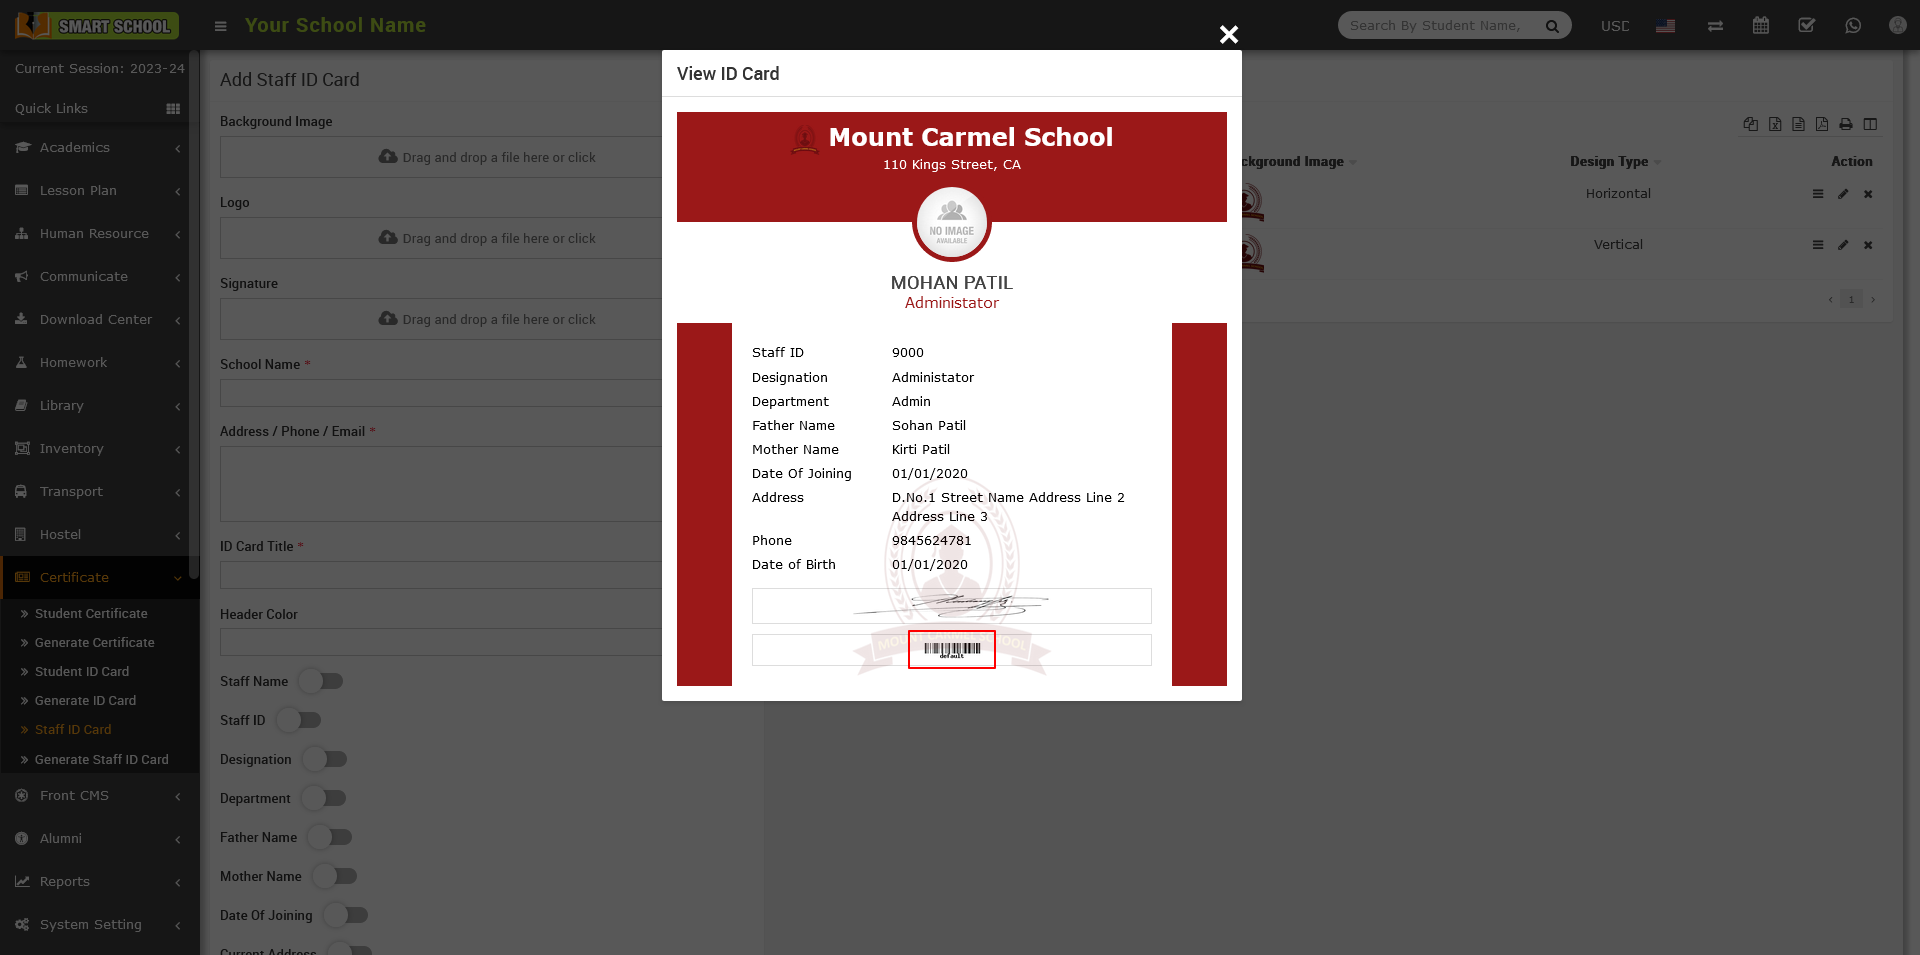
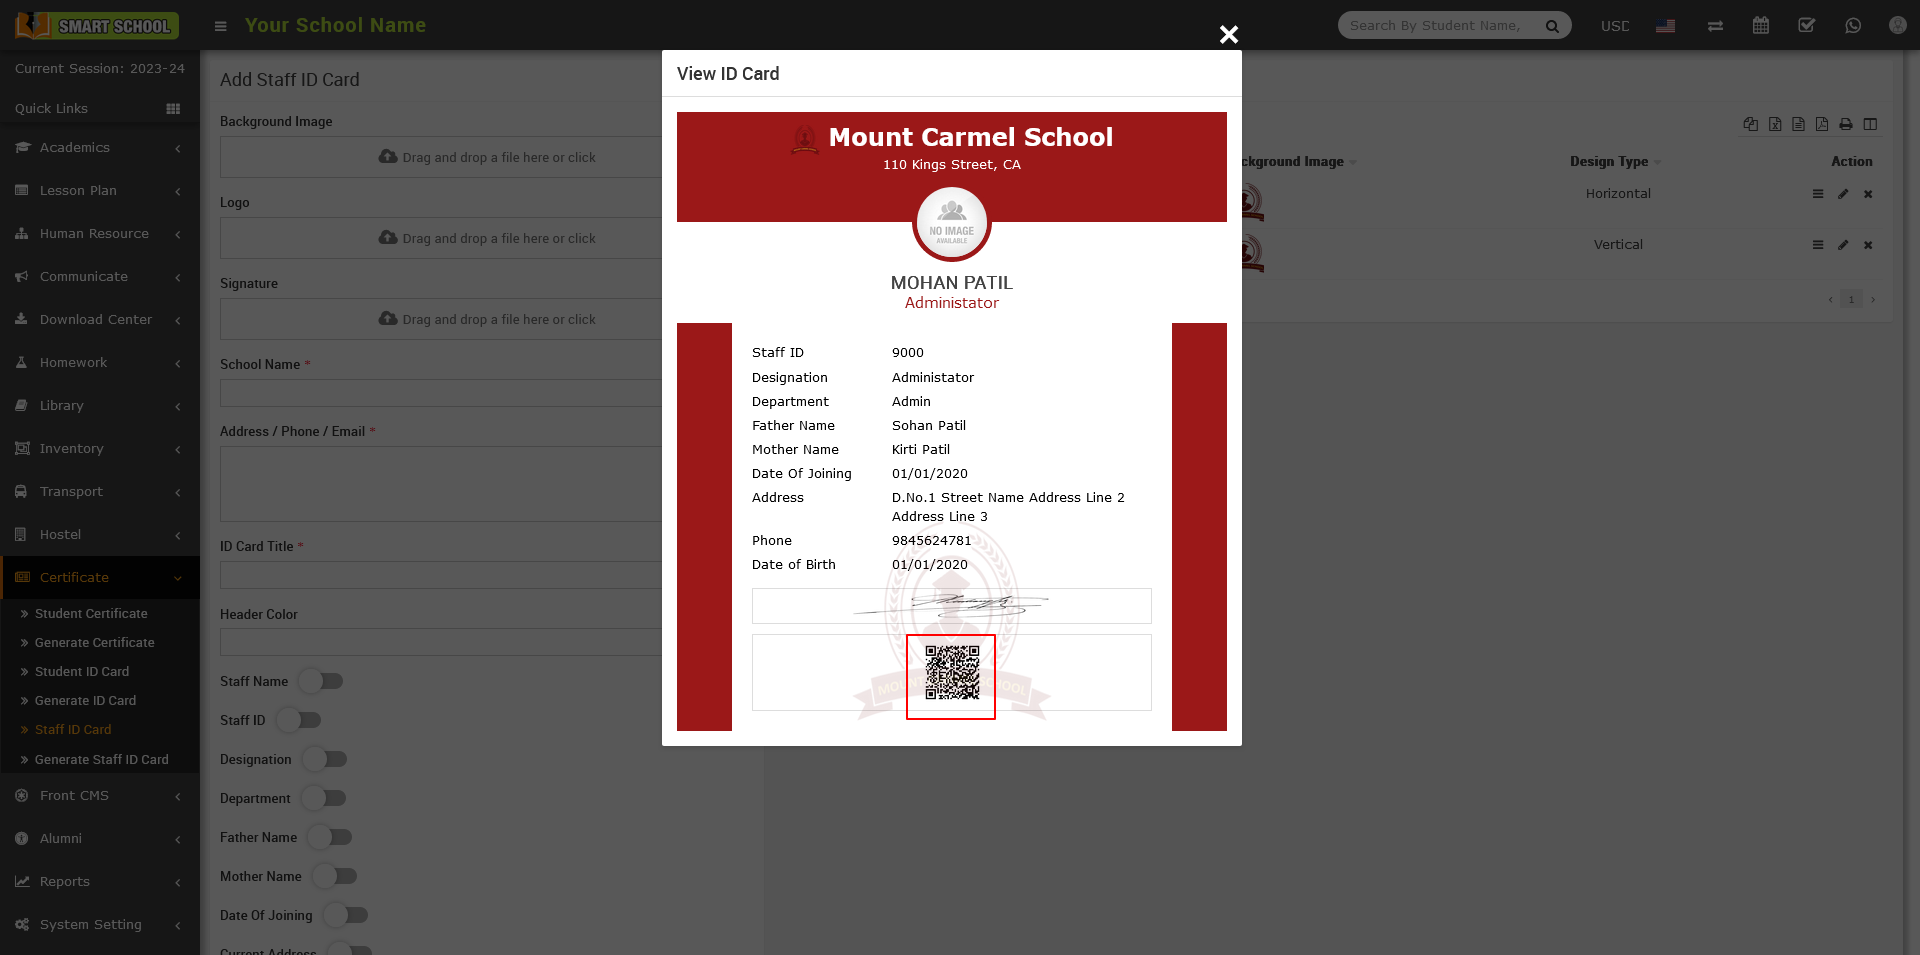
To view Staff ID card click on the View icon present in the Action column.
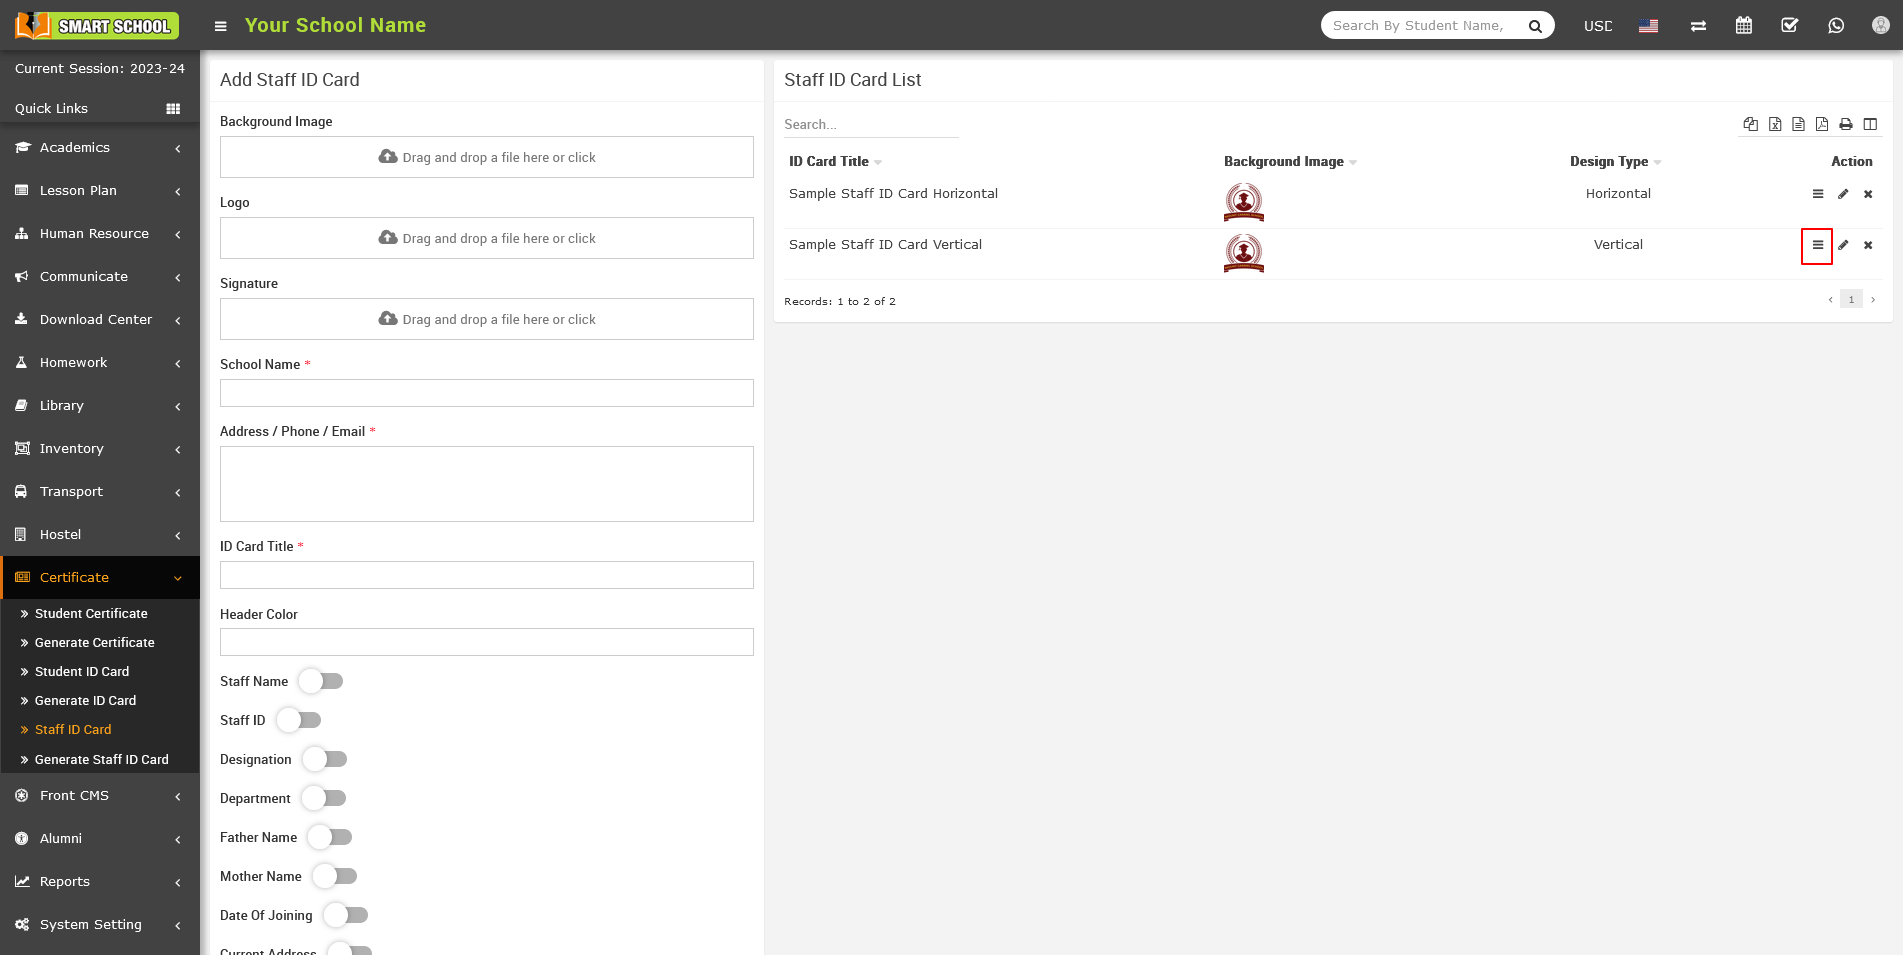
To edit Staff ID card click on the Edit icon and to delete Staff ID card click on the Delete icon present in the Action column
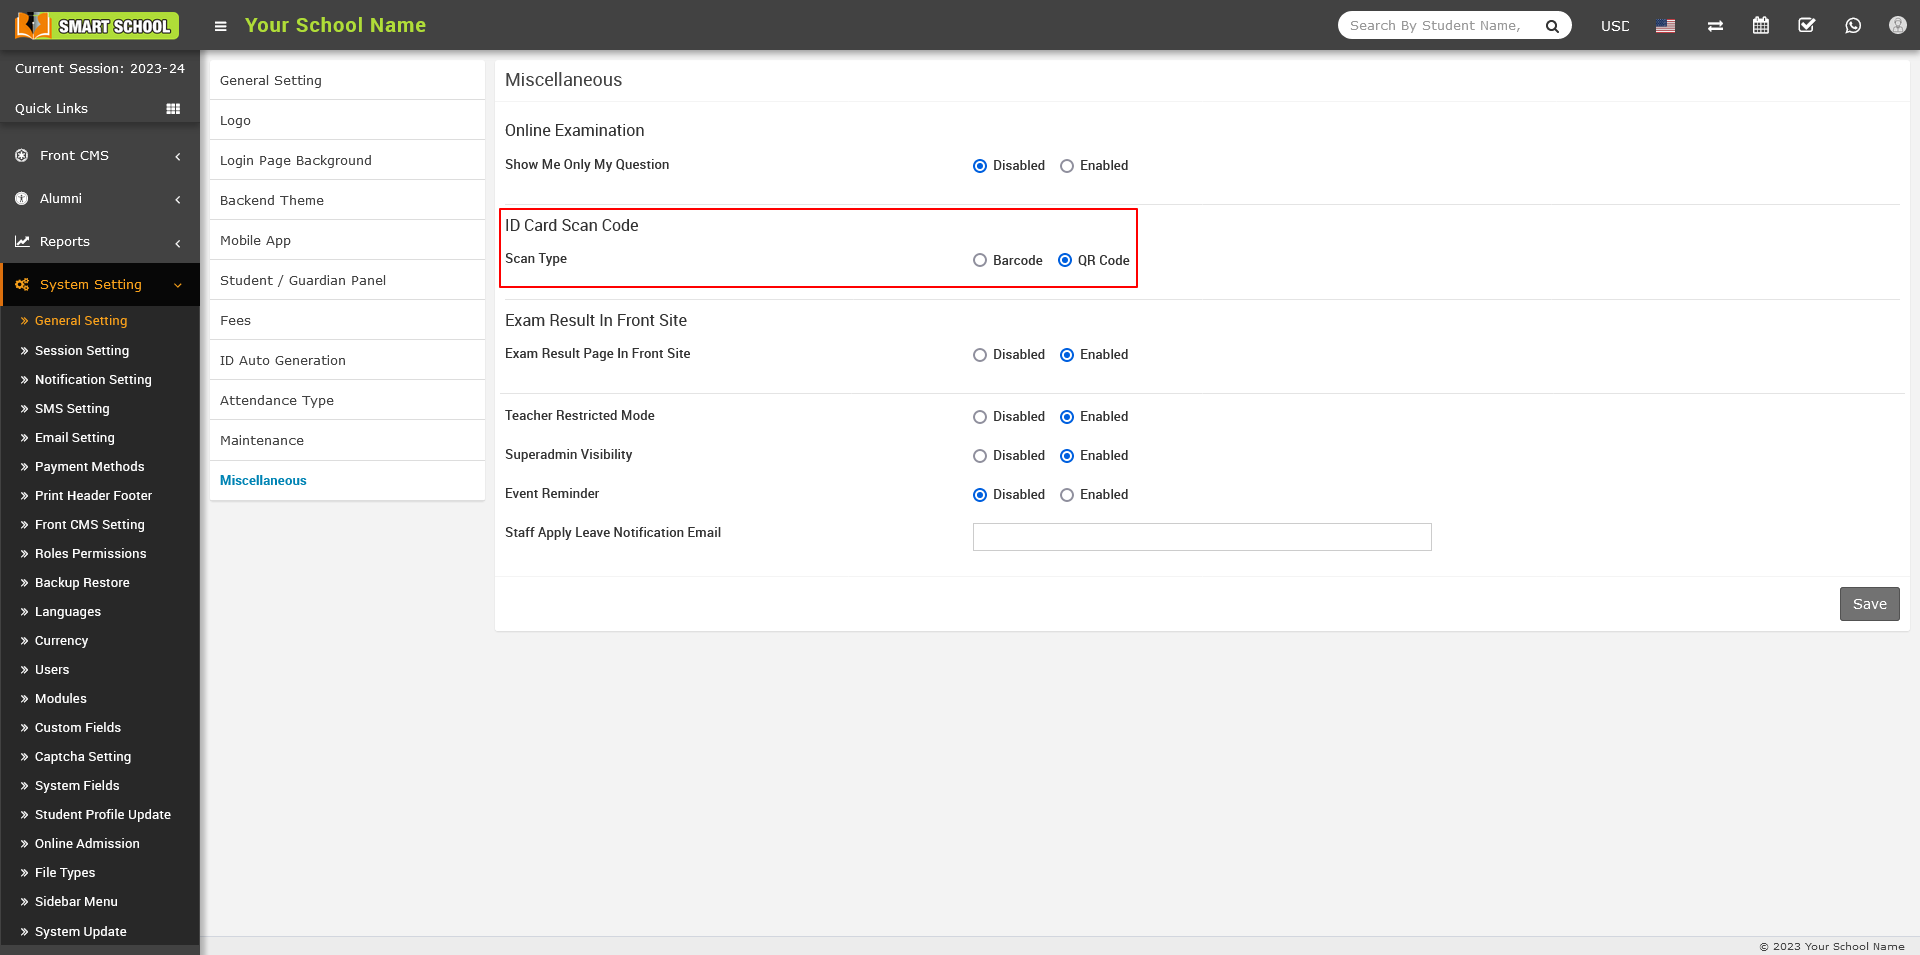
To add the Barcode in the staff/admin ID card , go to System Settings > General Settings > Miscellaneous. Here, you will find the second option that displays the ID Card Scan Code.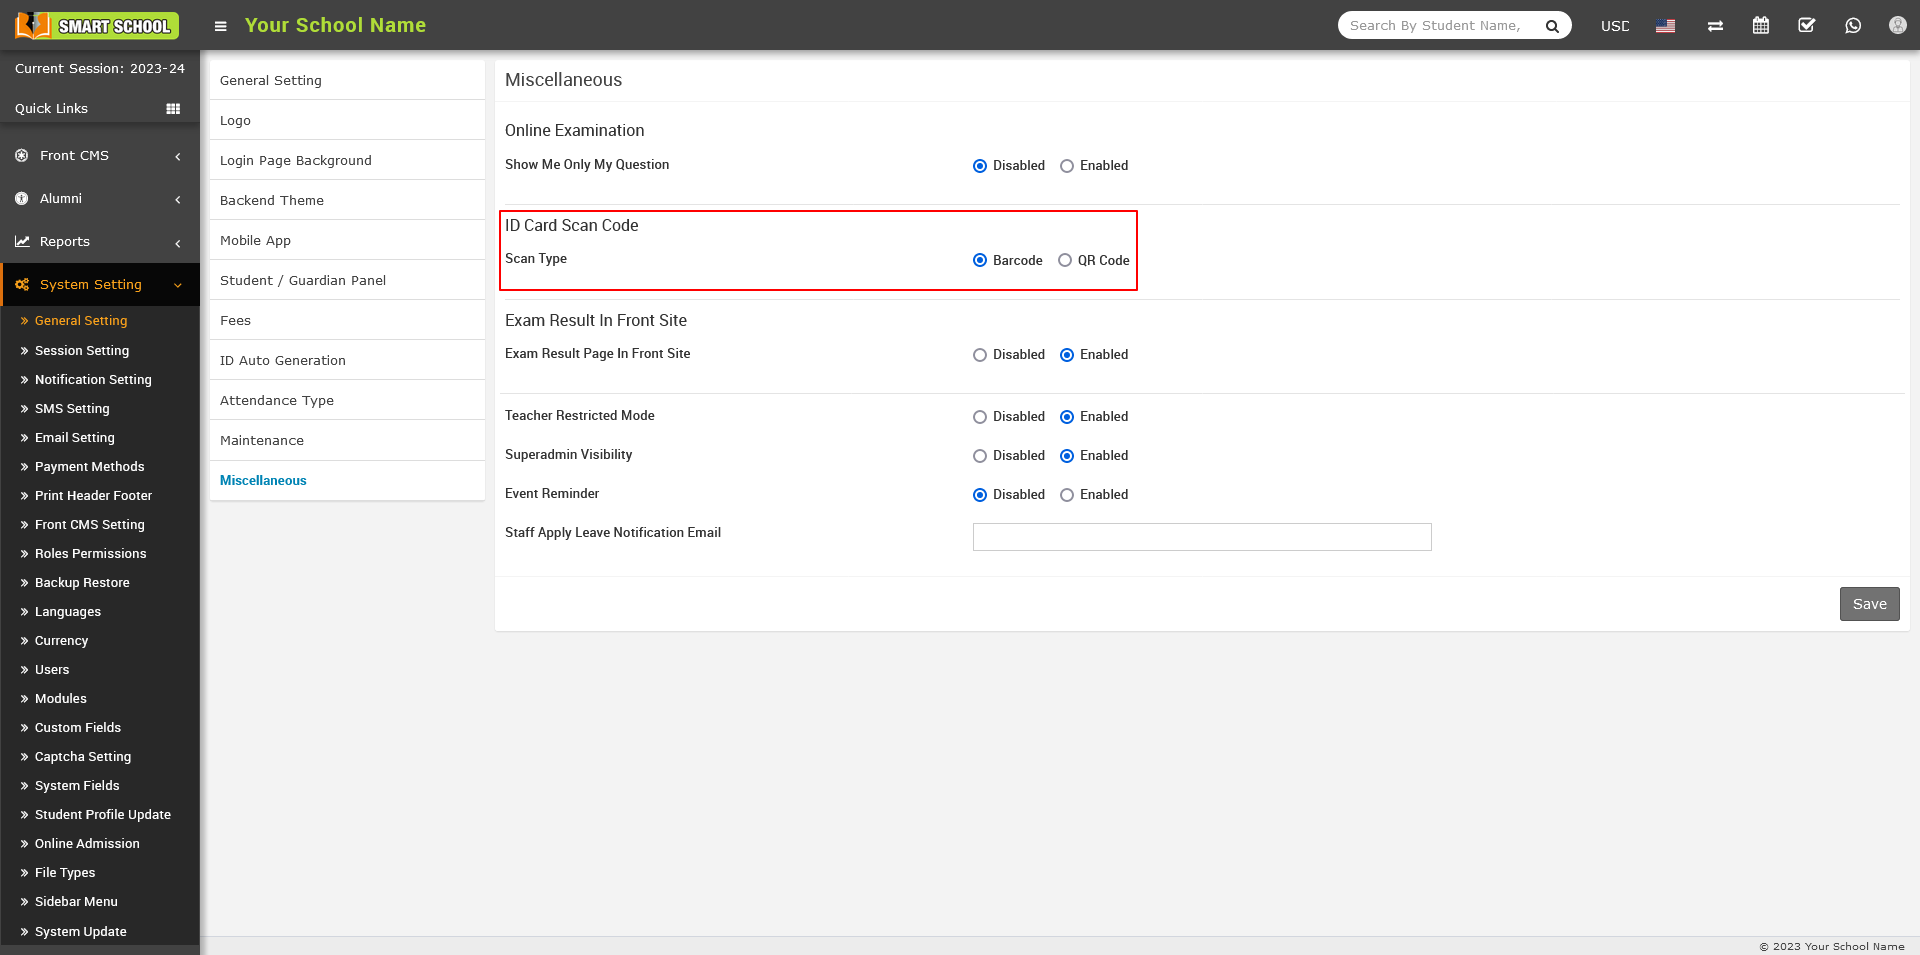
After enabling the Barcode in the above settings, Go to Certificate > Staff ID Card. On the right side, you will see a list of staff ID card. Click on the view icon in the action column.

Now click on the view button, staff id card will be open and bottom you can see the barcode on it.
To add the QR Code in the staff/admin ID card , go to System Settings > General Settings > Miscellaneous. Here, you will find the second option that displays the ID Card Scan Code.
After enabling the QR Code in the above settings, Go to Certificate > Staff ID Card. On the right side, you will see a list of staff ID card. Click on the view icon in the action column.
Now click on the view button, staff id card will be open and bottom you can see the QR Code on it.
How to generate barcode and QR code for admin/staff on his profile?
To generate the Barcode in the admin/staff ID card and his profile, first you need to go to System Settings > General Settings > Miscellaneous. Here, you will find the second setting option that displays the ID Card Scan Code. In the ID card scan code section, you will find two available options for scan type: the first is Barcode, and the second option is QR code. Simply enable the Barcode option by clicking on it, and then click on the Save button located at the bottom right to apply the changes.

Not go to add barcode for admin/staff, go to the Certificate > Generate Staff ID Card then Select Role (Admin, Teacher, Accountant, Librarian, Receptionist, Super Admin) and ID Card Template, then click on Search.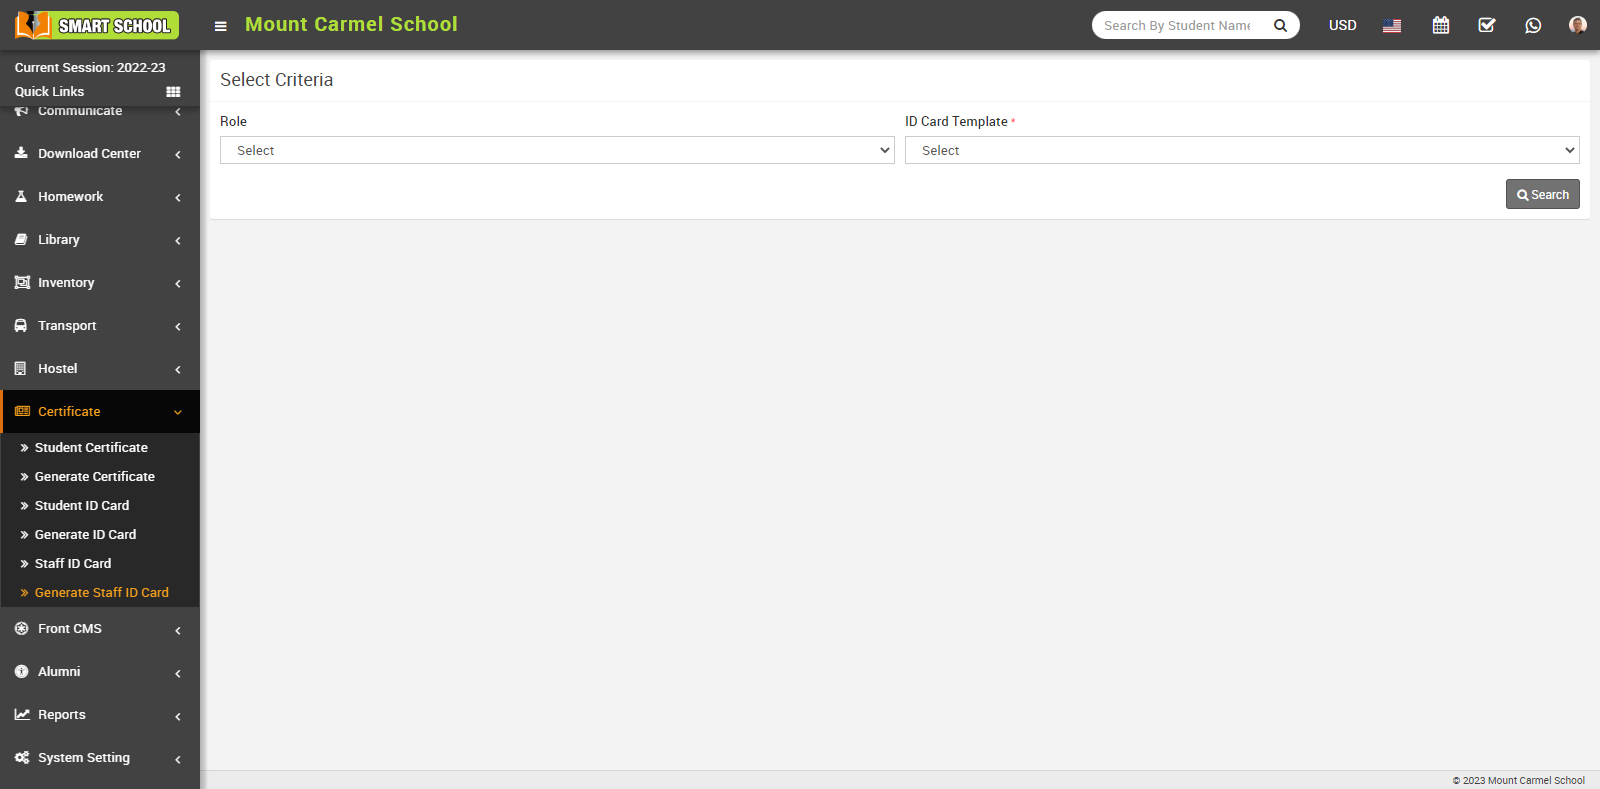
This will open the staff list, select the staff for whose you want to generate the bar code by checking the checkbox, then click the Generate button. 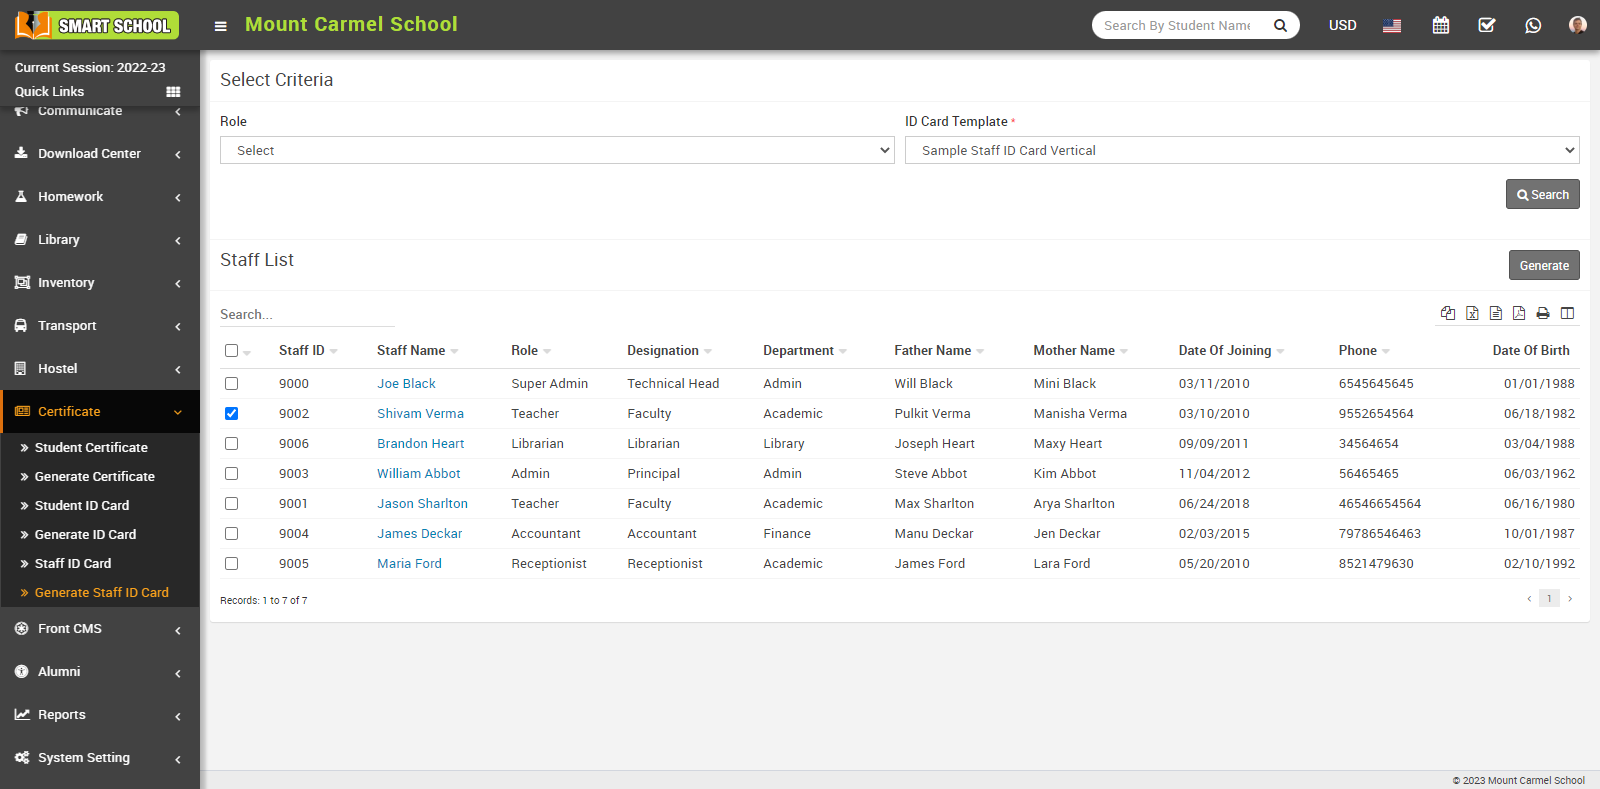
To view the admin/staff barcode, go to Human Resources > Staff Directory, select the role (Admin, Teacher, Accountant, Librarian, Receptionist, Super Admin), and click Search. The staff list will open below, and you can also select Search by Keyword by entering the staff id, name, or role keyword to open the staff list for that role. 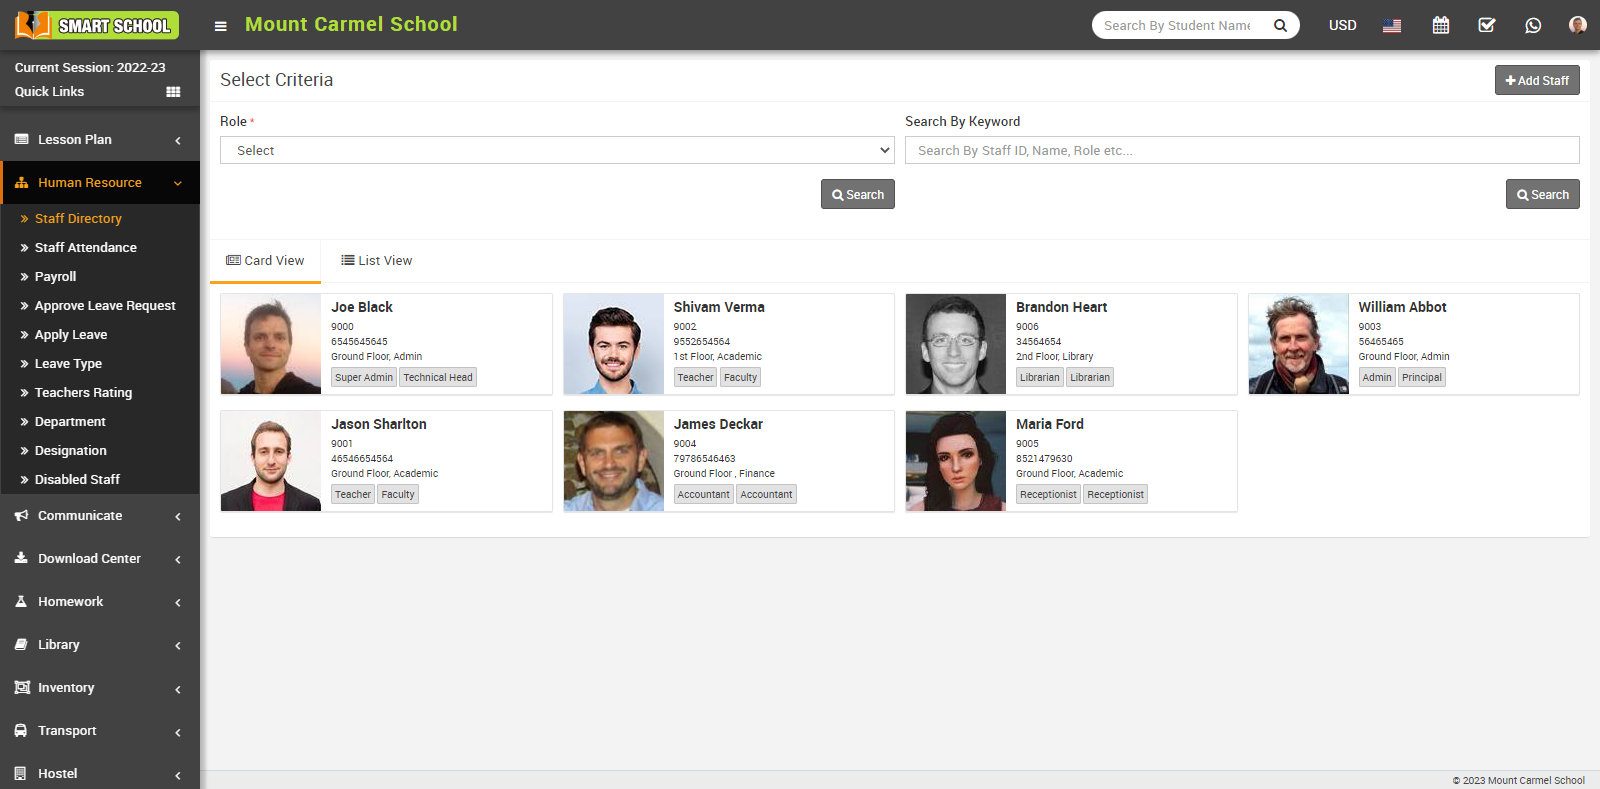
Now click on View button which is showing on staff to open the staff profile.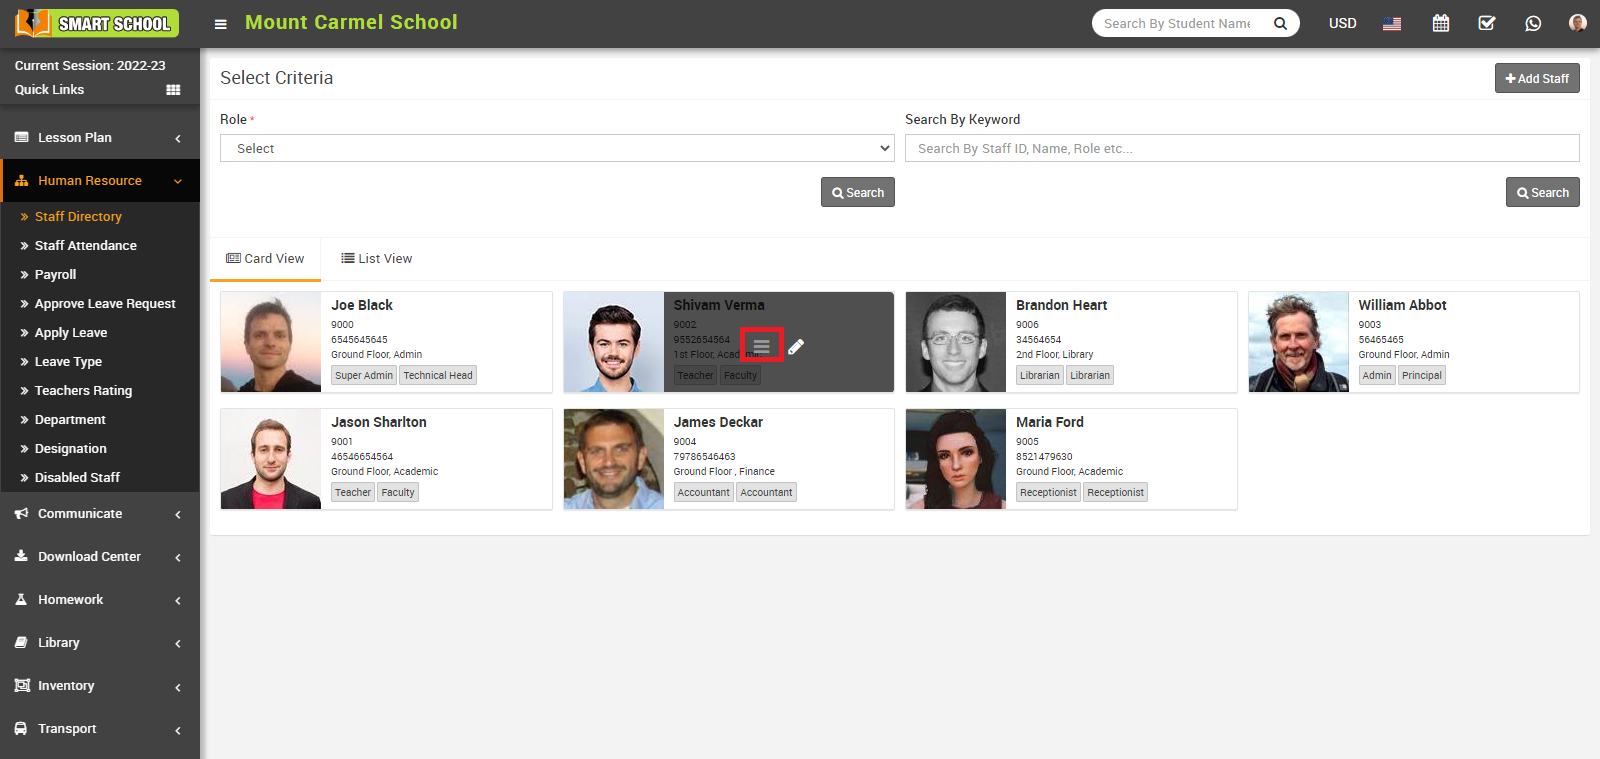
Now, you can see the Staff Barcode in the below.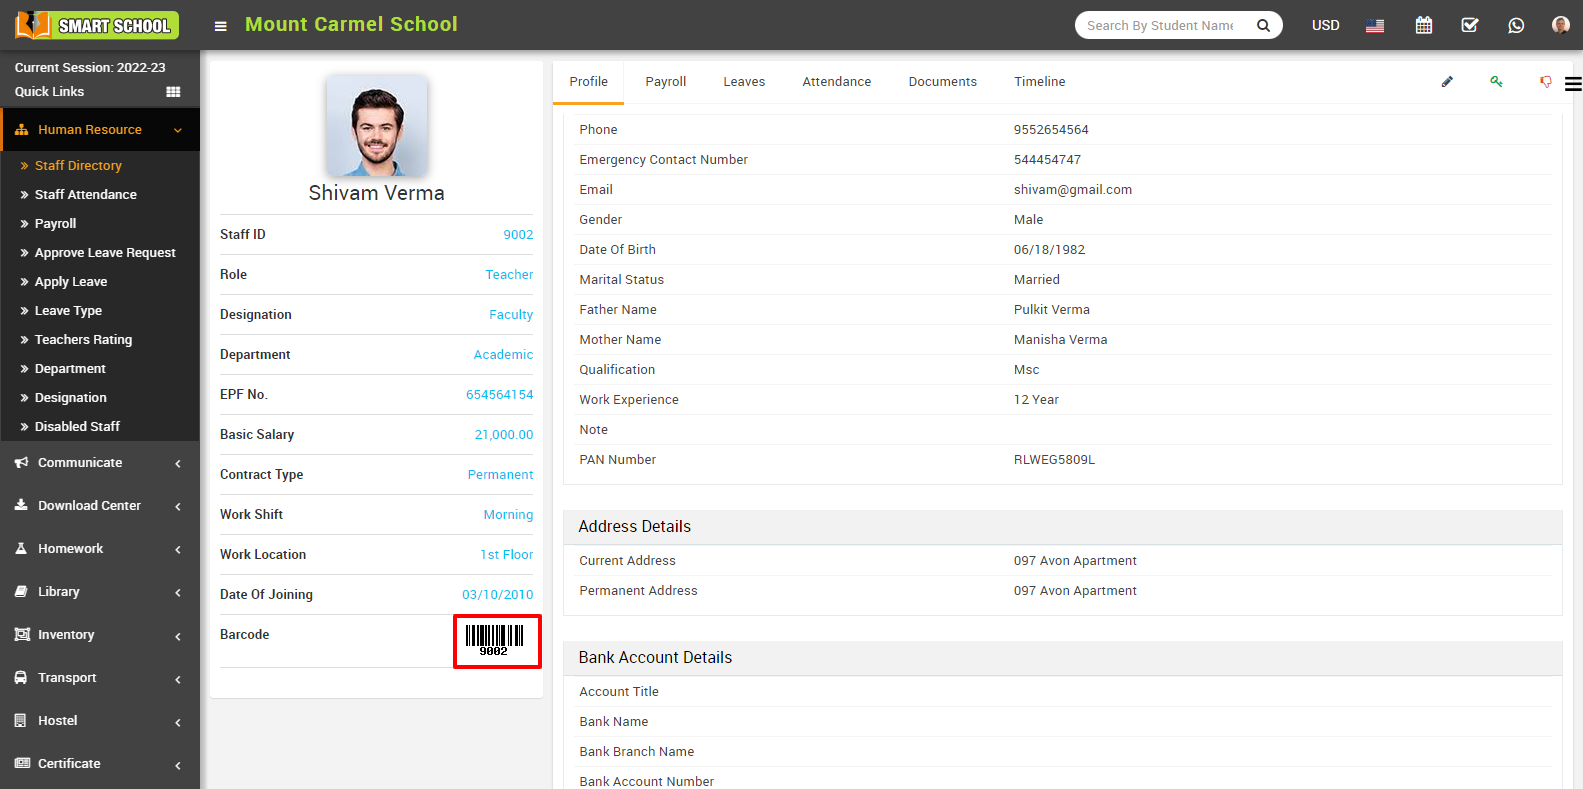
Now generate the QR Code on staff/admin profile, simply go to System Settings > General Settings > Miscellaneous. Here, you will find the second setting option that displays the ID Card Scan Code. In the ID card scan code section, you will find two available options for scan type: the first is Barcode, and the second option is QR Code. Simply enable the QR Code option by clicking on it, and then click on the Save button located at the bottom right to apply the changes.

Now, follow the same steps as mentioned above for the Barcode to generate the QR Code on the staff/admin profile.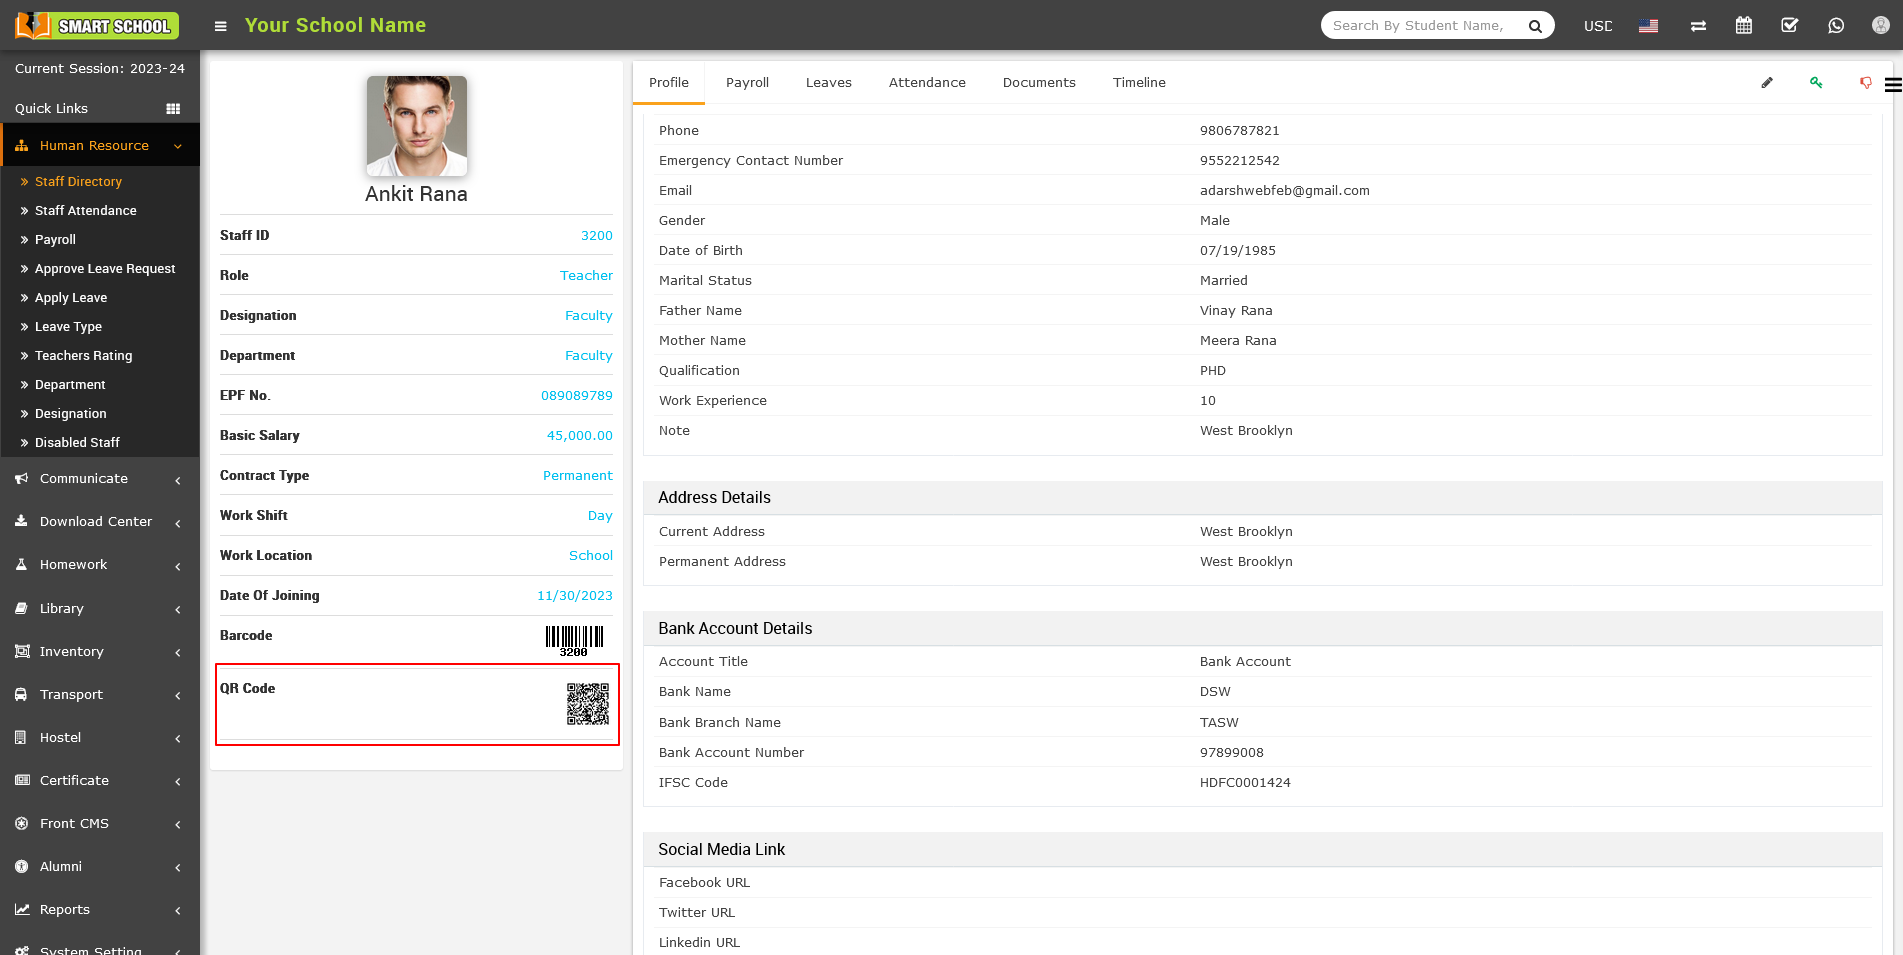
How to add Barcode in student id card and his profile?
To add the Barcode to the student id card and his profile, go to System Settings > General Settings > Miscellaneous. Here, you will find the second option that displays the ID Card Scan Code.

In the ID card scan code section, you will find two available options for scan type: the first is Barcode, and the second option is QR code. Simply enable the Barcode option by clicking on it, and then click on the Save button located at the bottom right to apply the changes.
Now, Go to the Certificate tab and select "Generate ID Card." Now select Class, Section, and ID Card Template, and click on the Search button.
Student List will be open in below, now check the Checkbox next to the student name whom you want to generate the id card then Click on Generate button.
Student id card will be generated successfully and this student id card you can also see the barcode , which is showing in below.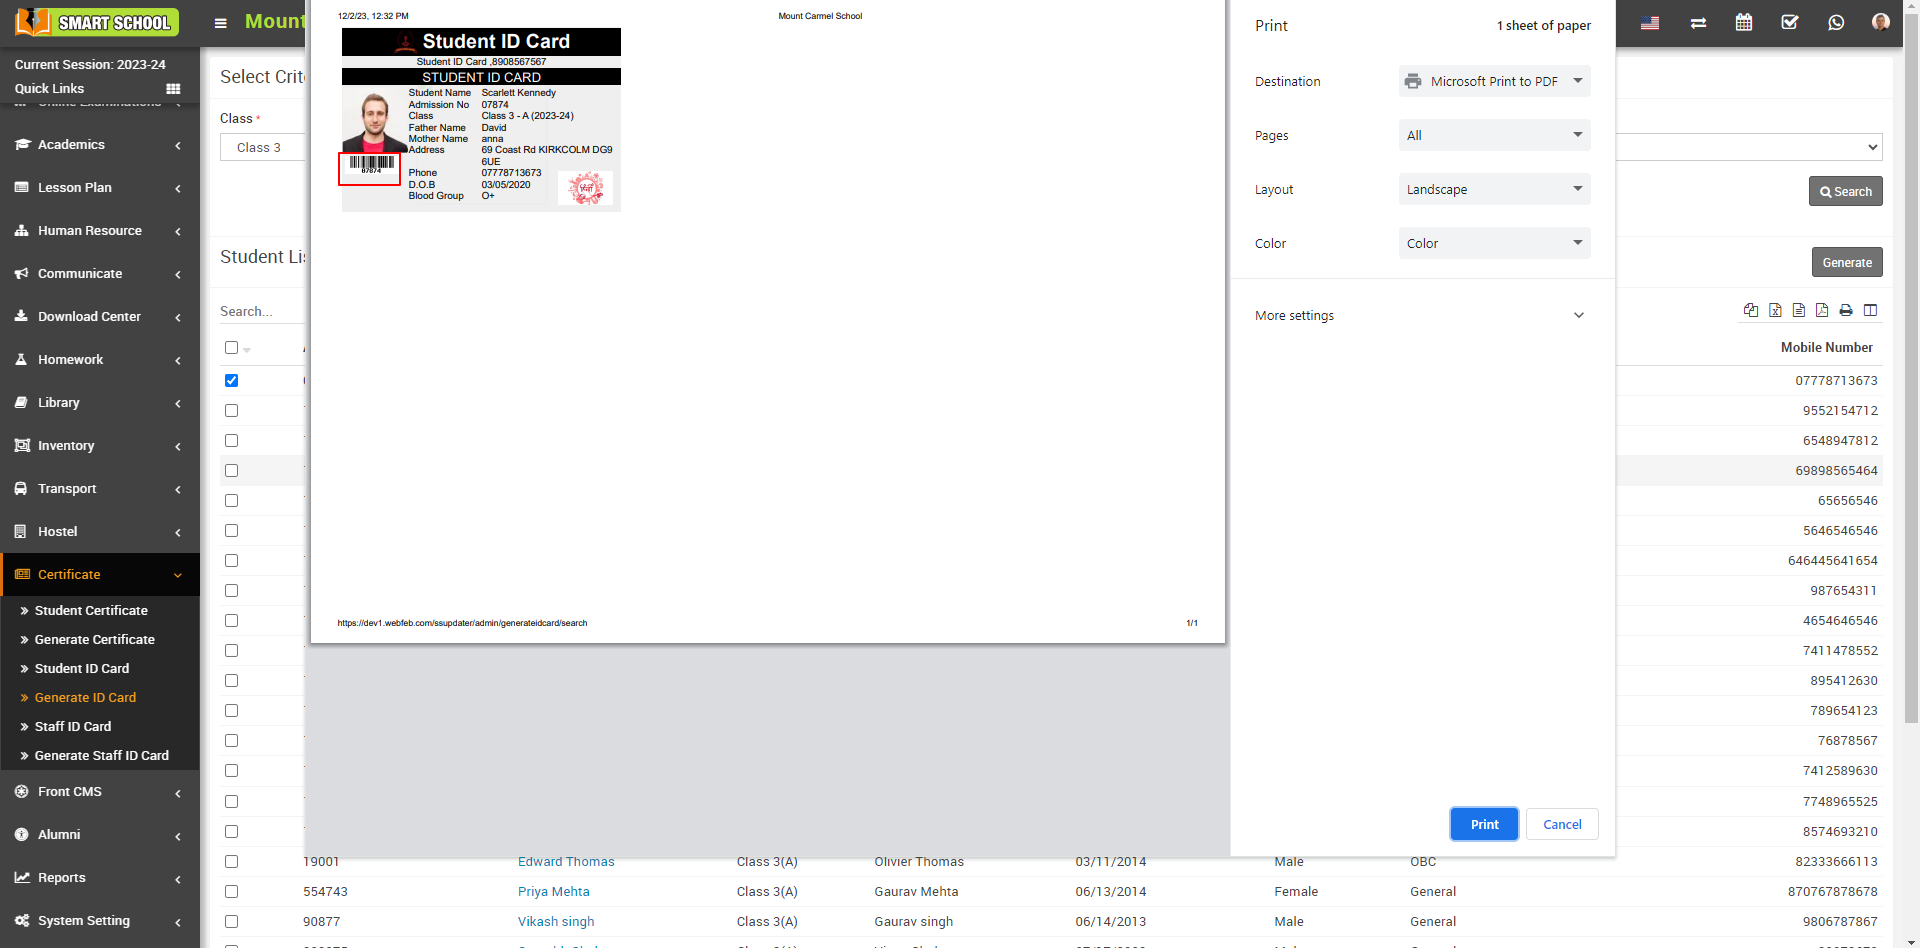
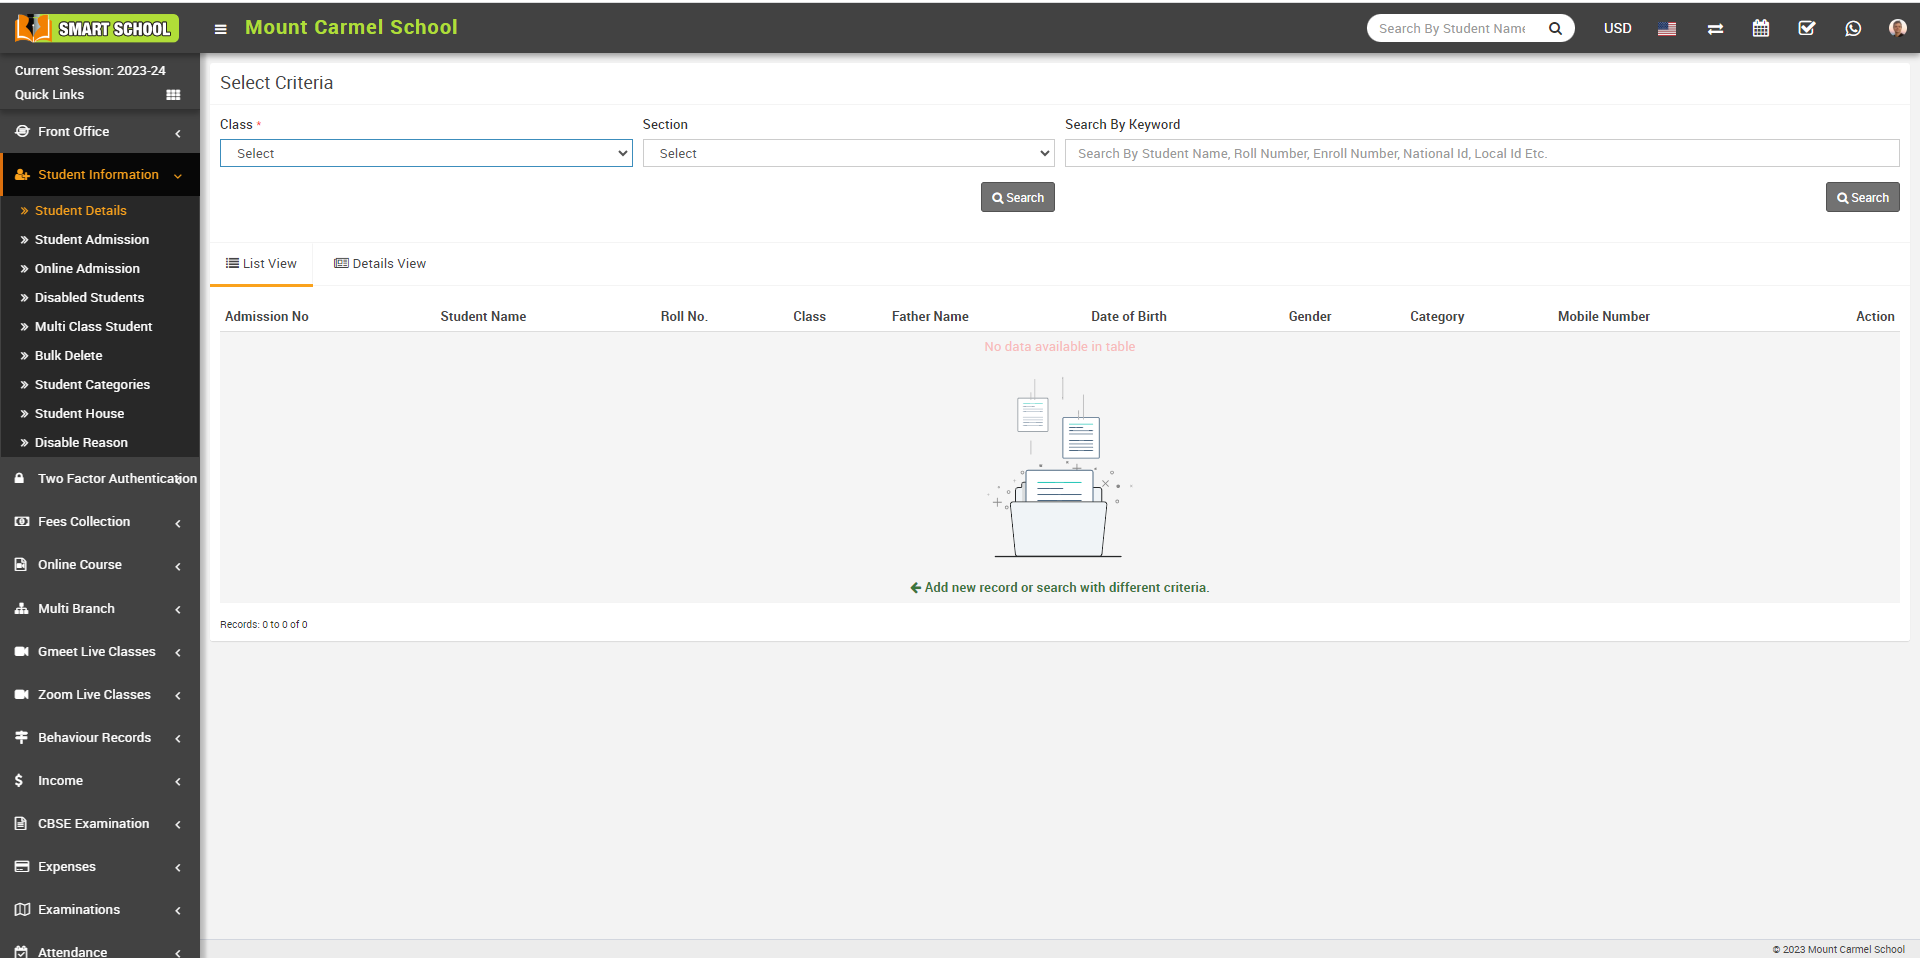
Now, to see barcode in student profile, you just need to go to the Student Information > student Details and Select Class, Section or search by keyword and click on search button.
Student list will be open in below, now open the student profile, by click on view icon or student name.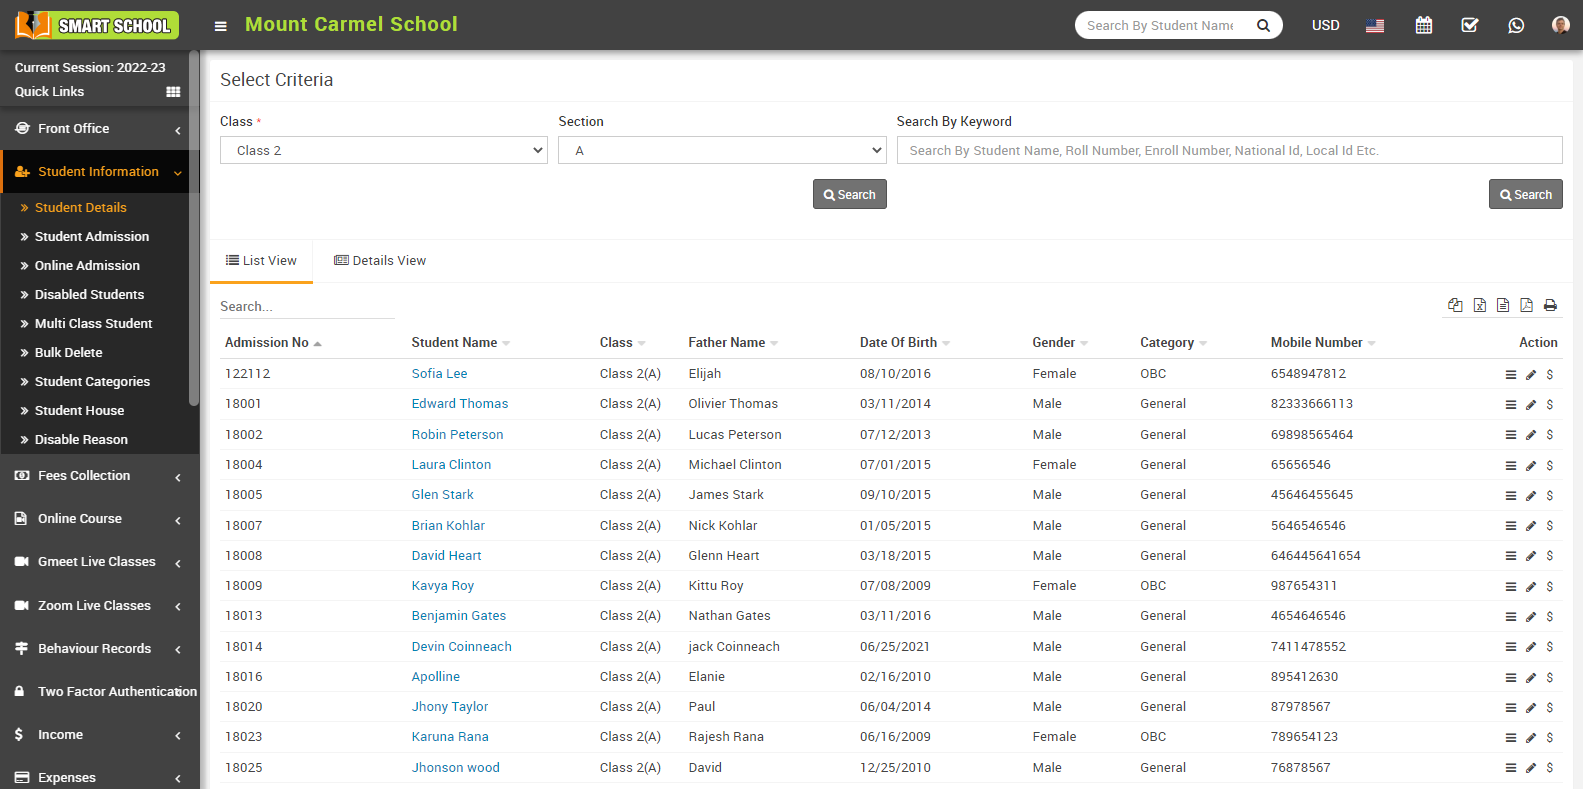
Here, you can see the Barcode generated in the student profile.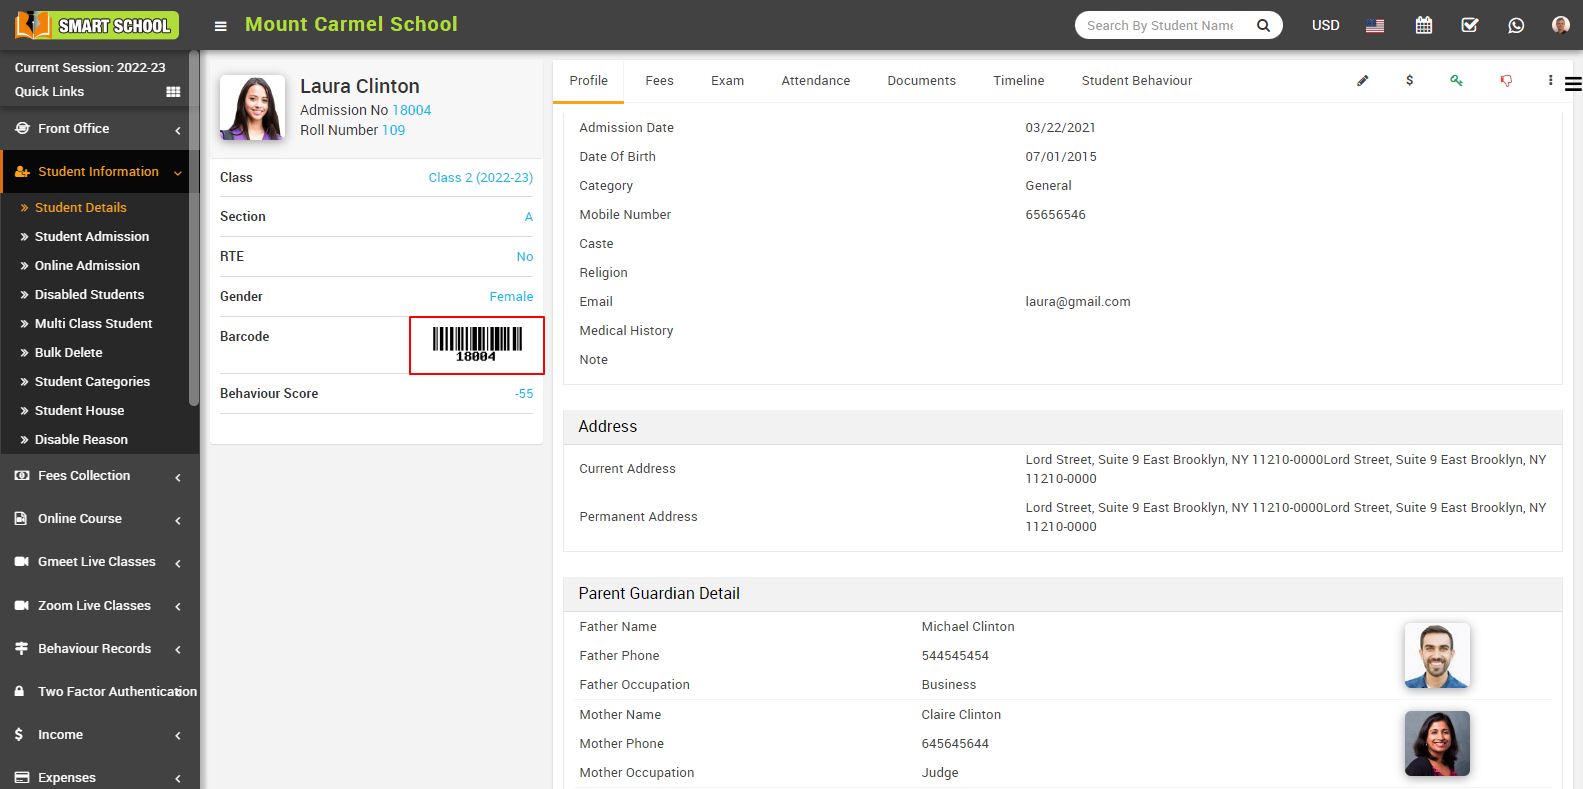
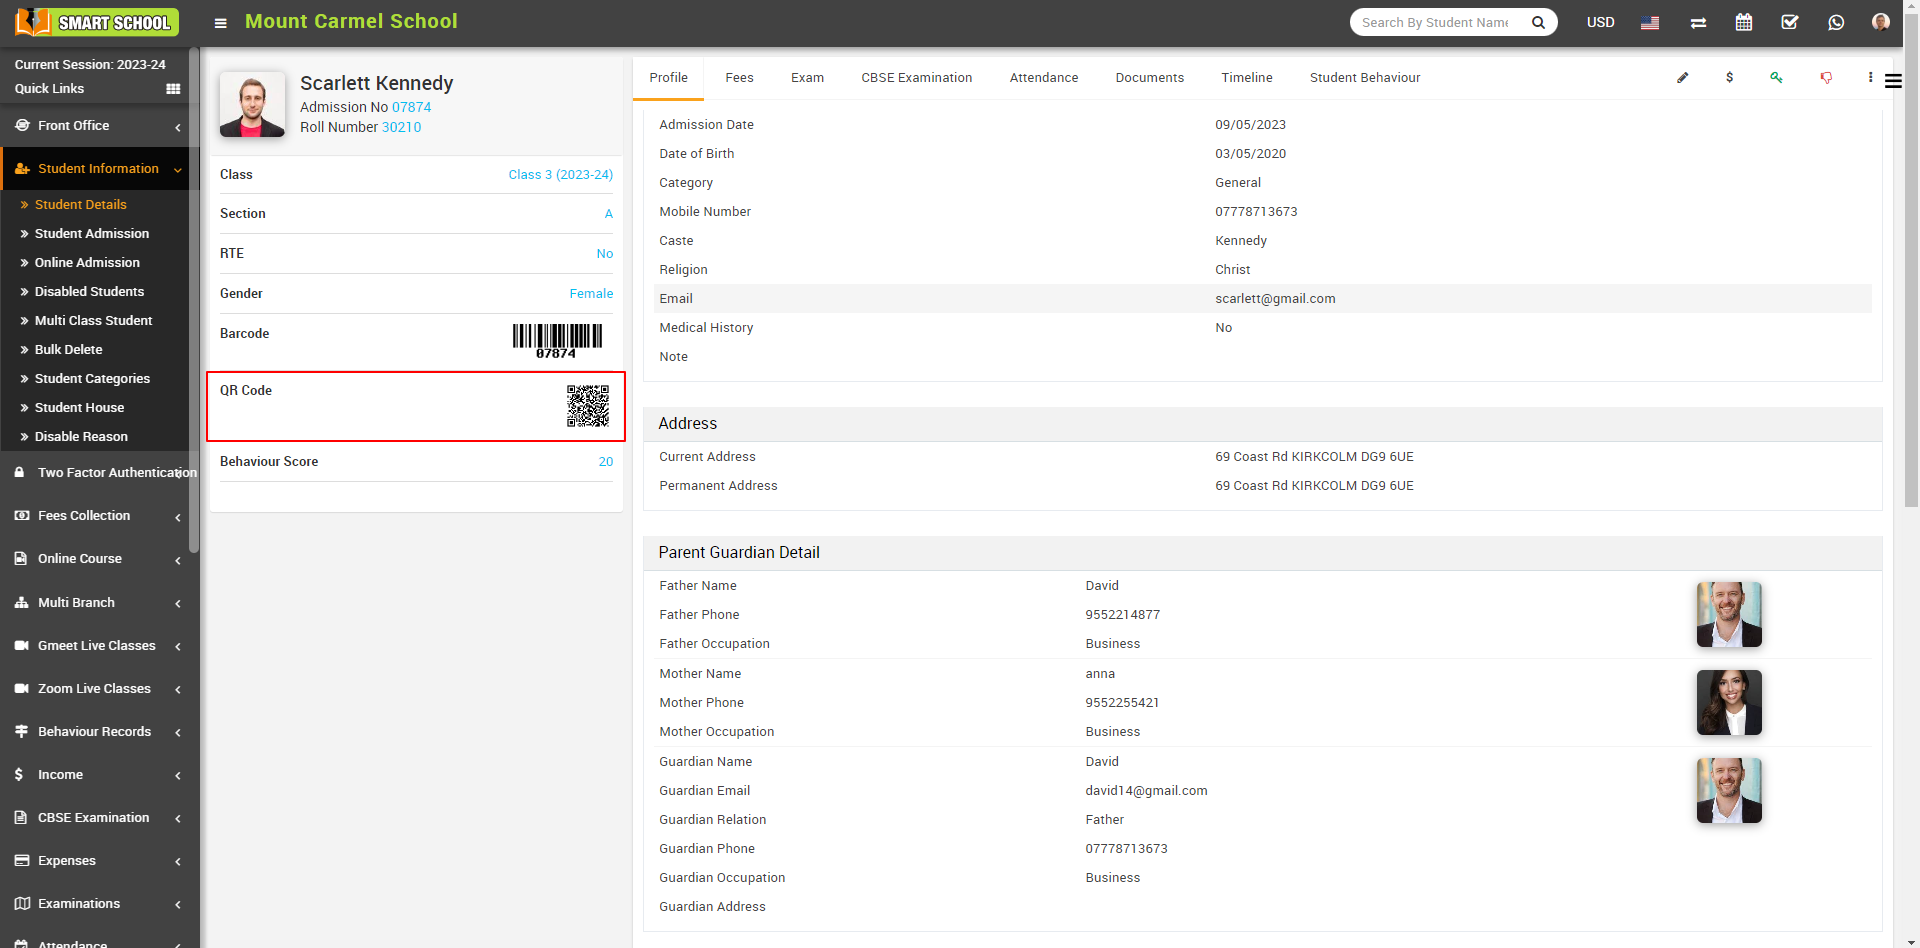
How to add QR Code in student id card and his profile?
To add the QR code to the student id card and his profile, go to System Settings > General Settings > Miscellaneous. Here, you will find the second option that displays the ID Card Scan Code.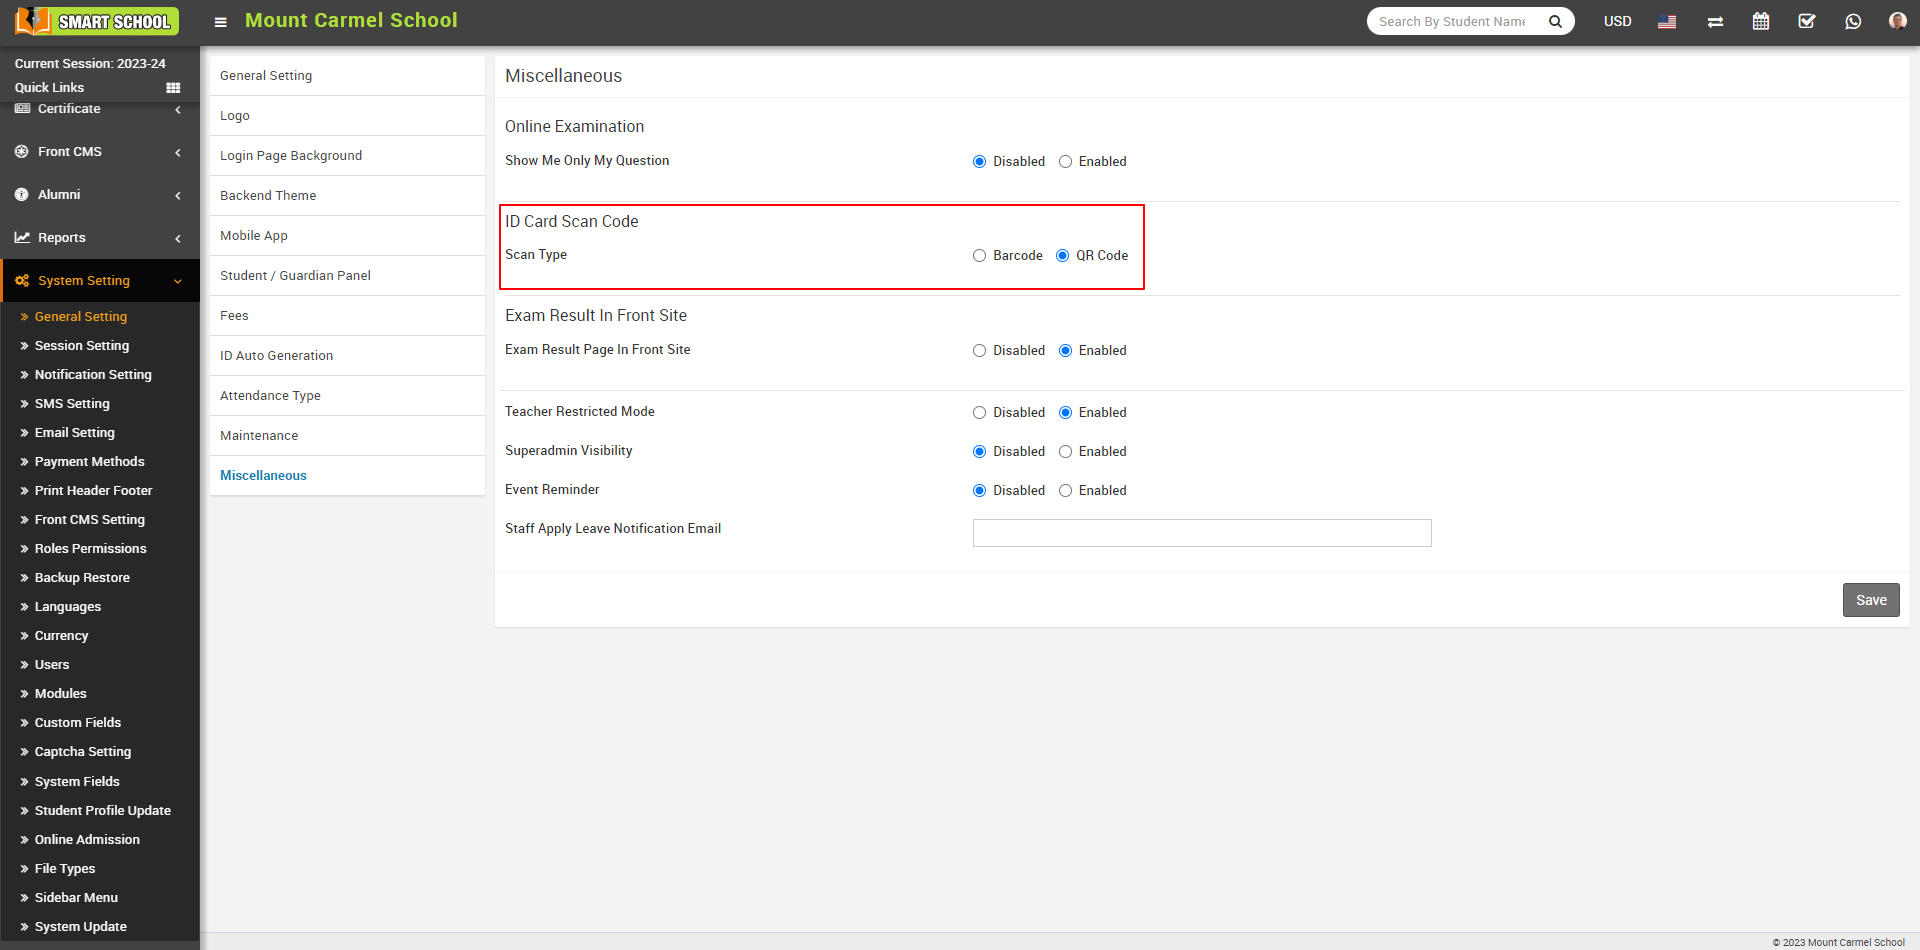
In the ID card scan code section, you will find two available options for scan type: the first is Barcode, and the second option is QR code. Simply enable the QR code option by clicking on it, and then click on the Save button located at the bottom right to apply the changes.
Now, Go to the Certificate tab and select "Generate ID Card." Now select Class, Section, and ID Card Template, and click on the Search button.
Student List will be open in below, now check the Checkbox next to the student name whose you want to generate the id card then Click on Generate button. 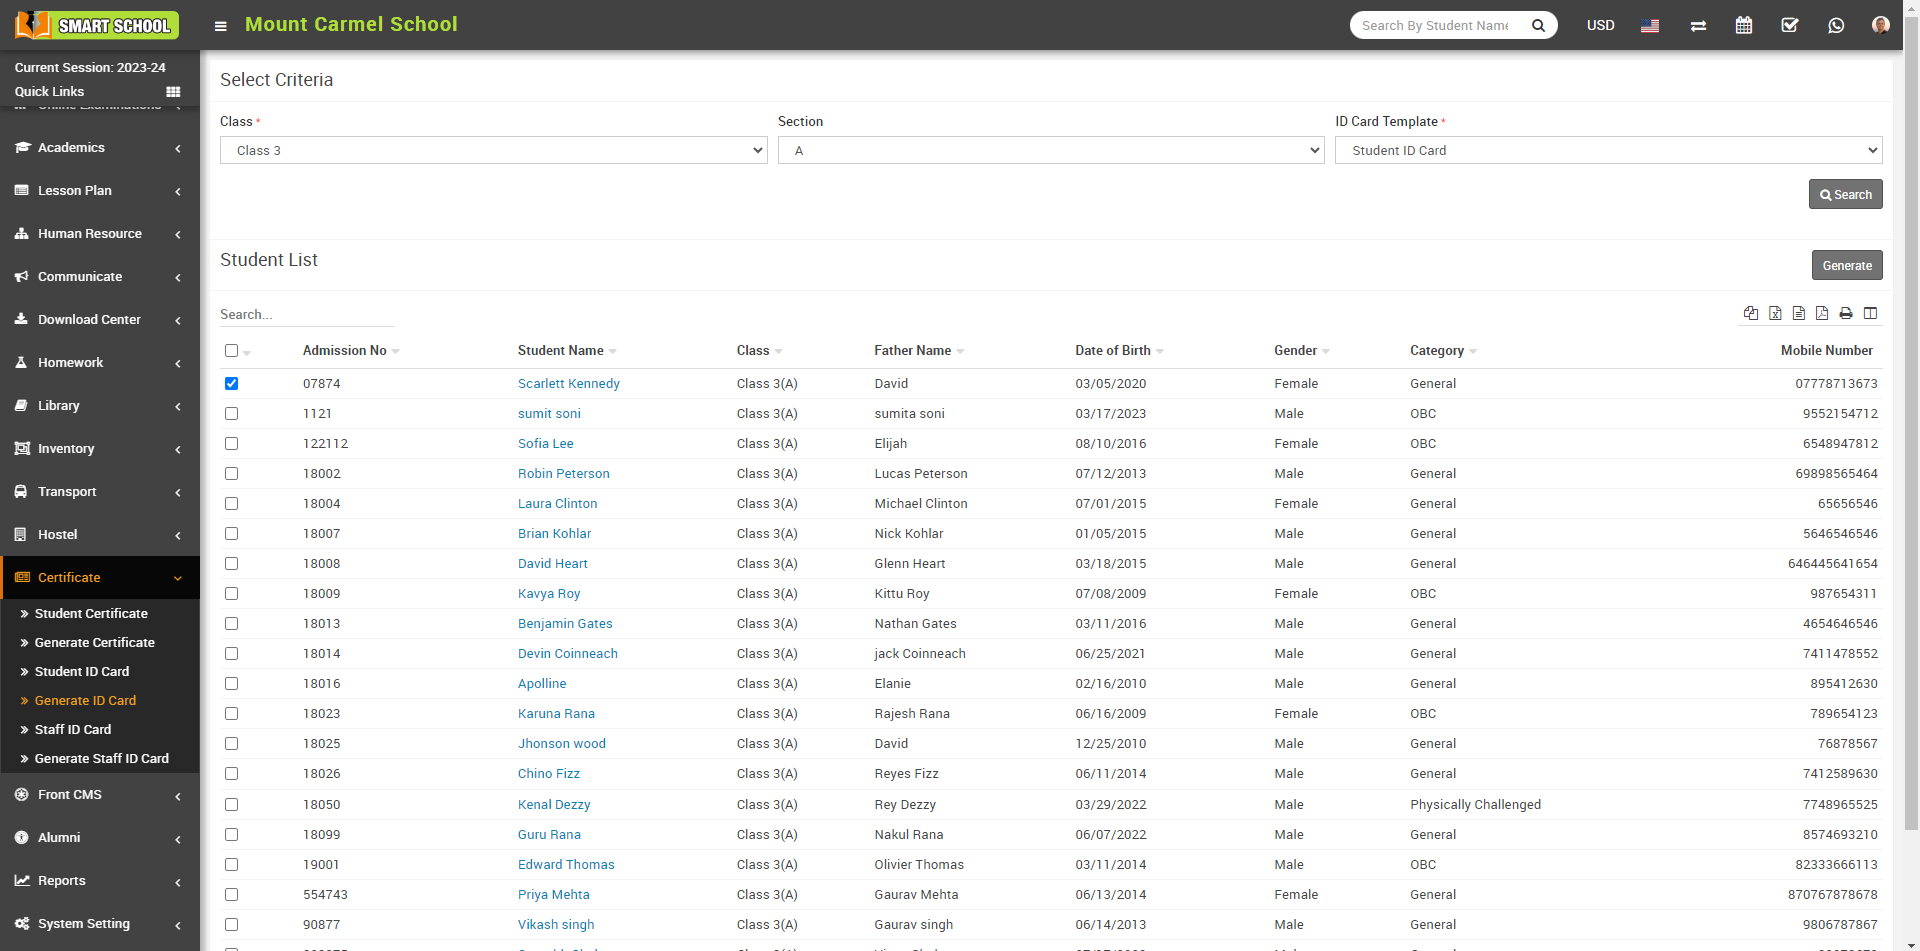
Student ID card will be generated successfully and on this student ID card you can also see the QRcode, which is showing in below.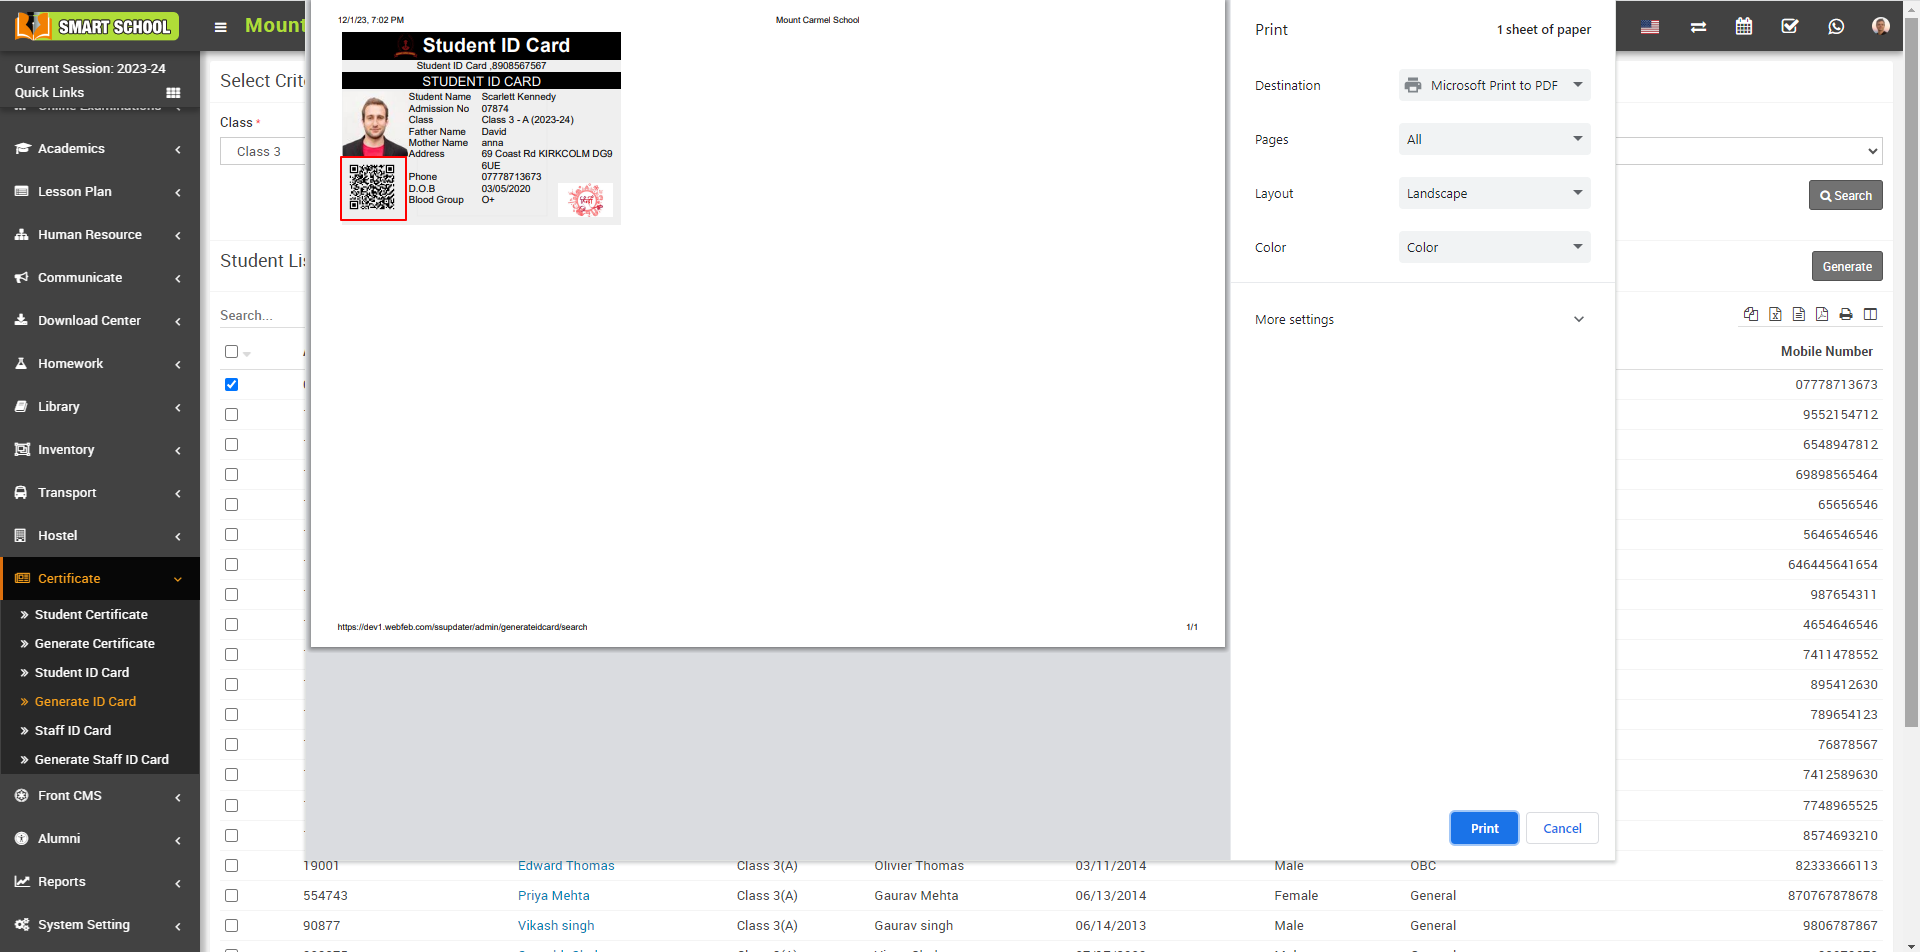
Now, to see QRcode in student profile just you need to go to the Student Information > student Details and Select Class, Section or search by keyword and click on Search button.
Student list will be open in below, now open the student profile, by click on View icon or student name.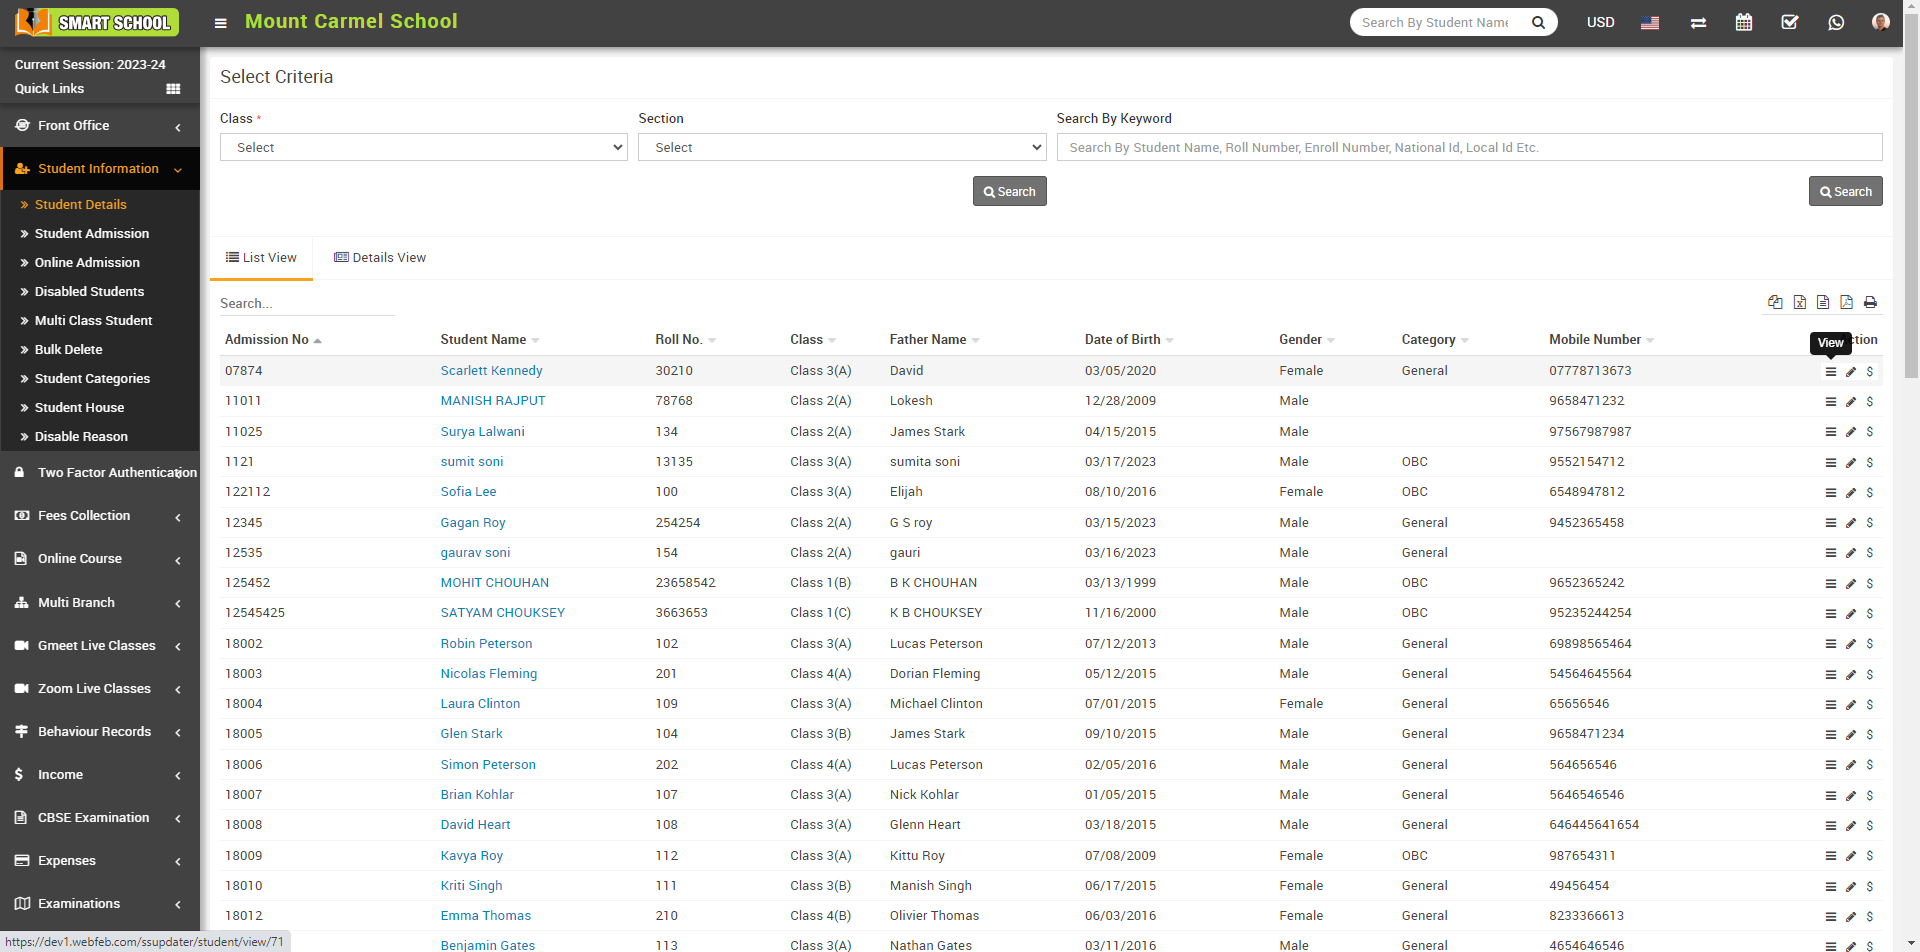
Now you can see the Student QR Code is generated.